A meat grinder is a popular tool that is a must to clean every time you work with raw meat, to prevent the buildup of germs and bacteria that come from the waste. Cleaning a chopper isn’t much different from cleaning other kitchen utensils. For example, by storing your pieces properly, you ensure that they keep well and are less likely to get dirty when you use them. You must follow some additional instructions when using the chopper to make cleaning easier for you.
Read this article: which is the best meat grinder attachment for Kitchenaid?
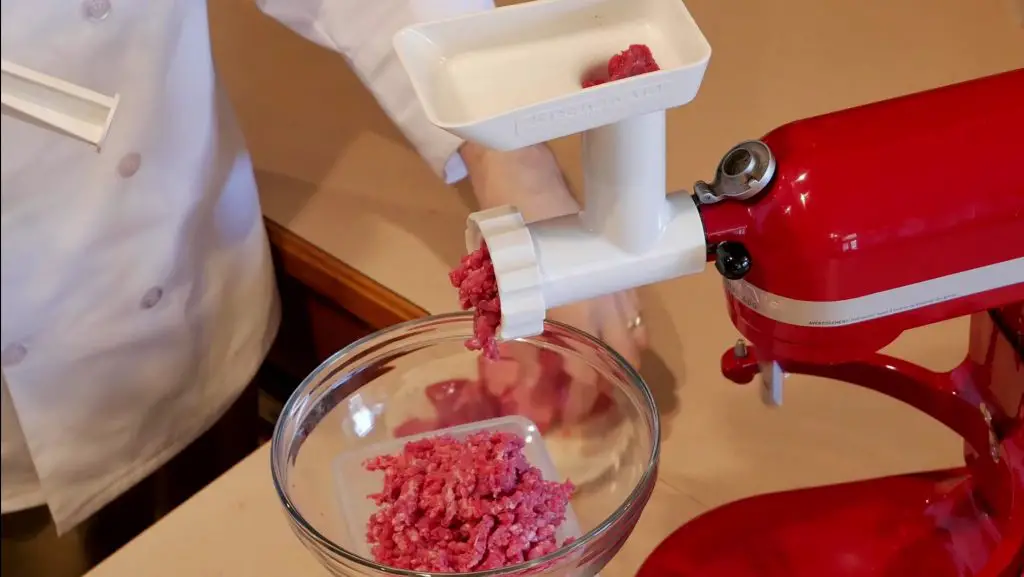
3 Easy & Best Ways How to clean KitchenAid meat grinder
Wash the chopper by hand
1. Clean the mincer immediately after each use. Meat often leaves behind oil and fat as it goes through the grinder (plus small bits). These items tend to dry out and crust over if you let them sit for a while, so don’t wait too long before cleaning them. To make things easier, you should take care of cleaning the chopper immediately after each use.
2. Put bread in the grinder. Before disassembling the machine, take two or three slices of bread and run them through the grinder just like you do with meat. The pan will absorb the oil and fat from the meat and expel any loose particles that remain inside the machine.
3. Disassemble the grinder: First, you must unplug it if it is electric. Then separate your pieces. This procedure may vary by type and model, but a meat grinder generally consists of the following parts:
- An impeller, a feed tube, and a hopper (which is usually a single piece through which the meat is fed into the grinder).
- A screw (an internal part that forces the meat through the grinder).
- A knife.
- A plate or a Terraza (the piece of metal with holes through which the meat comes out).
- A cover for the blade and the plate.
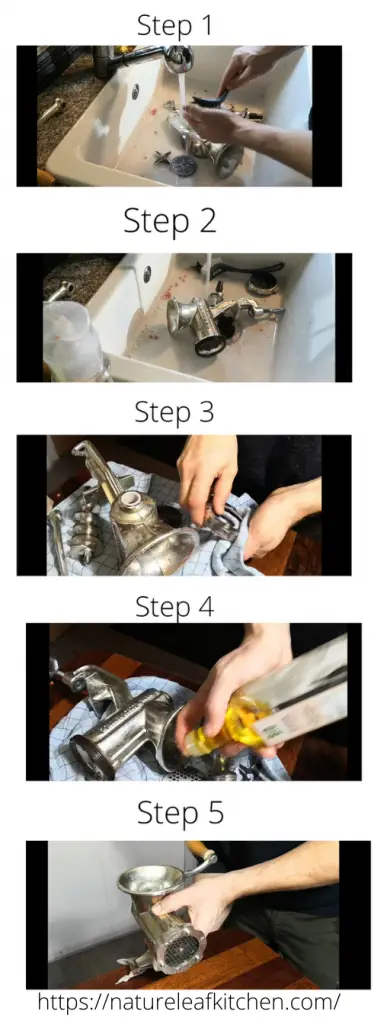
4. Soak the pieces: Fill a sink or bucket with warm water and add dishwashing detergent. Place the pieces inside and let them sit for about a quarter of an hour to loosen any fat, oil, or leftover meat.
If the mincer is an electric model, you should not submerge any motorized parts. Instead, you can use this time to wipe down the outside of the base with a damp cloth, then wipe it dry with a dry cloth.
5. Scrub the pieces: Use a sponge to clean the blade, cover & screw. Be careful when handling the blade, as it is usually very sharp and can easily cut you if mishandled. Use a bottle brush to clean the inside of the feed tube, hopper, and plate holes. Then, rinse each piece with clean water once you’re done.
You must take your time to carry out this process. The goal is to remove all waste so it doesn’t become a breeding ground for germs and bacteria. If you think you’ve scrubbed the pieces enough, you should scrub them some more.
See more: how to clean a meat grinder?
- Dry the pieces: First, wipe them with a dry towel to remove excess water. Then, place them on another towel or on a wire rack to air dry. You must wait until the pieces are completely dry before storing the chopper, to avoid the formation of rust.
Store the chopper
- Lubricates metal parts: You should keep the chopper well lubricated to prevent rust from forming during storage. With food-grade mineral oil fill a spray bottle. Then, spray an even layer of oil over all the metal parts of the chopper (with the exception of the electrical parts).
You should pay special attention to the impeller and the screw since these elements come into greater contact with the meat each time it passes through the grinder.
- Bag each piece with rice individually. Place each chopper piece in an airtight plastic bag. Then each bag add a handful of rice. The rice isn’t strictly necessary, but it does help absorb present and future moisture, which is great if you plan to store the pieces in the freezer or live in an area with high humidity levels.
- Store the pieces in the freezer (if possible). Keep in mind that the chopper works best when the pieces are cold. You can keep non-electric parts in the freezer if you have enough space. However, if you can’t allocate that much space for long-term storage, don’t worry. Instead, you can do the following:
Store the pieces in a dry place for now. Then simply place them in the freezer long enough to chill before next use (about an hour before).
- Sterilize lubricated parts with bleach before use. Mix a tablespoon of bleach with 1 gallon (4 liters) of water. Fill a spray bottle with this solution. Then, spray each piece of metal that you’ve lubricated before storage to disinfect them. Finally, rinse them thoroughly with clean water to remove all traces of bleach.
Ensure easy cleaning
- Keep the pieces and meat cold. If the meat is hot, you will create a huge mess when you run it through the grinder. You can make cleanup easier by keeping both the meat and the mincer parts very cold before you use them. If you need to mince the same meat several times, you should do the following:
- Fill a large container with ice. Place a second container inside the first and collect the minced meat inside it. You can repeat this procedure as needed to keep the meat relatively cool each time it goes through the grinder.
- Extract the nerves from the meat before mincing it. If you leave the ribs in the meat, the mincer blade will dull over time. Use a butcher knife to carefully cut the ribs before placing the meat in the grinder. In this way, you ensure a better performance of the machine and generate less clutter inside.
- Sharpen or replace blades (as needed). Remember that a dull blade creates a big mess inside the chopper. If the machine seems to spread the meat evenly instead of chopping it into small pieces, you should sharpen the blade or replace it with a new one. However, you should keep in mind the following:
The blade will get sharper as you use it, as long as you maintain the chopper well and avoid getting nerves inside it. You only need to sharpen or replace it once a year at most.
Warnings
Do not put chopper parts in the dishwasher. Excessive heat could damage them, while prolonged exposure to water can cause them to rust.
Things you will need
- 2 or 3 slices of bread.
- A sink or bucket.
- Warm water.
- Dishwashing detergent.
- A cloth.
- A sponge.
- A bottle brush.
- Towels.
- A spray bottle.
- Food-grade mineral oil.
- Rice.
- Airtight plastic bags.
- A freezer (optional).
- Bleach.
Conclusion:
Thanks for reading our blog about how to clean a KitchenAid meat grinder! We hope you found it helpful. If you have any questions or comments, please feel free to leave them below. And be sure to check out our other blog posts for more tips and tricks.