Are you craving a delicious homemade meal that calls for ground pork, but don’t have a grinder on hand? Don’t fret! In this guide, we will explore the art of making ground pork without a grinder. Whether you’re a culinary enthusiast looking to expand your skills or simply someone who wants to save a trip to the grocery store, this article is your ultimate resource. From practical techniques to expert tips, we’ll equip you with everything you need to know to create perfectly textured ground pork right in the comfort of your kitchen. Grinding your meat opens up a world of culinary possibilities, allowing you to control the quality and flavor of your dishes.
While a grinder is usually the go-to tool for achieving finely ground meat, there are alternative methods that can yield equally satisfying results. By following our step-by-step instructions, you’ll discover how to transform a humble cut of pork into a tender and flavorful ground meat that’s ideal for a wide range of recipes. So, let’s roll up our sleeves and embark on this exciting journey of making ground pork without a grinder!

How to Make Ground Pork Without a Grinder
-
Start by freezing the pork for about 30 minutes to make it easier to cut.
-
Using a sharp knife, thinly slice the pork into small pieces.
-
Place the sliced pork into a food processor or blender.
-
Pulse the pork until it reaches the desired consistency.
-
Your homemade ground pork is ready to be used in your favorite recipes!
Whether you don’t own a grinder or simply prefer a hands-on approach, this method will allow you to achieve the desired consistency and texture for your ground pork. Follow these instructions carefully to ensure success.
Step 1: Selecting the Meat
The first step in making ground pork without a grinder is selecting the right cut of meat. Look for a fatty cut, such as pork shoulder, as it will provide the necessary fat content for a flavorful and juicy result. Remove any excess skin, bones, or cartilage from the meat before proceeding.
Once you have your meat, cut it into small, manageable chunks. This will make the grinding process easier later on. Ensure that the pieces are uniform in size to ensure even cooking and consistent texture.
Step 2: Freezing the Meat
Before moving on to grinding the meat, it is crucial to freeze it. Place the meat chunks in a single layer on a baking sheet or tray, ensuring that they are not touching each other. Freeze the meat for about 30 minutes to an hour, or until it is partially frozen.
Freezing the meat helps to firm it up, making it easier to grind and preventing it from turning into a mushy paste. Additionally, the partially frozen meat will retain its shape and texture during the grinding process, resulting in more desirable ground pork.
Step 3: Grinding the Meat
Once the meat is partially frozen, it’s time to start grinding. There are a few different methods you can use, depending on the tools you have available.
If you have a food processor, you can use the pulse setting to grind the meat. Simply add a portion of the partially frozen meat to the food processor and pulse it a few times until the desired consistency is achieved. Be careful not to overprocess the meat, as it may become too fine and lose its texture.
If you don’t have a food processor, you can use a sharp knife or a meat mallet to manually grind the meat. Finely chop the partially frozen meat using a knife or pound it with a meat mallet until it reaches the desired consistency.
Step 4: Storing the Ground Pork
Once you have ground the meat to your liking, it’s important to handle it properly to ensure food safety. Use the ground pork immediately if you plan to cook with it right away. If not, divide the ground pork into smaller portions and store them in airtight containers in the refrigerator for up to 2 days or in the freezer for up to 3 months.
Remember to label the containers with the date to keep track of their freshness. When using frozen ground pork, make sure to thaw it in the refrigerator overnight before using it in your recipes.
Step 5: Enjoying Your Homemade Ground Pork
Congratulations! You have successfully made ground pork without a grinder. Now you can use your homemade ground pork in various recipes such as meatballs, dumplings, sausages, or any dish that calls for ground pork. Enjoy the satisfaction of creating your ground meat with this simple and effective method.
How do you manually Grind Pork?
Manual pork grinding is a traditional method that allows individuals to control the texture and fat content of ground pork. This process involves using simple tools and equipment, making it accessible to home cooks who want to experience the satisfaction of preparing their ground pork. In this guide, we will walk through the step-by-step process of manually grinding pork, ensuring that the meat is ground to the desired consistency while maintaining hygiene and safety standards.
Materials Needed:
- Fresh Pork: Choose a cut with a good balance of meat and fat, such as pork shoulder or pork butt.
- Cutting Board: A clean and sturdy surface for preparing and cutting the pork.
- Sharp Knife: A well-sharpened knife for trimming excess fat and cutting the meat into smaller chunks.
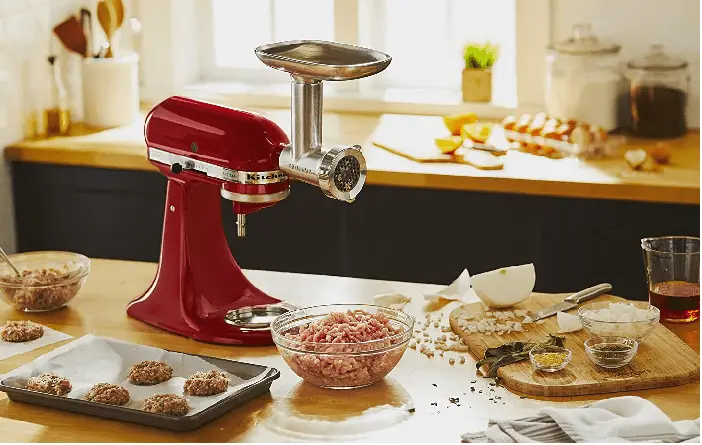
- Manual Meat Grinder: Available in various sizes, these hand-cranked devices come with different grinding plates for varied textures.
- Bowl or Tray: To collect the ground pork and ease the transfer to storage or cooking vessels.
- Refrigeration: Keep the meat and equipment cold to prevent bacterial growth during the grinding process.
Step-by-Step Process:
- Select and Prepare the Pork:
Choose a fresh cut of pork, ensuring it has a good meat-to-fat ratio for the desired flavor and texture.
Trim excess fat from the meat, leaving enough for flavor and moisture.
- Cut the Pork into Chunks:
Cut the pork into smaller, manageable chunks that can easily fit into the grinder’s feeding tube.
- Assemble the Manual Meat Grinder:
Follow the manufacturer’s instructions to assemble the manual meat grinder. This typically involves attaching the grinder to a stable surface and placing the appropriate grinding plate for your desired texture.
- Feed the Meat into the Grinder:
Turn the hand crank slowly and steadily to feed the chunks of pork through the grinder.
Use the stomper (if provided) to push the meat down the feeding tube.
- Collect the Ground Pork:
Allow the ground pork to fall into a clean bowl or tray, ensuring it remains separate from the raw meat.
- Repeat as Needed:
Continue grinding the pork in batches until all the meat has been processed.
- Clean the Equipment:
Disassemble the meat grinder and clean all parts thoroughly with hot, soapy water.
Ensure that no meat residue remains to prevent contamination.
- Store or Use the Ground Pork:
Use the ground pork immediately in your recipes or store it in airtight containers in the refrigerator or freezer.
Tips:
- Keep the pork and equipment cold to maintain food safety standards.
- Experiment with different grinding plates to achieve the desired texture.
- Regularly clean and maintain your manual meat grinder for optimal performance.
By following these steps, you can manually grind pork at home, tailor the texture to your preferences, and enjoy the satisfaction of preparing your fresh ground meat for various culinary creations.
Frequently Asked Questions
Grinding Meat without a Meat Grinder in Minutes
Conclusion
Making ground pork without a grinder may seem like a daunting task, but with the right techniques and tools, it can be easily achieved. By following the steps outlined in this guide, you can enjoy the delicious taste and versatility of ground pork in your favorite recipes.
Whether you choose to use a food processor or a knife and cutting board, the key is to ensure that the meat is properly prepared and processed to achieve the desired texture. With a little patience and practice, you can become adept at making ground pork without a grinder, impressing your family and friends with your culinary skills.