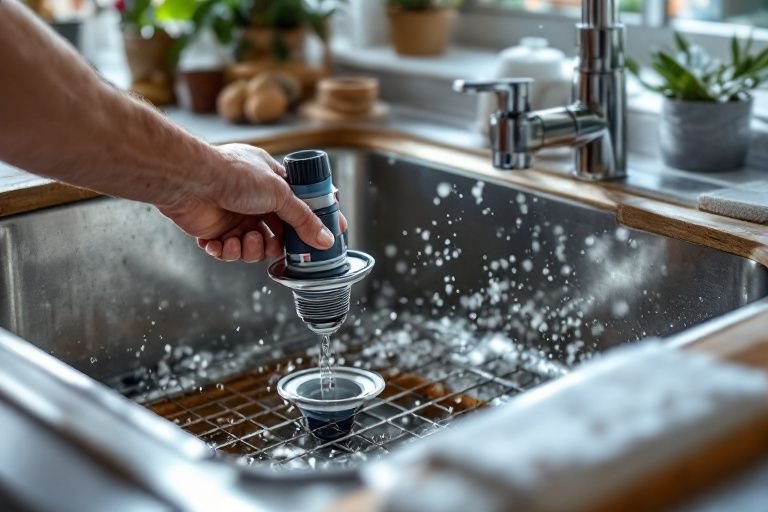
Are you struggling with a clogged kitchen sink or contemplating a remodel? Knowing how to plumb a kitchen sink drain is essential for any homeowner or DIY enthusiast. With over 15 years of experience in home improvement and plumbing, I understand the challenges that come with proper drain installation. In this article, you’ll learn about the necessary tools, step-by-step procedures, and common pitfalls to avoid. By the end, you’ll be equipped with the knowledge to tackle this plumbing task confidently and efficiently.
Understanding Kitchen Sink Drain Plumbing Basics
Plumbing a kitchen sink drain involves a series of steps that ensure proper waste removal and prevent leaks. Understanding the components of a kitchen sink drain system is essential. Key components include the drain assembly, trap, and venting system. The drain assembly consists of the sink strainer, which collects food particles, and connects to the trap, which prevents sewer gases from entering the home. Proper venting is crucial; it allows air to enter the plumbing system, ensuring smooth drainage and preventing siphoning. Familiarizing yourself with these components sets a solid foundation for successful plumbing.
Key Components of a Sink Drain
A kitchen sink drain system includes various components: the sink strainer, which filters out food debris; the trap, which holds water to block sewer gases; and the waste pipe that carries wastewater away. Each component plays a crucial role in maintaining hygiene and functionality. Understanding these parts helps in troubleshooting common issues like clogs or leaks.
Importance of Proper Venting
Venting is essential for maintaining pressure in your plumbing system, allowing wastewater to flow smoothly. A vent pipe connected to the drain prevents negative pressure that can lead to slow draining or gurgling sounds. Properly installed vents also reduce the chance of sewer gas entering your home. Ensuring your sink is adequately vented is a critical step in effective plumbing.
Key Points:
- Understanding key components is essential for effective plumbing
- Proper venting prevents drainage issues and improves sink functionality
Tools and Materials Needed for Plumbing a Kitchen Sink Drain
Before starting the plumbing process, having the right tools and materials is crucial. Essential tools include a pipe wrench, adjustable pliers, a hacksaw, and a plunger. Materials typically consist of PVC or ABS pipes, fittings, a sink strainer, and a trap. Gathering everything beforehand saves time and frustration during installation. Additionally, ensure you have plumber’s tape and appropriate adhesive for sealing connections. Familiarizing yourself with these tools and materials will streamline the plumbing process.
Essential Tools for the Job
Key tools needed for plumbing a kitchen sink drain include a pipe wrench for securing and loosening pipes, adjustable pliers for gripping fittings, and a hacksaw for cutting pipes to size. A plunger can be handy for clearing minor clogs. Having these tools on hand will make the plumbing process more efficient and effective.
Materials Required for Installation
The main materials you’ll need include pipes (PVC or ABS), fittings to connect different sections, a sink strainer to prevent debris from clogging the drain, and a trap that holds water to block sewer gases. Additionally, plumber’s tape is necessary for sealing threaded connections. Gathering these materials ensures that you have everything you need to complete the project.
Key Points:
- Gathering tools and materials beforehand saves time
- Understanding each tool’s purpose enhances the installation process
Understanding Kitchen Sink Drain Components
Before plumbing a kitchen sink drain, familiarize yourself with its essential components. The primary elements include the sink basin, drain assembly, P-trap, and the discharge pipe. Each part plays a crucial role in ensuring that wastewater flows smoothly while preventing odors from escaping. The sink basin collects water, while the drain assembly directs this water into the P-trap, which is designed to trap a small amount of water to block sewer gases. Finally, the discharge pipe connects the P-trap to the home’s plumbing system. Knowing these components will help you effectively install and troubleshoot your kitchen sink drain.
Identifying Essential Tools
To successfully plumb a kitchen sink drain, gather the necessary tools. Common tools include a pipe wrench, adjustable pliers, a hacksaw, and plumber’s tape. These tools will assist you in cutting and fitting pipes, tightening connections, and ensuring a watertight seal. Additionally, consider having a bucket on hand to catch any residual water during installation. Proper tool selection not only speeds up the process but also helps prevent damage to plumbing components.
Understanding Local Plumbing Codes
Before installation, it’s crucial to familiarize yourself with local plumbing codes. These regulations ensure that your plumbing is safe and compliant with community standards. Check for any specific requirements related to drain size, venting needs, and materials allowed. Adhering to these codes can save you from future fines and installation rework. Always consult local resources or a plumbing professional if you’re unsure about the regulations in your area.
Key Points:
- Understanding components is essential for effective installation.
- Gathering the right tools can streamline the plumbing process.
💡 Familiarize yourself with the layout of your plumbing system to avoid surprises during the installation process.
💡 Always wear safety gear, such as gloves and goggles, to protect against debris and sharp edges.
💡 Double-check measurements before cutting pipes to minimize waste and ensure a proper fit.
Step-by-Step Installation Process
Installing a kitchen sink drain involves a systematic approach to ensure proper functionality. Begin by turning off the water supply to avoid leaks. Next, remove the old drain assembly if applicable, and clean the sink surface thoroughly. Install the new drain assembly by inserting it into the sink, securing it with a washer and nut. Following that, connect the P-trap to the drain assembly and the discharge pipe, ensuring all connections are tight. Once assembled, turn the water supply back on and check for leaks. Adjust as necessary to achieve a secure fit that prevents water from escaping.
Sealing Connections Properly
Proper sealing of connections is vital to prevent leaks. Use plumber’s tape on threaded connections to enhance the seal. When connecting the P-trap and discharge pipe, ensure that the rubber gaskets are intact and fitted correctly. Tighten connections by hand first, then use tools for a snug fit without over-tightening, which can damage the fittings. Always check for leaks after installation by running water through the system and observing all joints.
Testing the Drainage System
After installation, testing your drainage system is crucial. Run water through the sink and observe how quickly it drains. Look for any signs of slow drainage or leaks at the joints. If you notice any issues, troubleshoot by checking for clogs or loose connections. Regular testing after installation can help identify potential problems early, ensuring your kitchen sink operates efficiently.
Key Points:
- A systematic installation approach ensures a functional drain.
- Testing the system helps catch issues early on.
💡 Take your time during installation to ensure every connection is secure and properly aligned.
💡 Perform a thorough visual inspection for any signs of wear or damage to existing components before beginning.
💡 Document your plumbing setup for future reference or repairs; this can save time down the road.
EXPERT TIPS Pro Advice
Plan your plumbing layout in advance
A well-planned layout minimizes mistakes and ensures efficient drainage. Sketching it out helps visualize the connections and components before starting.
Use high-quality materials
Investing in quality materials reduces the risk of leaks and damages over time, ultimately saving you money on repairs and replacements.
Take note of slope requirements
Properly sloping pipes towards the drain prevents standing water and clogs. Aim for a slope of 1/4 inch per foot to facilitate drainage.
Consider future access
Design your plumbing layout to allow for easy access for repairs or maintenance. This foresight can save you significant time and effort in the long run.
Keep your work area clean
A clean workspace prevents accidents and makes it easier to find tools and materials, contributing to a more efficient installation process.
Frequently Asked Questions
Conclusion
Plumbing a kitchen sink drain involves careful measurement, proper tool selection, and understanding of drainage systems. By following local plumbing codes and ensuring secure connections, you can effectively prevent leaks and clogs. Knowledge of both PVC and metal pipes aids in making the right choice for your installation.
🎯 Key Takeaways:
- Gather essential tools including a pipe wrench and hacksaw.
- Accurately measure distances for effective plumbing.
- Proper drainage is crucial for hygiene and preventing clogs.
- DIY plumbing is possible with basic knowledge; consult a pro if needed.
- PVC pipes are generally more reliable than metal.
Expert Advice: Always prioritize safety and accuracy when plumbing. Familiarize yourself with local codes and consider documenting your work for future reference. If you face challenges, don’t hesitate to seek professional help.
Now that you have the knowledge, gather your tools and start planning your kitchen sink drain plumbing project!