To use the Kitchenaid sausage stuffer, slide the open casing end onto the stuffer tube, feed pinches of seasoned meat into the hopper tube, and guide the meat into the worm gear using the stomper. It’s important to go slow and be careful during the process to avoid any mishaps or accidents.
The Kitchenaid sausage stuffer is a popular attachment for those who enjoy making homemade sausages. Whether you’re a professional chef or a home cook, this attachment can help you create delicious sausages with ease. We’ll take a closer look at the Kitchenaid sausage stuffer and provide tips and tricks on how to use it effectively.
We’ll cover everything from assembling the attachment to stuffing sausage casings and offer some expert advice on how to get the best results.
Introduction To Kitchenaid Sausage Stuffer
Welcome to our guide on how to use the Kitchenaid Sausage Stuffer. Whether you’re a seasoned home cook or just getting started with sausage making, the Kitchenaid Sausage Stuffer Kit is a versatile and convenient attachment for your Kitchenaid stand mixer. In this section, we’ll explore the reasons why you should choose the Kitchenaid Sausage Stuffer and the components of the kit that make it an essential tool for sausage enthusiasts.
Why Choose Kitchenaid
When it comes to choosing a sausage stuffer, Kitchenaid stands out for its commitment to quality and innovation. The Kitchenaid Sausage Stuffer attachment is designed to seamlessly integrate with your Kitchenaid stand mixer, ensuring a hassle-free and efficient sausage-making experience. With its durable construction and user-friendly design, the Kitchenaid Sausage Stuffer is the ideal choice for anyone looking to elevate their sausage-making game.
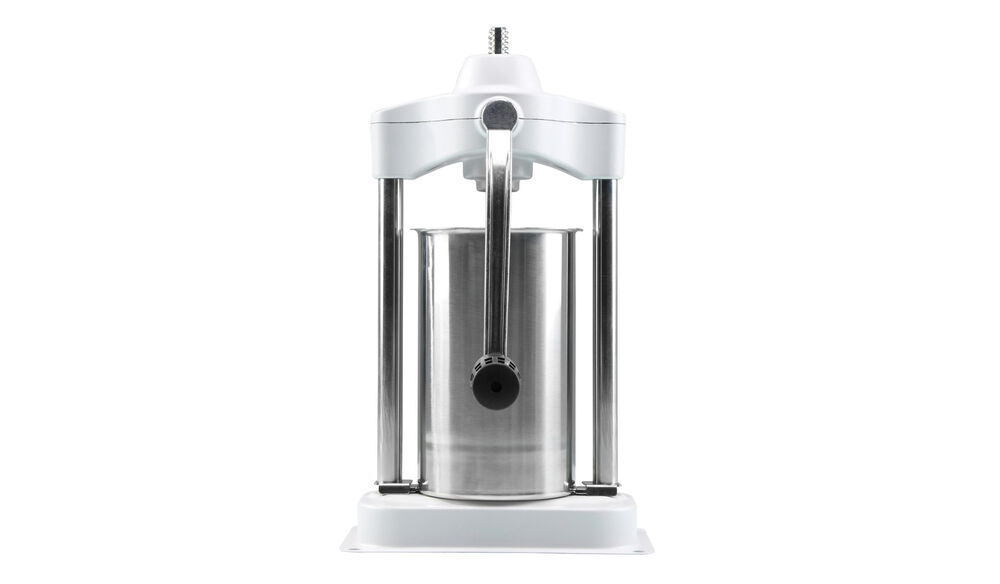
Components Of The Sausage Stuffer Kit
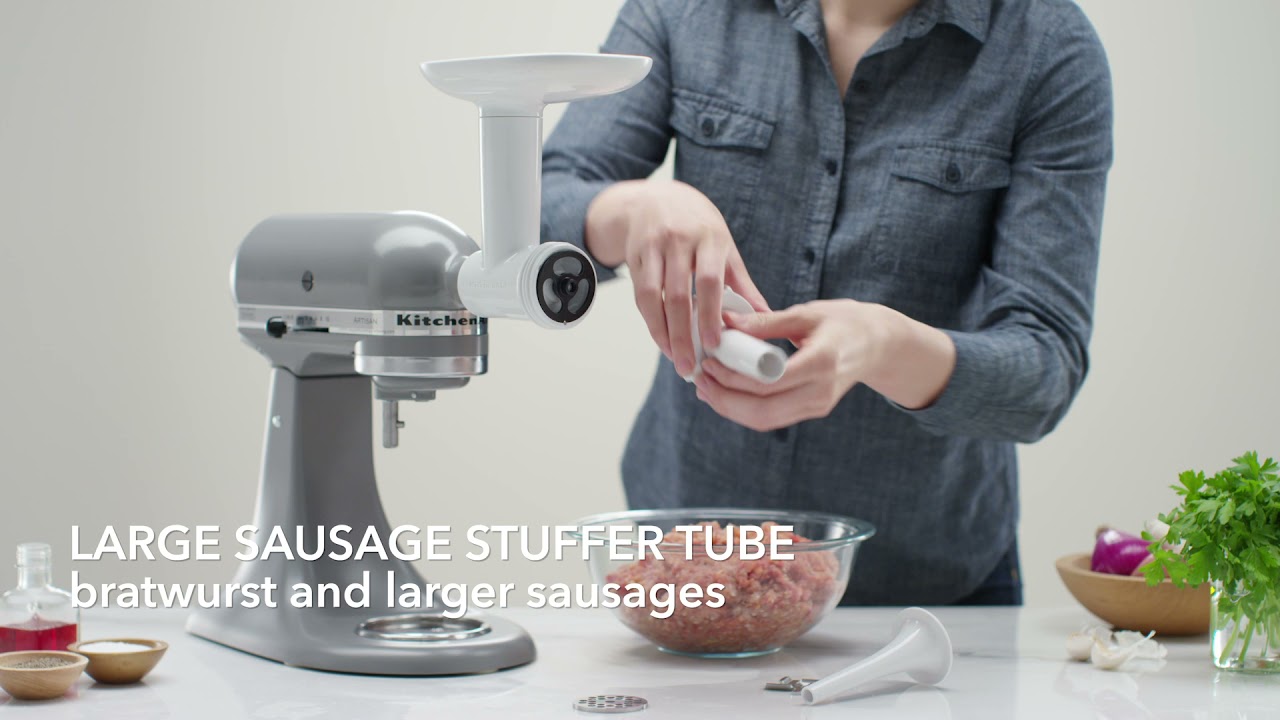
The Sausage Stuffer Kit includes essential components that are crucial for creating homemade sausages. The kit typically consists of a stuffer tube, nozzle, and a secure attachment mechanism that connects to the food grinder attachment of your Kitchenaid stand mixer. The stuffer tube allows you to feed the sausage casing onto the tube, while the nozzle enables you to control the sausage filling process with precision. This comprehensive kit empowers you to craft sausages of varying sizes and flavors, making it a must-have tool for any sausage enthusiast.

Credit: www.amazon.com
Before You Begin
Before you begin using the Kitchenaid Sausage Stuffer, it’s important to assemble it properly and choose the right speed on your stand mixer. Make sure to cut your meat and fat into small pieces before feeding it into the hopper tube and guiding it with the stomper.
Follow these steps carefully to create delicious homemade sausages with ease.
Safety Precautions
Before using the Kitchenaid Sausage Stuffer, it’s crucial to adhere to these safety precautions:
- Ensure the stand mixer and attachments are securely assembled and locked in place.
- Keep long hair, loose clothing, and jewelry away from the stand mixer during operation.
- Always use the sausage stuffer on a stable and level surface to prevent accidents.
- Keep hands and utensils away from moving parts to avoid injury.
Cleaning And Maintenance Tips
Proper cleaning and maintenance are essential for the longevity and hygiene of the Kitchenaid Sausage Stuffer. Follow these tips:
- After use, disassemble the sausage stuffer and clean all parts with warm, soapy water.
- Dry all components thoroughly before reassembling to prevent rust and corrosion.
- Regularly inspect for any signs of wear or damage and replace any worn parts immediately.
- Store the sausage stuffer and attachments in a clean, dry place to prevent dust and debris buildup.
Preparing The Sausage Mixture
To prepare the sausage mixture using the Kitchenaid sausage stuffer, start by sliding the open casing end onto the stuffer tube until the knot is right at the tip. Slowly and carefully feed small amounts of ground, seasoned meat into the hopper tube.
Use the stomper to guide the meat into the hopper tube and gently press small amounts into the worm gear. Follow these steps to make delicious homemade sausages with ease.
Selecting Ingredients
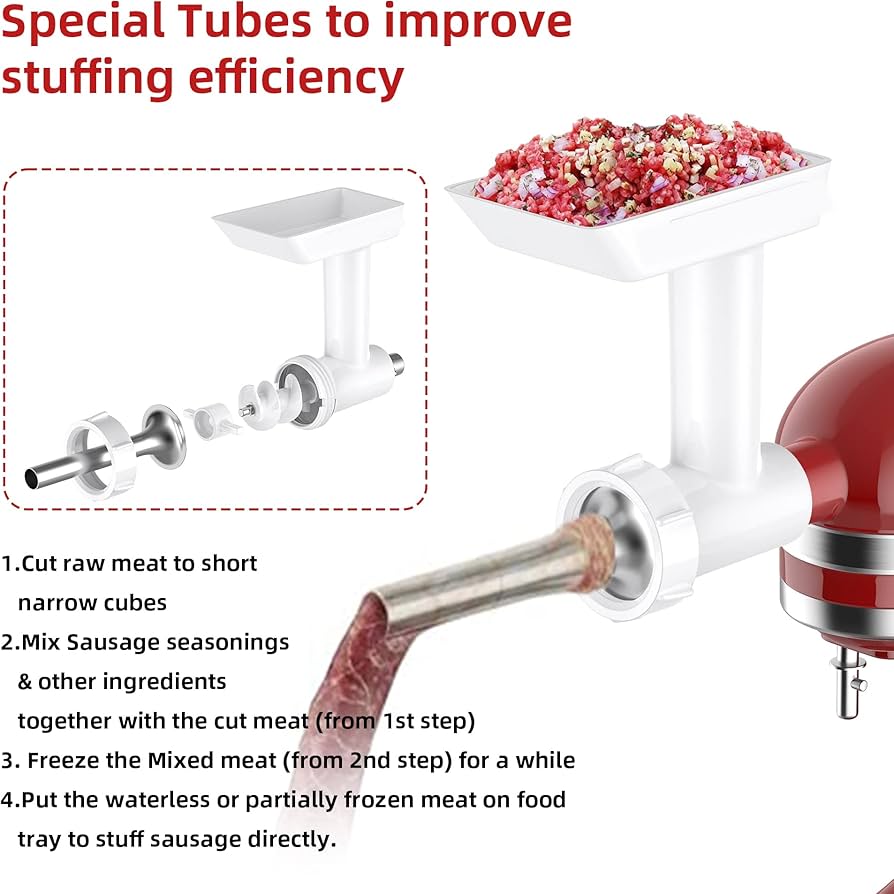
When it comes to preparing the perfect sausage mixture, selecting the right ingredients is crucial. Start by choosing high-quality meats such as pork, beef, or a combination of both. It’s important to use fatty cuts of meat to ensure a juicy and flavorful sausage. You can also experiment with different types of sausages by adding chicken, turkey, or even lamb to the mix.Grinding Meat
Once you have selected your desired meats, it’s time to grind them. Using a Kitchenaid sausage stuffer attachment, grind the meat using the fine grinding plate. Make sure the meat is chilled before grinding to maintain its texture and prevent the fat from melting. Grinding the meat at a slow speed will help retain its moisture and produce a better consistency for your sausages.Mixing Spices And Seasonings
To give your sausages a burst of flavor, it’s essential to mix the right spices and seasonings into the meat mixture. Start by preparing your spice blend, which can include a combination of salt, pepper, garlic powder, paprika, fennel seeds, and other herbs and spices of your choice. Mix the spices thoroughly into the ground meat, making sure they are evenly distributed. You can also add additional ingredients such as minced garlic, chopped onions, or even grated cheese to enhance the taste of your sausages. Be creative and experiment with different flavor profiles to find your perfect combination. Remember to handle the mixture gently to avoid over-mixing, as this can result in a tough texture. Once the spices and seasonings are thoroughly incorporated, cover the mixture and refrigerate it for at least an hour to allow the flavors to meld together. Preparing the sausage mixture is an essential step in creating delicious homemade sausages. By selecting the right ingredients, grinding the meat properly, and mixing in flavorful spices and seasonings, you can elevate your sausage-making game to a whole new level. So grab your Kitchenaid sausage stuffer attachment and get ready to impress your family and friends with your homemade sausages.
Credit: www.amazon.com
Assembling The Sausage Stuffer
To assemble the Kitchenaid Sausage Stuffer, first, slide the open casing onto the stuffer tube and knot it at the tip. Then, slowly feed ground meat into the hopper tube using the stomper and pressing small amounts into the worm gear.
Finally, guide the meat through and start creating delicious homemade sausages.
Attaching To The Kitchenaid Mixer
Before you can start making delicious sausages, you need to attach the sausage stuffer to your Kitchenaid mixer. Here’s how:
- Ensure that your Kitchenaid mixer is turned off and unplugged.
- Locate the attachment hub on the front of your mixer. It is the round socket where you usually attach other accessories.
- Take the sausage stuffer attachment and align it with the attachment hub.
- Insert the attachment shaft into the hub and rotate it clockwise until it clicks into place.
- Give the attachment a gentle tug to make sure it is securely attached.
Now that you have successfully attached the sausage stuffer, it’s time to set up the stuffer components.
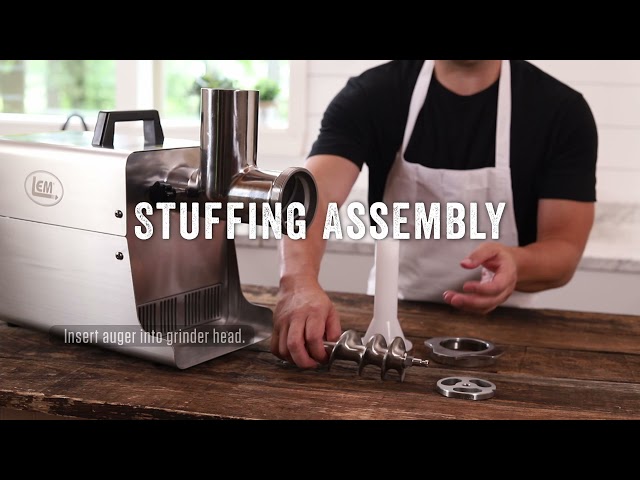
Setting Up The Stuffer Components
Setting up the stuffer components is an important step to ensure smooth operation and optimal sausage stuffing. Follow these steps:
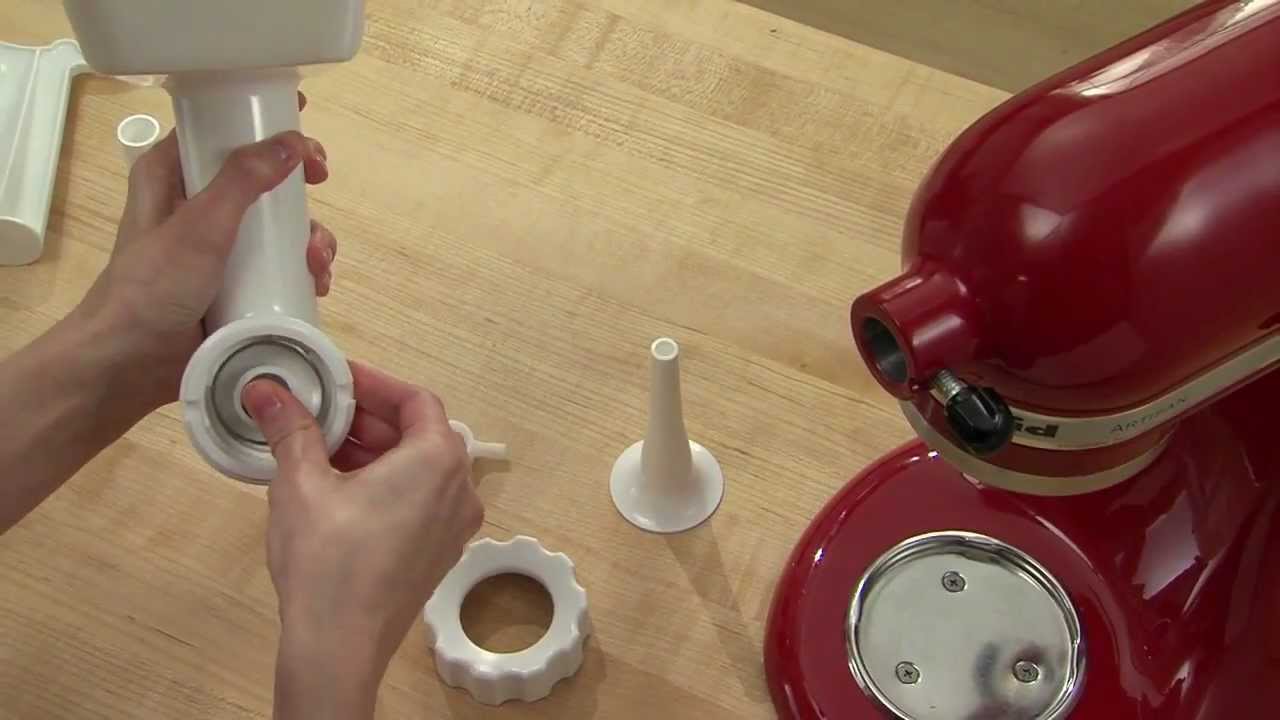
- First, make sure you have all the necessary components of the sausage stuffer kit, including the stuffer tube, the locking ring, and the plunger.
- Take the stuffer tube and slide it into the opening at the front of the sausage stuffer attachment. Ensure that it fits securely.
- Next, place the locking ring over the stuffer tube and twist it clockwise to secure it in place.
- Attach the plunger to the top of the stuffer tube, making sure it is firmly in place.
With the stuffer components properly set up, you are now ready to start stuffing sausages using your Kitchenaid sausage stuffer. Remember to always refer to the owner’s manual for specific instructions on operating the sausage stuffer and adjusting the speed settings on your Kitchenaid mixer.
Loading The Casing
To load the casing using the Kitchenaid Sausage Stuffer, slide the open end of the casing onto the stuffer tube until the knot is at the tip. Slowly feed small amounts of ground, seasoned meat into the hopper tube using the stomper and gently press it into the worm gear.
Loading the Casing is the first and most crucial step in using the Kitchenaid Sausage Stuffer. The success of your homemade sausage depends on how well you load the casing onto the stuffer tube. In this section, we will discuss the different types of casings, how to prepare them, and how to attach them to the tube.Types Of Casings
Before you begin loading the casing, it’s essential to understand the types of casings available. There are two main types of casings: natural casings and synthetic casings. Natural casings are made from animal intestines, while synthetic casings are made from collagen or cellulose.Preparation Of Casings
Once you have chosen the type of casing, it’s time to prepare it. For natural casings, you need to soak them in water for at least 30 minutes before using them. This process helps to remove any salt or preservatives and makes them more pliable. Synthetic casings do not require soaking and are ready to use straight out of the package.Attaching Casings To The Tube
The final step is to attach the casing to the stuffer tube. First, slide the open end of the casing onto the tube until the knot is right at the tip. Ensure that the casing is not twisted or wrinkled as this can cause the sausage to burst. Slowly and carefully feed the ground meat into the hopper tube, guiding the meat into the hopper tube using the stomper and pressing small amounts into the worm gear. Continue to fill the casing until you reach the desired length, leaving enough room at the end to tie it off. In conclusion, loading the casing is the first and most important step in using the Kitchenaid Sausage Stuffer. By understanding the types of casings available, preparing them correctly, and attaching them to the tube, you can ensure the success of your homemade sausage.Stuffing The Sausage
To use the Kitchenaid Sausage Stuffer, start by sliding the open casing end onto the stuffer tube, then feed small amounts of seasoned meat into the hopper tube using the stomper. Slowly guide the meat into the worm gear and let the stuffer do the work.
Enjoy making homemade sausages with ease!
Stuffing the sausage is a crucial step in the process of making homemade sausages. With the Kitchenaid Sausage Stuffer attachment, this task becomes much easier and efficient. In this section, we will discuss how to use the Kitchenaid Sausage Stuffer to stuff the sausage properly, including filling the hopper, controlling the mixer speed, and handling the sausage.Filling The Hopper
Before stuffing the sausage, you need to fill the hopper with the seasoned meat mixture. To do this, you need to remove the food grinder attachment from your Kitchenaid mixer and attach the sausage stuffer attachment to the mixer’s power hub. Once attached, you can fill the hopper with the ground meat mixture. It is essential to ensure that the mixture is not too compacted in the hopper to prevent clogging.Controlling The Mixer Speed
The mixer speed is a vital factor in the sausage stuffing process. It is recommended to start at a low speed to avoid overworking the meat mixture and prevent air bubbles from forming. As you continue to fill the casings, you can gradually increase the mixer’s speed. However, keep in mind that the speed should not be too high as it can cause the casing to burst.Handling The Sausage
When stuffing the sausage, it is crucial to handle it with care to prevent air pockets and ensure that the casing is evenly filled. Start by sliding the open casing end onto the stuffer tube until the knot is right at the tip. Slowly and carefully feed “pinches” of the ground, seasoned meat into the hopper tube. Guide the meat into the hopper tube using the stomper and gently press small amounts into the worm gear. As you stuff the sausage, ensure that the casing is not too tight or too loose. In conclusion, using the Kitchenaid Sausage Stuffer attachment is a convenient and efficient way to stuff homemade sausages. By following the steps outlined above, you can fill the casings evenly and with ease. Remember to fill the hopper correctly, control the mixer speed, and handle the sausage with care to achieve the desired result.Finishing Touches
After you have successfully stuffed your sausages using the Kitchenaid Sausage Stuffer, there are a few important finishing touches to consider. These steps will ensure that your sausages are properly tied off and stored for optimal freshness and flavor.
Tying Off The Sausages
Once you have finished stuffing the sausages, it’s important to tie off the ends to secure the filling and prevent any leakage during cooking. Here’s a simple step-by-step guide:
- Slide the open end of the sausage casing onto the stuffer tube until the knot is right at the tip.
- Slowly and carefully feed small pinches of the ground, seasoned meat into the hopper tube.
- Use the stomper to guide the meat into the hopper tube, gently pressing small amounts into the worm gear.
- Continue this process until the casing is filled with the desired amount of sausage.
- To tie off the sausages, leave a small amount of casing at the end and twist it a few times to seal the filling.
- Tie a knot at the twisted end to secure the sausage.
By following these steps, you will ensure that your sausages are properly tied off and ready for cooking.
Proper Storage Techniques
Proper storage is essential to maintain the quality and freshness of your homemade sausages. Here are some tips for storing your sausages:
- Place the sausages in an airtight container or wrap them tightly in plastic wrap.
- Label the container with the date of preparation to keep track of freshness.
- Store the sausages in the refrigerator for up to 3-4 days.
- If you have a large batch of sausages, consider freezing them for long-term storage.
- Before freezing, make sure to individually wrap each sausage to prevent freezer burn.
- Store the wrapped sausages in a freezer-safe bag or container.
- When you’re ready to use the frozen sausages, thaw them in the refrigerator overnight before cooking.
By following these proper storage techniques, you can enjoy your homemade sausages for an extended period without compromising their taste and quality.
Cooking Your Sausage
Learn how to effortlessly use the Kitchenaid Sausage Stuffer to create your own delicious sausages at home. Simply attach the stuffer to the food grinder, load the casing onto the stuffer tube, and start feeding the seasoned meat into the hopper tube using the stomper.
Enjoy making sausages like a pro with this convenient Kitchenaid attachment.
Grilling Tips
Grilling your sausages can give them a delicious smoky flavor. Here are some tips to ensure the perfect grilled sausages:
- Preheat your grill to medium-high heat.
- Brush the sausages with a little oil to prevent sticking.
- Place the sausages on the grill and close the lid.
- Cook for about 10-15 minutes, turning occasionally, until the sausages are cooked through and browned.
- Use a meat thermometer to ensure the internal temperature of the sausages reaches 160°F (71°C).
Pan-frying
If you prefer a crispy exterior, pan-frying your sausages is a great option. Follow these steps for perfectly pan-fried sausages:
- Heat a little oil in a frying pan over medium heat.
- Add the sausages to the pan and cook for about 5-7 minutes, turning frequently, until they are browned on all sides.
- Reduce the heat to low and cover the pan. Cook for an additional 10-15 minutes, or until the sausages are fully cooked.
- Use a meat thermometer to ensure the internal temperature of the sausages reaches 160°F (71°C).
Boiling Methods
Boiling sausages is a quick and easy cooking method that ensures even cooking. Here’s how to boil sausages:
- Fill a large pot with enough water to cover the sausages.
- Bring the water to a boil over high heat.
- Add the sausages to the boiling water and reduce the heat to medium-low.
- Cook the sausages for about 10-15 minutes, or until they are fully cooked.
- Use a meat thermometer to ensure the internal temperature of the sausages reaches 160°F (71°C).
Whether you choose to grill, pan-fry, or boil your sausages, always make sure they are cooked to the proper internal temperature to ensure food safety. Enjoy your homemade sausages in your favorite recipes or simply on their own!
Troubleshooting Common Issues
When using the KitchenAid Sausage Stuffer, you may encounter some common issues that can affect the quality of your sausages. Understanding how to troubleshoot these issues is essential for achieving the perfect results. Below, we’ll discuss the troubleshooting steps for handling air pockets, avoiding meat smearing, and addressing casing breakage.
Handling Air Pockets
Air pockets in the sausage can lead to uneven texture and affect the overall taste. To address this issue, ensure that the meat mixture is thoroughly packed into the sausage stuffer to minimize the presence of air pockets. Additionally, slowly and steadily crank the stuffer to allow the meat to fill the casing evenly, minimizing the likelihood of air pockets forming.
Avoiding Meat Smearing
Meat smearing can occur if the meat mixture is too soft or warm, causing it to stick to the stuffer tube. To avoid this, ensure that the meat mixture is adequately chilled before stuffing. Additionally, consider using a slightly coarser grind to prevent the meat from smearing during the stuffing process.
Casing Breakage Solutions
Casing breakage can be frustrating, but there are steps you can take to address this issue. Firstly, ensure that the casing is properly lubricated before use to reduce friction and minimize the risk of breakage. Furthermore, avoid overfilling the casing, as this can put excess pressure on the casing and lead to breakage. Finally, consider using high-quality, properly soaked casings to enhance their durability during the stuffing process.
Advanced Tips For Perfect Sausages
When using the KitchenAid Sausage Stuffer, mastering the art of creating perfect sausages is a delightful experience. Here are some advanced tips that will take your sausage-making skills to the next level.
Consistency In Sausage Size
Consistency in the size of your sausages is crucial for both visual appeal and even cooking. To achieve this, carefully regulate the amount of meat being fed into the stuffer. Always use the recommended speed setting on your KitchenAid mixer for a uniform sausage size. Additionally, ensure that the casings are evenly filled to avoid variations in sausage thickness.
Flavor Enhancements
Enhancing the flavor of your sausages can elevate the overall dining experience. Experiment with different seasonings and spices to create unique flavor profiles. Boldly mix in ingredients such as garlic, paprika, or fennel seeds to add depth to your sausages. Remember to thoroughly mix the seasonings with the meat before stuffing to ensure an even distribution of flavors.
Experimenting With Recipes
Exploring diverse recipes can lead to exciting sausage creations. Fearlessly experiment with various meats, such as pork, beef, or a blend of both, to discover new flavor combinations. You can also incorporate different ingredients like cheese, herbs, or even fruits to create unconventional yet delicious sausages. Keep a record of your experiments to replicate successful recipes in the future.
Cleaning And Care After Use
After enjoying the process of making delicious sausages with your Kitchenaid Sausage Stuffer, it’s important to properly clean and care for the equipment. This ensures that it remains in optimal condition for future use and maintains its functionality. In this section, we will guide you through the steps of disassembling the stuffer, proper cleaning techniques, and storage recommendations.
Disassembling The Stuffer
Before you begin cleaning the sausage stuffer, it’s crucial to disassemble the different parts. This allows for a thorough cleaning and prevents any food residue from remaining trapped. Follow these steps to disassemble your Kitchenaid Sausage Stuffer:
- First, detach the stuffer attachment from your Kitchenaid stand mixer.
- Next, remove the plunger and the stuffer tube from the attachment.
- Finally, separate the different parts of the stuffer tube, such as the nozzle and the collar, if applicable.
Proper Cleaning Techniques
Once the stuffer is disassembled, it’s time to clean each individual part to ensure hygiene and remove any food remnants. Follow these proper cleaning techniques for your Kitchenaid Sausage Stuffer:
- Start by rinsing each part under warm water to remove any loose debris.
- Use a mild dish soap or a kitchen cleaner to wash each part thoroughly.
- Scrub any stubborn residue with a soft brush or sponge, paying close attention to crevices and hard-to-reach areas.
- Rinse each part again under warm water to remove any soap residue.
- Dry each part completely with a clean towel or allow them to air dry.
Storage Recommendations
Once the cleaning process is complete, it’s important to store your Kitchenaid Sausage Stuffer properly to maintain its longevity. Follow these storage recommendations:
- Find a clean and dry storage area for your stuffer parts.
- Consider using the original packaging or a separate container to keep all the parts together.
- Avoid storing the stuffer in a humid or damp environment to prevent rust or damage.
- Keep the stuffer in a place where it won’t be exposed to extreme temperatures.
By following these cleaning and care guidelines after using your Kitchenaid Sausage Stuffer, you can ensure its longevity and enjoy many more delicious homemade sausages in the future.
Credit: www.youtube.com
Expanding Your Sausage-making Repertoire
Making sausages with the KitchenAid Sausage Stuffer opens up a world of possibilities. Let’s explore some exciting ways to expand your sausage-making repertoire.
Trying Different Meat Combinations
Experimenting with various meat combinations can lead to unique and flavorful sausages. Consider mixing pork with beef or chicken to create a well-balanced blend. You can also combine spicy and mild sausages for a diverse range of flavors.
Exploring International Sausage Recipes
Delve into the rich and diverse world of international sausage recipes. From Italian to German to Mexican sausages, each culture offers its own unique blend of spices and flavors. Embrace the culinary diversity and explore recipes from around the globe.
Frequently Asked Questions
How Do You Use A Kitchenaid Sausage Stuffer Kit?
To use a KitchenAid sausage stuffer kit, slide the open end of the casing onto the stuffer tube. Slowly feed small pinches of ground meat into the hopper tube using the stomper. Gently press the meat into the worm gear.
Avoid starting sentences with certain phrases and use active voice.
How Do You Use A Sausage Stuffer?
To use a sausage stuffer, slide the open end of the casing onto the stuffer tube. Slowly feed small amounts of seasoned meat into the hopper tube using the stomper. Gently press the meat into the worm gear. Avoid starting sentences with specific phrases and write in active voice.
How Do You Put Sausage Casing On A Sausage Stuffer?
To put sausage casing on a sausage stuffer, slide the open end of the casing onto the stuffer tube until the knot is at the tip. Slowly and carefully feed small amounts of seasoned meat into the hopper tube using the stomper.
Gently press the meat into the worm gear. Repeat until the casing is filled.
Conclusion
Using the Kitchenaid Sausage Stuffer is a simple way to make homemade sausages. With the right techniques, you can create delicious sausages with ease. By following the instructions and being patient, you can enjoy the process of making your own sausages at home.