Are you struggling with a leaky kitchen faucet hose? You’re not alone; many homeowners face this common plumbing issue. Knowing how to replace kitchen faucet hose can save you time and money while ensuring your kitchen remains functional. With over 15 years of experience in home maintenance and plumbing, I understand the frustrations that come with DIY repairs. In this article, you’ll learn the essential steps to replace your kitchen faucet hose, tips to avoid common pitfalls, and how to ensure a proper installation. Whether you’re a seasoned DIYer or a beginner, our comprehensive guide will empower you to tackle this project with confidence.
Understanding the Kitchen Faucet Hose
Replacing a kitchen faucet hose is a straightforward task that can enhance the functionality of your kitchen. A faucet hose is crucial for connecting your faucet to the water supply, enabling smooth water flow. Familiarizing yourself with the components of your faucet will ease the replacement process. Typically, kitchen faucets come equipped with either a pull-down or pull-out hose. Knowing the differences between them helps in selecting the right replacement hose. Additionally, understanding the role of the hose in your faucet’s operation will allow you to troubleshoot any issues that may arise, ensuring a more efficient repair process.
Components of a Kitchen Faucet Hose
A kitchen faucet hose generally consists of a flexible tubing and connectors at both ends. The tubing allows for easy maneuverability, while the connectors secure the hose to the faucet and water supply. It’s essential to examine these components before initiating a replacement to identify any wear and tear. Proper understanding of these parts can prevent complications during the replacement process.
Common Signs of a Worn Hose
Identifying when to replace the kitchen faucet hose is crucial for maintaining optimal performance. Common signs include leaks, reduced water pressure, or a hose that won’t retract properly. These issues can lead to water wastage and increased utility bills. Regularly inspecting your hose for cracks or bulges can help you catch problems early, ensuring a timely replacement.
Key Points:
- Understanding the components aids in effective replacement
- Regular inspection can prevent unexpected issues
Preparation for Replacing the Kitchen Faucet Hose
Before replacing a kitchen faucet hose, proper preparation is essential. This includes gathering necessary tools and materials, ensuring you have everything at hand to make the process seamless. Tools often needed include a wrench, bucket, and towels to manage any spills. Additionally, it’s important to turn off the water supply to avoid any accidents during the replacement. Preparing your workspace by clearing the area around the sink will provide you with ample room to work, minimizing the risk of dropping tools or components.
Tools and Materials Needed
To replace a kitchen faucet hose, basic tools such as an adjustable wrench, screwdriver, and bucket are necessary. The bucket will catch any residual water, while the wrench helps loosen fittings. Having a towel nearby can help in managing spills and keeping the area clean. Ensuring you have the correct replacement hose is equally important; measure the existing hose to avoid purchasing the wrong size.
Turning Off the Water Supply
Before beginning the replacement, locate the water supply valves under the sink and turn them off. This step is crucial as it prevents water from flowing while you disconnect the hose, reducing the chance of leaks or flooding. If your sink lacks individual shut-off valves, you may need to turn off the main water supply for your home, thus ensuring a safe working environment.
Key Points:
- Preparation minimizes hassle during replacement
- Turning off water supply is critical for safety
Understanding Your Kitchen Faucet Hose
Before you replace your kitchen faucet hose, it is essential to understand its components and functionality. A kitchen faucet hose is crucial for facilitating water flow, and knowing its layout will help in the replacement process. Typically, hoses connect to the faucet body and the water supply lines. Familiarizing yourself with different types of hoses—such as pull-down or pull-out—will influence your choice for replacement and installation methods.
Assessing Compatibility
Compatibility is critical when replacing a kitchen faucet hose. Ensure the new hose matches the size and threading of your existing connections. Measure the length of the hose and check for any additional features, such as integrated weights or connectors, to ensure a proper fit.
Key Points:
- Understand the types and compatibility of hoses to ensure a successful replacement.
- Familiarize yourself with the layout of your faucet system to streamline the process.
💡 Always turn off your water supply before beginning any replacement work to avoid flooding.
💡 Take photos of the existing connections for reference during reinstallation.
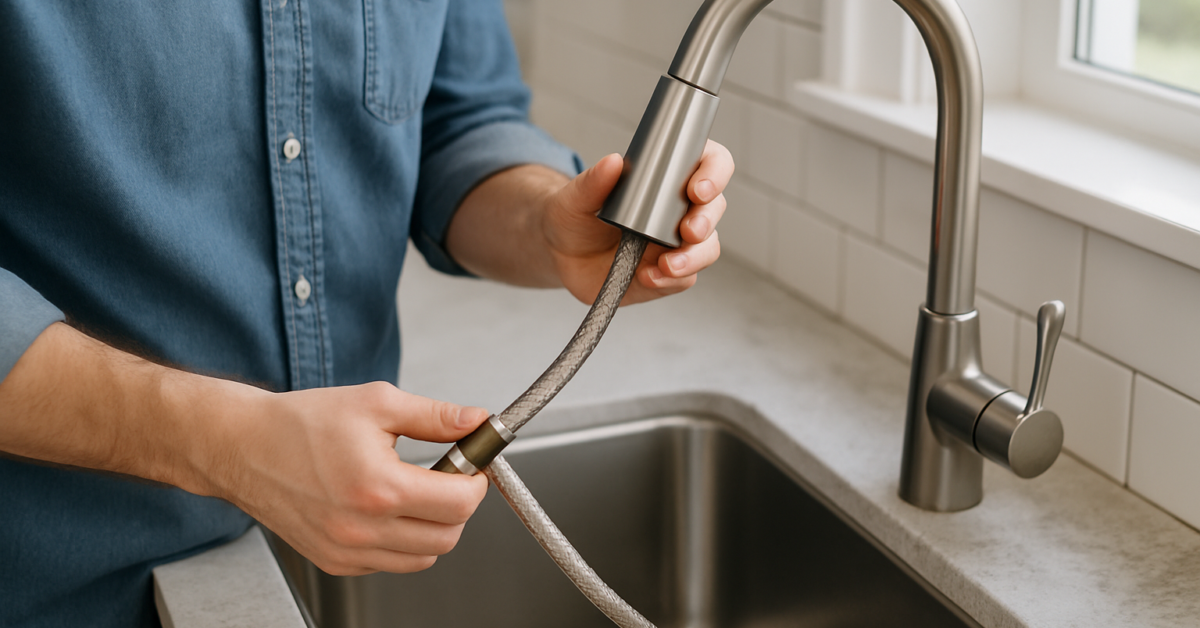
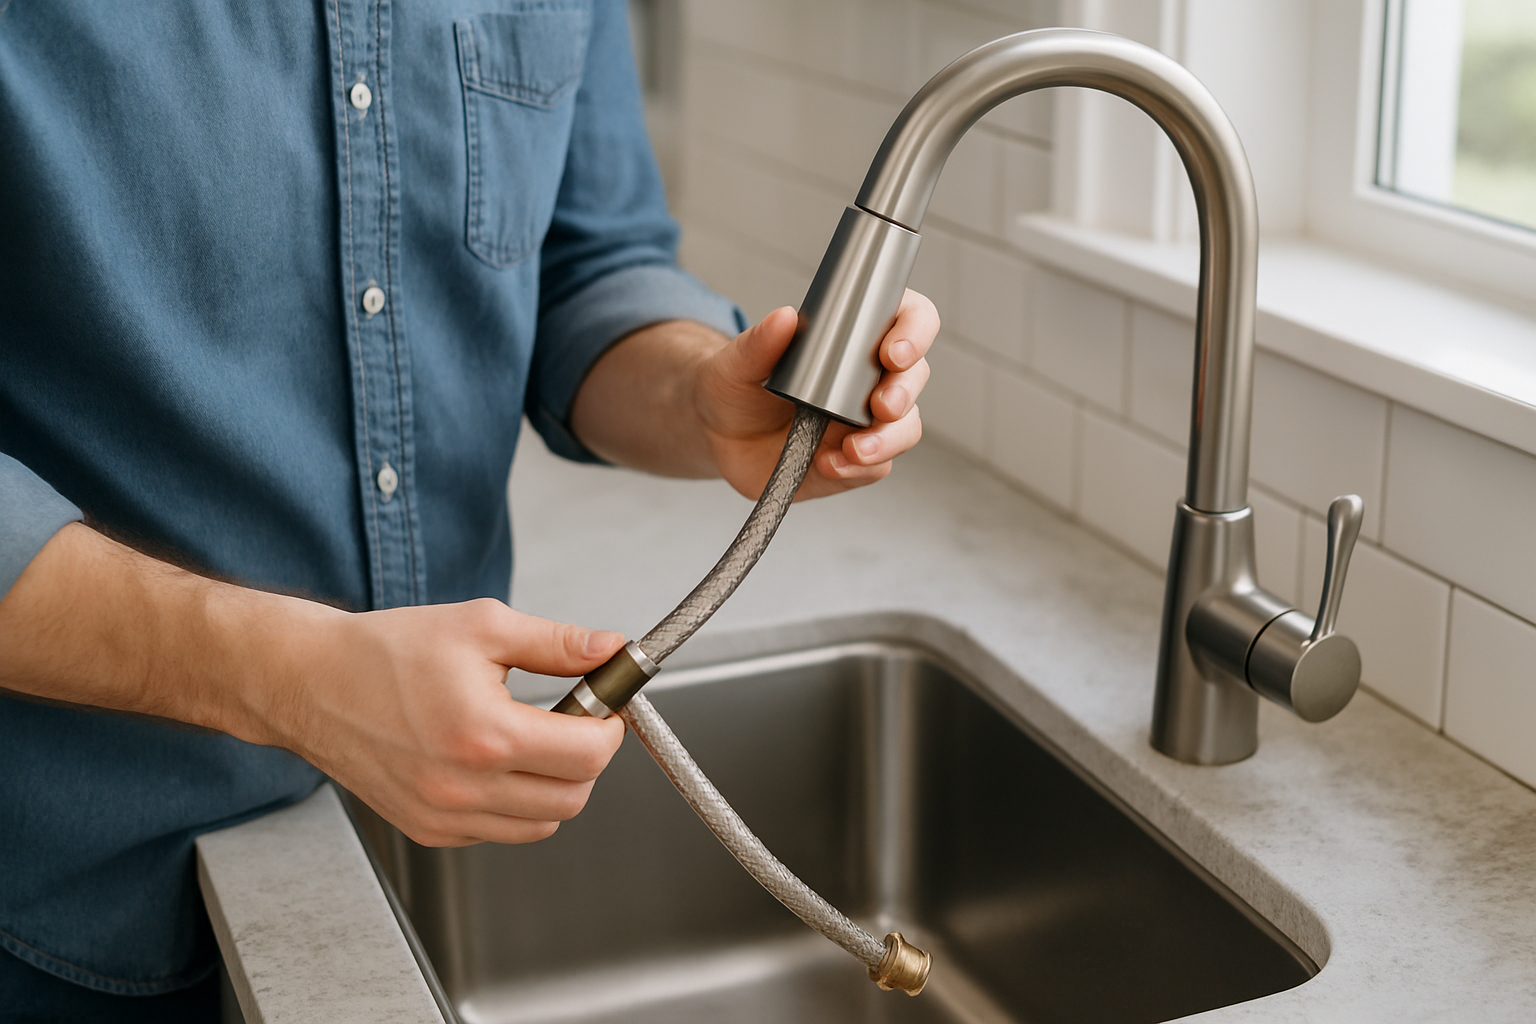
Step-by-Step Replacement Process
Replacing your kitchen faucet hose can be a straightforward DIY project if approached methodically. Start by gathering the necessary tools, including a wrench, pliers, and a towel. Next, follow the steps to disconnect the old hose, install the new one, and test for leaks. The entire procedure can usually be completed in under an hour, making it a practical home improvement task.
Installing the New Hose
Once the old hose is removed, attach the new hose by connecting it to the faucet and water supply lines. Ensure the connections are tight but do not over-tighten, as this can lead to damage. Once secured, run the hose through any guides or clips as needed to keep it organized.
Key Points:
- Take careful steps to disconnect the old hose to avoid damaging other parts.
- Ensure secure connections to prevent leaks after installation.
💡 Check for leaks by running the water after installation; tighten connections if needed.
💡 If the hose does not fit easily, double-check compatibility or consult installation guides.
EXPERT TIPS Pro Advice
Use thread seal tape on connections.
This helps to create a watertight seal, preventing leaks at the joint where the hose connects to the faucet.
Consider the hose length carefully.
Too short a hose can limit mobility, while too long can create kinks; measure accurately before purchasing.
Inspect the faucet body for wear.
Before installation, check for any damage or wear on the faucet body to avoid future issues.
Keep a bucket nearby during the replacement.
This can catch any water that spills during the process, helping to keep your work area clean.
Frequently Asked Questions
Conclusion
Replacing a kitchen faucet hose can be a straightforward task with the right tools and knowledge. Ensure you identify signs of wear, follow safety precautions, and use proper techniques for installation. By understanding these key steps, you can efficiently replace the hose and maintain your faucet’s functionality.
🎯 Key Takeaways:
- Gather necessary tools like wrenches and pliers before starting.
- Identify signs of hose wear, such as leaks and low pressure.
- Always turn off the water supply before beginning the replacement.
- Use plumber’s tape for secure and leak-free connections.
- Consider compatibility if a new hose doesn’t fit your faucet.
Expert Advice: Approach the replacement process with patience and attention to detail. Familiarize yourself with the components involved and don’t hesitate to consult resources for guidance if needed.
Ready to replace your kitchen faucet hose? Gather your tools and follow the steps outlined to successfully complete the task yourself.


