To put casing on the sausage stuffer, coat the stuffer tube with vegetable shortening and gently place the casing onto the tube, leaving approximately four inches of casing hanging off the end. Slowly and carefully feed pinches of the ground, seasoned meat into the hopper tube, guiding the meat into the hopper tube using the stomper.
It is important to ensure that the meat is not stuffed too tightly into the casings as it will not allow room for expansion when cooking or when linking the skins. Additionally, it is important to avoid placing sausages into a piping hot frying pan to prevent them from bursting.
Collagen casings do not require soaking prior to using on stuffing equipment and doing so may result in poor size control and high give away.

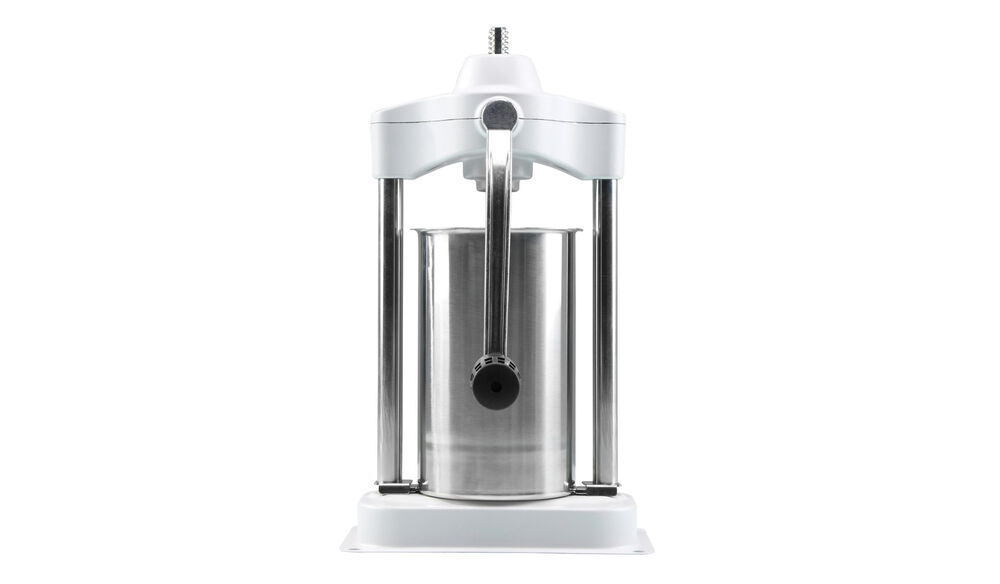
Credit: www.amazon.com
Introduction To Sausage Making
Making sausages at home can be a rewarding and delicious experience. The process of sausage making involves several steps, including selecting the right casings, preparing the meat, and using a sausage stuffer to fill the casings. In this article, we will explore the role of casings in sausage production and discuss the different types of casings available.
The Role Of Casings In Sausage Production
Casings play a vital role in sausage production, as they encase the seasoned meat mixture and give the sausages their characteristic shape. Additionally, casings help to retain the flavor and moisture of the sausages during cooking. They also provide a barrier that prevents the loss of fat and keeps the sausages intact.
Types Of Casings: Natural Vs. Collagen
When it comes to selecting casings for sausage making, there are two primary types to consider: natural casings and collagen casings.
- Natural Casings: These casings are made from animal intestines, typically from pigs, sheep, or cattle. Natural casings are known for their traditional appearance and superior flavor. They are ideal for making traditional sausages like bratwurst, Italian sausage, and chorizo.
- Collagen Casings: These casings are made from collagen, a protein derived from animal skin or bones. Collagen casings are uniform in size and provide excellent consistency. They are suitable for a wide range of sausage types and are often preferred for their ease of use and storage.
Understanding the differences between natural and collagen casings can help you choose the right option for your sausage making endeavors.

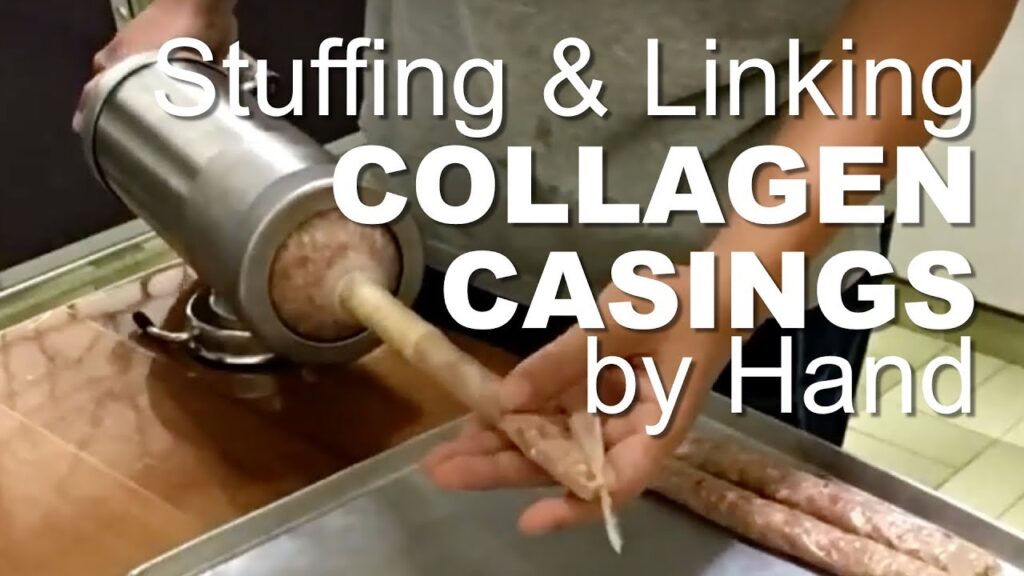
Credit: m.youtube.com
Preparing The Casings
Properly preparing the casings is crucial for successful sausage stuffing. This process involves cleaning and inspecting the casings, as well as soaking and lubricating them to ensure they are pliable and ready for use.
Cleaning And Inspecting Casings
Before use, clean the casings by rinsing them thoroughly under cold running water. Inspect each casing, checking for any tears, holes, or imperfections that could affect the stuffing process.
Soaking And Lubricating Casings
Next, soak the casings in cold water for at least 30 minutes to hydrate and soften them. Once soaked, lubricate the casings by running water through them to ensure smooth and easy stuffing.
Assembling The Sausage Stuffer
To assemble the sausage stuffer and put casing on it, first, slide the open end of the casing onto the stuffer tube until the knot is at the tip. Then, slowly feed small amounts of ground meat into the hopper tube using the stomper.
Gently press the meat into the worm gear to guide it through.
Selecting The Right Stuffing Tube
When assembling the sausage stuffer, it is important to select the right stuffing tube. The stuffing tube determines the size and shape of the sausages you will be making. Different types of sausages require different stuffing tubes, so it’s essential to choose the appropriate one for your recipe. Consider the diameter and length of the tube to ensure it fits your stuffer and meets your desired sausage specifications.Attaching The Tube To The Stuffer
Once you have selected the right stuffing tube, it’s time to attach it to the sausage stuffer. Follow these steps to ensure a secure and proper attachment:- First, make sure the stuffer is turned off and unplugged for safety.
- Locate the attachment point on the stuffer where the tube will be inserted.
- Align the tube with the attachment point, ensuring it is straight and properly aligned.
- Gently push the tube into the attachment point until it fits snugly.
- Double-check that the tube is securely attached and won’t come loose during the stuffing process.
Loading Casings Onto The Stuffer
When it comes to making sausages, loading casings onto the stuffer is an essential step in the process. This is where you carefully slide the casings onto the stuffer tube, ensuring even distribution and preparing them for filling. In this section, we will discuss techniques for sliding on casings and ensuring an even distribution, ensuring each H3 heading adheres to HTML syntax.
Techniques For Sliding On Casings
When it comes to sliding casings onto the stuffer, there are a few techniques you can use to make the process easier and more efficient:
- Preparation: Before you begin, make sure the casings are properly prepared. If you are using natural casings, soak them in warm water for about 30 minutes to soften them. If you are using collagen casings, no soaking is required.
- Open one end: Start by opening one end of the casing. If using natural casings, gently slide your finger along the inside to remove any excess salt or debris.
- Slide onto the stuffer tube: With one end of the casing open, slide it onto the stuffer tube. Make sure the knot is right at the tip of the tube.
- Slow and steady: Slowly and carefully feed “pinches” of the ground, seasoned meat into the hopper tube. Guide the meat into the hopper tube using the stomper and gently press small amounts into the worm gear.
Ensuring Even Distribution
Ensuring even distribution of the casings is crucial for consistent and well-formed sausages. Here are a few tips to achieve this:
- Avoid overstuffing: Be mindful of not overstuffing the casings, as this can lead to bursting during the cooking process. Leave some room for expansion.
- Take your time: Take your time when filling the casings to ensure an even distribution of the meat. This will help prevent air pockets and ensure a consistent texture throughout the sausages.
- Keep the casings taut: As you fill the casings, gently guide them off the stuffer tube while keeping them taut. This will help prevent any twists or kinks in the sausages.
By following these techniques and ensuring even distribution, you can load casings onto the stuffer with ease and create perfectly formed sausages every time.
Stuffing The Sausage
To put casing on the sausage stuffer, start by coating the stuffer tube with vegetable shortening. Gently place the casing onto the tube, leaving about four inches hanging off the end. Then, carefully feed pinches of the seasoned meat into the hopper tube, using the stomper to guide the meat into the worm gear.
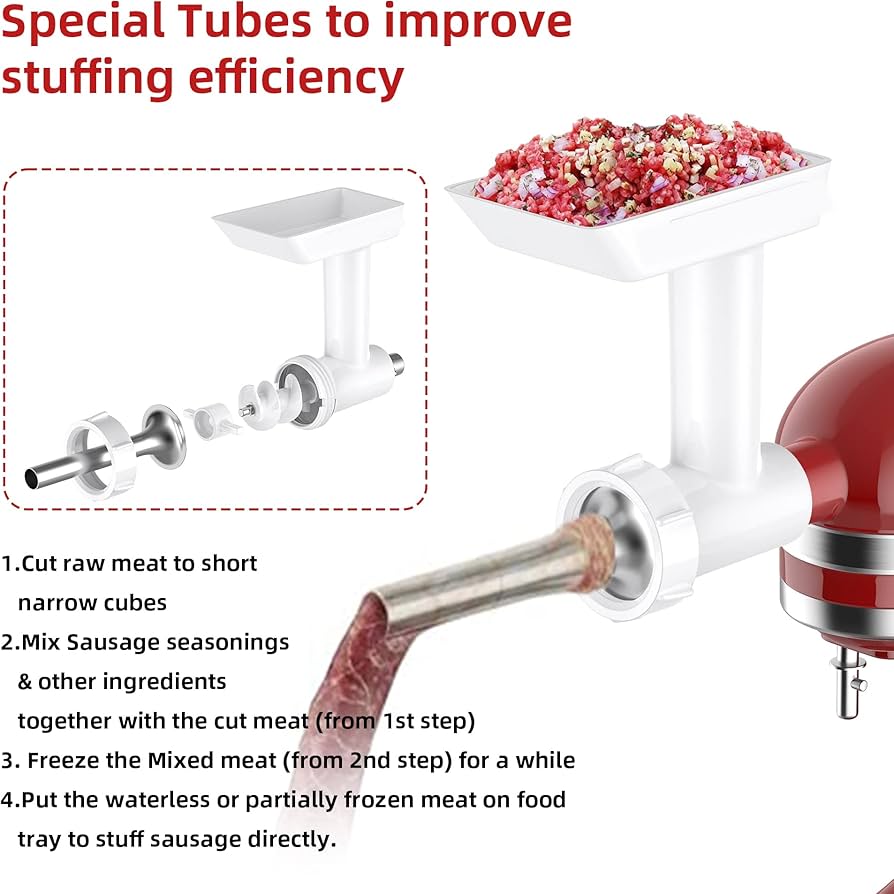
The Meat Mixture: Preparation And Tips
Before stuffing your sausage, it’s important to prepare the meat mixture properly. Start by selecting the right type of meat, such as pork, beef, or chicken, and grind it to the desired consistency using a meat grinder. You can also add spices, herbs, and other flavorings to the mixture to give it a unique taste. When preparing the meat mixture, it’s important to keep it cold to prevent bacteria growth. You can achieve this by placing the meat and grinder parts in the freezer for about an hour before grinding. Additionally, make sure to mix the ingredients thoroughly to ensure even distribution of flavors.Controlling The Stuffing Speed
When it comes to stuffing the sausage, controlling the speed is crucial to achieving the right consistency and texture. You can control the speed by adjusting the pressure on the stuffer handle or by using a stuffer with different speed settings. To start, slide the open casing end onto the stuffer tube until the knot is right at the tip. Slowly and carefully feed “pinches” of the ground, seasoned meat into the hopper tube. Guide the meat into the hopper tube using the stomper and gently press small amounts into the worm gear. Make sure not to overstuff the casings, as this can cause them to burst.Ensuring Success
To ensure success when stuffing sausage, it’s important to follow these tips:- Use high-quality, fresh ingredients
- Keep the meat mixture cold to prevent bacterial growth
- Control the stuffing speed to achieve the right consistency and texture
- Do not overstuff the casings to prevent bursting
- Practice makes perfect! Don’t be discouraged if your first attempts are not perfect.
Avoiding Common Problems
Putting casing on a sausage stuffer can be tricky, but there are ways to avoid common problems. Make sure to coat the stuffer tube with vegetable shortening, gently place the casing onto the tube, and slowly and carefully feed the meat into the hopper tube using the stomper.
Preventing Casing Blowouts
One of the most common problems when putting casing on the sausage stuffer is casing blowouts. This happens when the casing tears or bursts during the stuffing process. To prevent this, make sure to properly moisten the casing before sliding it onto the stuffer tube. Additionally, avoid overstuffing the casing and make sure to leave enough space for the sausage mixture to expand. In case the casing does blow out, stop the stuffing process and tie off the casing with a knot to prevent the mixture from spilling out.Dealing With Air Pockets
Another common problem is the formation of air pockets in the casing, which can cause uneven cooking and texture. To avoid this, make sure to remove any air trapped in the casing before stuffing. You can do this by running your fingers along the casing and gently pressing out any air pockets. Additionally, make sure to pack the sausage mixture tightly into the casing, using a stuffer with a slow and steady pressure to avoid trapping air.Ensuring Proper Links
When stuffing sausage casings, it’s important to ensure that each link is uniform in size and shape. To do this, use a twisting technique to separate the sausage mixture into individual links. Start by stuffing the casing with the desired amount of mixture, and then twist the casing to create the first link. Continue twisting the casing in the opposite direction to create the next link, making sure to keep each link the same size. Finally, tie off the end of the casing to seal the sausage inside. By following these simple tips, you can avoid common problems when putting casing on the sausage stuffer. Remember to moisten the casing, remove any air pockets, and create uniform links for perfectly stuffed sausages every time.Linking And Twisting Sausages
To put casing on a sausage stuffer, first coat the stuffer tube with vegetable shortening. Then, carefully slide the open end of the casing onto the tube until the knot is at the tip. Slowly and carefully feed pinches of the seasoned meat into the hopper tube, guiding it with the stomper.
Gently press small amounts into the worm gear and twist the sausages to form links. Avoid overstuffing to prevent the casings from breaking during cooking.
Creating Uniform Sausage Links
To create uniform sausage links, start by sliding the open casing end onto the stuffer tube until the knot is right at the tip. This will ensure a smooth and controlled filling process. Once the casing is in place, slowly and carefully feed “pinches” of the ground, seasoned meat into the hopper tube. Use the stomper to guide the meat into the hopper tube, gently pressing small amounts into the worm gear.Securing Ends And Storing Sausages
After filling the casings, it’s important to secure the ends of the sausages to prevent any leakage. To do this, twist the sausage at regular intervals along its length. This will create individual links that are easy to separate and serve. Once the sausages are linked, you can either cook them immediately or store them for later use. To store the sausages, you can follow these steps:- Place the linked sausages on a baking sheet lined with parchment paper.
- Ensure that there is enough space between each sausage to prevent them from sticking together.
- Cover the baking sheet with plastic wrap or aluminum foil to protect the sausages from drying out.
- Place the baking sheet in the refrigerator and allow the sausages to chill for at least 1 hour.
- Once the sausages are chilled, transfer them to airtight containers or freezer bags for longer-term storage.

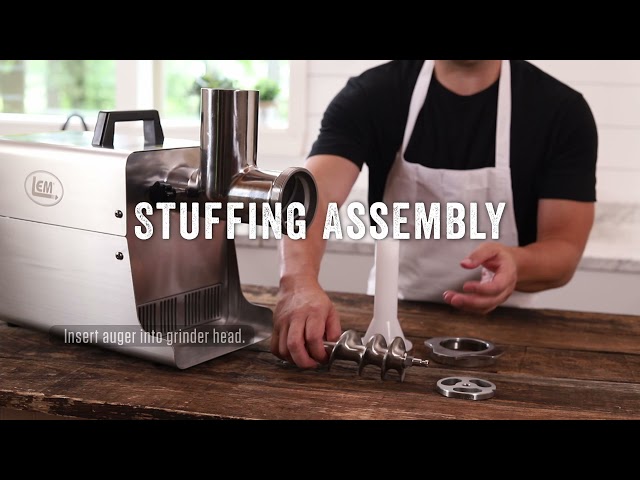
Credit: www.sausagemaker.com
Cleaning Up
To put casing on the sausage stuffer, first coat the stuffer tube with vegetable shortening. Then, gently slide the open end of the casing onto the stuffer tube until the knot is at the tip. Slowly feed small amounts of seasoned meat into the hopper tube using the stomper, guiding it into the worm gear.
Cleaning Up After successfully stuffing your sausages, it’s time to clean up your sausage stuffer to ensure its longevity and continued performance. Proper cleaning and maintenance will not only keep your equipment in optimal condition but also guarantee the safety and quality of your sausages. Post-stuffing cleanup procedure: 1. Disassemble the sausage stuffer: Start by carefully disassembling the sausage stuffer according to the manufacturer’s instructions. Remove any detachable parts such as the hopper, plunger, and stuffing tubes. 2. Empty the remaining casing: Check the stuffer tube for any leftover sausage casing. Use a small brush or cloth to clean out any remaining residue. Make sure to remove all traces of casing to prevent any contamination in future use. 3. Wash the parts: Thoroughly wash all the detachable parts with warm soapy water. Use a mild dish soap and a sponge or cloth to clean the surfaces. Pay special attention to the plunger and stuffing tubes, as they come into direct contact with the sausage mixture. 4. Rinse and dry: After washing, rinse all the parts with clean water to remove any soap residue. Dry them thoroughly with a clean towel or allow them to air dry completely before reassembling. Maintaining your sausage stuffer: 1. Regular lubrication: Apply a food-grade lubricant or grease to the moving parts of your sausage stuffer. This will help ensure smooth operation and prevent any rust or corrosion from developing. 2. Store in a dry place: After cleaning and drying, store your sausage stuffer in a cool, dry place. Moisture can lead to the growth of bacteria and mold, so it’s essential to keep your equipment in a dry environment. 3. Periodic deep cleaning: In addition to regular cleaning, perform a deep cleaning of your sausage stuffer at least once a year. This involves a more thorough disassembly and cleaning of all parts to remove any buildup or residue that may have accumulated over time. 4. Check for wear and tear: Regularly inspect the parts of your sausage stuffer for any signs of wear and tear. Replace any damaged or worn-out components to ensure the equipment functions properly and safely. By following these post-stuffing cleanup procedures and maintaining your sausage stuffer regularly, you can prolong its lifespan and enjoy delicious sausages for years to come. Remember, cleanliness is crucial when it comes to food preparation, so prioritize proper cleaning to ensure the safety and quality of your homemade sausages.Advanced Tips And Tricks
When it comes to mastering the art of sausage making, the devil is in the details. In this section, we’ll explore advanced tips and tricks for putting casing on the sausage stuffer that will take your sausage-making skills to the next level.
Flavor Infusion Techniques
Enhancing the flavor of your sausages is an art form. Here are some advanced flavor infusion techniques to elevate your sausage game:
- Experiment with different types of wood chips when smoking sausages to impart unique flavors such as hickory, applewood, or mesquite.
- Consider incorporating specialty ingredients like truffle oil, sundried tomatoes, or roasted garlic into your sausage mix for a gourmet touch.
- Explore the world of spice blends to create complex and nuanced flavor profiles. From smoky paprika to fragrant fennel seeds, the possibilities are endless.
Expert Casing Handling
Proper handling of sausage casings is crucial for achieving the perfect texture and appearance. Here are expert tips to ensure seamless casing application:
- Inspect the casings for any imperfections or tears before use to prevent potential breakage during the stuffing process.
- Ensure the casings are well-soaked in lukewarm water to improve their flexibility and aid in smooth application onto the stuffer tube.
- When loading the casings onto the stuffer tube, take care to avoid overstretching or twisting, as this can lead to uneven sausage links.
- Keep the casings lubricated with a light coating of oil to facilitate smooth stuffing and prevent them from sticking to the stuffer tube.
Troubleshooting Guide
Learn how to put casing on the sausage stuffer with this troubleshooting guide. Avoid stuffing the sausage mix too tightly into the casings to prevent them from breaking during cooking. Additionally, do not soak collagen casings before using them, as they are ready to use right out of the carton.
Follow these tips and tricks to successfully prepare sausages with ease.
Common Stuffer Malfunctions
If you encounter issues when putting casing on the sausage stuffer, it’s essential to identify the common stuffer malfunctions that may occur. These include:
- Difficulty in sliding the casing onto the stuffer tube
- Casing blowouts during the stuffing process
- Inconsistent filling of the casings
- Uneven linking of the sausages
Solutions To Frequent Casing Issues
When faced with casing problems, it’s crucial to implement effective solutions to ensure smooth operation of the sausage stuffer. Here are some common casing issues and their solutions:
- Casing Blowouts: If the casing keeps bursting during stuffing, ensure that the sausage mix is not overly compacted into the casings. Additionally, avoid placing the sausages into excessively hot pans.
- Difficulty in Sliding Casings: To ease the process of sliding casings onto the stuffer tube, ensure that the casings are properly moistened. This can prevent them from sticking and tearing during the setup.
- Inconsistent Filling: If you experience inconsistencies in the filling of casings, adjust the pressure and speed at which the sausage mix is being fed into the stuffer. This can help achieve a more uniform filling.
- Uneven Linking: To address issues with uneven linking, ensure that the sausages are being properly guided and linked during the stuffing process. This can prevent variations in the size and shape of the sausages.
Frequently Asked Questions
How Do You Set Up A Sausage Stuffer?
To set up a sausage stuffer, coat the tube with vegetable shortening and gently slide the casing onto the tube. Leave about four inches hanging off the end to tie a knot. Then, carefully feed seasoned meat into the hopper using the stomper.
What Steps Do You Use To Prepare Casings Prior To Sausage Stuffing?
To prepare casings for sausage stuffing, first soak them in warm water. Then, slide the casing onto the stuffer tube, leaving enough extra at the end. Finally, coat the stuffer tube with vegetable shortening to ease the process.
Why Does The Casing Of Sausage Keep Breaking When Stuffing?
When stuffing sausages, the casing may break if the sausage mix is packed too tightly, leaving no room for expansion during cooking. Another cause could be placing the sausage in a piping hot frying pan. Make sure to leave some space in the casing and avoid high heat to prevent the casing from breaking.
Conclusion
Mastering the art of putting casing on the sausage stuffer is essential for perfect sausages. Take your time, use proper lubrication, and handle the casings gently. Remember to avoid overfilling and follow the right techniques to prevent casing blowouts. With practice, you’ll become a sausage stuffing pro!