To make a water-powered sausage stuffer, you will need to attach a cap to a base and a head, drill a hole in the cap, make a piston and grooves for anchor rings, and assemble the parts. The stuffer is powered by water pressure, so a foot switch and pipe fittings are necessary.
There are many DIY videos available online that demonstrate the process of making a water-powered sausage stuffer, and some Amish-made models are also available for purchase. Whether you are a professional meat processor or a home cook, a sausage stuffer is a useful tool for making your own sausages with custom flavors and ingredients.
Introduction To Water-powered Sausage Stuffers
Discover the innovative world of water-powered sausage stuffers and learn how to make your own at home. This efficient and eco-friendly method eliminates the need for manual cranking or electricity, making sausage stuffing easier and more sustainable. Experience the convenience of water-powered sausage stuffing today!
Benefits Of A Diy Stuffer
A DIY water-powered sausage stuffer offers various advantages, making it an appealing choice for sausage enthusiasts. Firstly, it provides a cost-effective solution for those who prefer making their sausages at home. Additionally, this stuffer allows for precise control over the stuffing process, resulting in consistent and high-quality sausages. Furthermore, the DIY approach fosters a sense of accomplishment and satisfaction, as individuals can customize the stuffer to fit their specific needs and preferences.
Basic Principles Of Water Pressure
Understanding the basic principles of water pressure is crucial when creating a water-powered sausage stuffer. Water pressure is the force exerted by the water against the walls of its container, which can be harnessed to generate the necessary power for the stuffer. By utilizing the force of water, individuals can effectively and efficiently operate the sausage stuffer, ensuring a seamless and controlled stuffing process.

Credit: www.youtube.com
Tools And Materials Needed
Before embarking on the project to make a water-powered sausage stuffer, it’s essential to gather the necessary tools and materials. The success of the project hinges on having the right equipment and resources at hand. Below, you’ll find a detailed list of the essential tools and materials needed, as well as tips on sourcing the materials.
Essential Tools List
Here is a list of the essential tools required to build a water-powered sausage stuffer:
- Drill: A drill will be used to create holes in the cap and other parts of the stuffer.
- Screwdriver: This tool will be needed for attaching the cap to the base and head of the stuffer.
- Measuring Tape: It is essential for checking the diameter of the rim and ensuring accurate measurements.
- Saw: A saw will be used for cutting the cap to size and making modifications as required.
- Wrench: This tool is necessary for removing quick connects and making adjustments as needed.
Sourcing Materials
When it comes to sourcing the materials for the water-powered sausage stuffer, it’s important to ensure that all components are of high quality to guarantee the stuffer’s durability and efficiency.
Here are the main materials required for the project:
| Material | Usage |
|---|---|
| Piston | To create the piston that will drive the sausage mixture into the casing. |
| Anchor Rings | These will be used to secure the piston and ensure smooth operation. |
| O-Rings | To provide a tight seal and prevent water leakage. |
| Pipe and Fittings | For constructing the framework of the water-powered sausage stuffer. |
| Sausage Horn | This will be modified to fit the stuffer and facilitate the sausage stuffing process. |
| Power Supply | To provide the necessary energy for the water-powered piston. |
By securing these essential tools and materials, you’ll be well-equipped to commence the construction of your very own water-powered sausage stuffer.
Designing Your Stuffer
When it comes to making a water-powered sausage stuffer, designing the stuffer is a crucial step. By choosing the right dimensions and understanding water flow, you can ensure a smooth and efficient operation. Let’s dive into the details.
Choosing The Right Dimensions
When designing your water-powered sausage stuffer, it’s important to consider the dimensions that will work best for your needs. The size of the stuffer will depend on the volume of sausages you plan to make and the available space in your kitchen or workshop.
You’ll want to choose a diameter for the stuffer tube that allows for easy stuffing of the sausage mixture. A larger diameter will make it easier to fill the casing, while a smaller diameter may require more force to push the mixture through. Keep in mind that the tube should also be long enough to accommodate the desired length of the sausages.
Additionally, consider the size of the piston or plunger that will be used to push the sausage mixture through the stuffer tube. The dimensions of the piston should be compatible with the diameter of the tube to ensure a tight fit and prevent leakage.
Understanding Water Flow
Water flow is a key factor in the design of a water-powered sausage stuffer. By harnessing the power of water pressure, you can create a smooth and controlled flow that aids in the stuffing process.
To ensure efficient water flow, it’s important to design the stuffer with the correct water inlet and outlet positions. The water inlet should be positioned in a way that allows for easy filling of the stuffer with water, while the outlet should be strategically placed to provide consistent pressure for pushing the sausage mixture through the tube.
It’s also crucial to consider the size and shape of the water reservoir. A larger reservoir will allow for a greater volume of water, resulting in increased pressure and a more forceful flow. However, be mindful of the overall weight and stability of the stuffer when designing a larger reservoir.
By carefully considering the dimensions and water flow of your water-powered sausage stuffer, you can create a well-designed tool that ensures efficient sausage stuffing every time. Whether you’re a professional chef or a passionate home cook, this DIY project can elevate your sausage-making game to a whole new level.
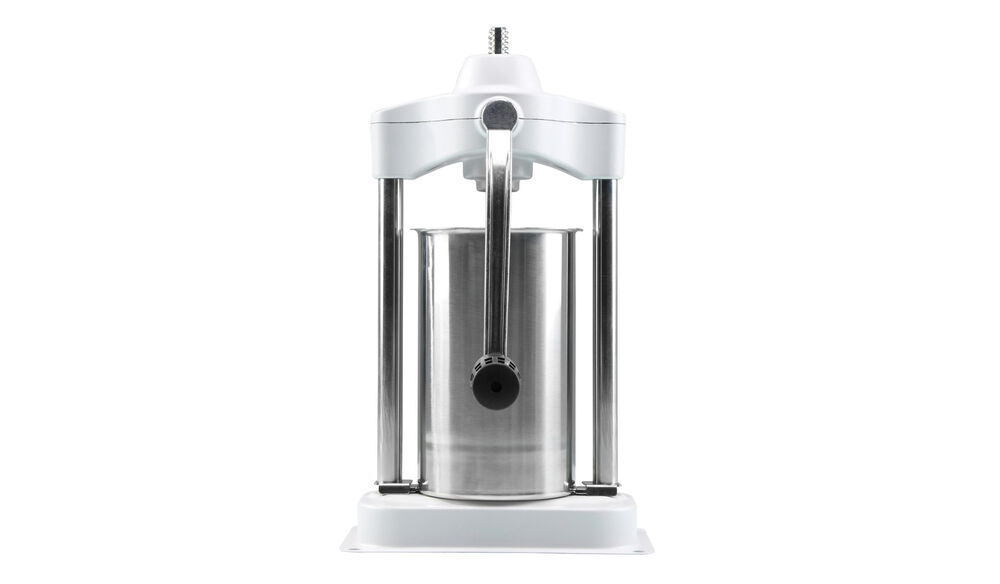
Constructing The Cylinder
When it comes to making a water-powered sausage stuffer, constructing the cylinder is an essential step. The cylinder serves as the main body that holds the sausage mixture and allows it to be pushed through the casing. In this section, we will guide you through the process of cutting the PVC pipe and sealing the cylinder ends.
Cutting The Pvc Pipe
The first step in constructing the cylinder is to cut the PVC pipe to the desired length. You will need a PVC pipe cutter or a hacksaw to make precise cuts. Measure the length you want for your cylinder and mark it on the pipe. Then, using the cutter or saw, carefully cut the pipe along the marked line. Remember to wear safety goggles and gloves to protect yourself during this process.
Once the pipe is cut, use sandpaper to smooth the edges and remove any roughness. This will ensure a proper fit and prevent any leaks when the cylinder is assembled.
Sealing The Cylinder Ends
After cutting the PVC pipe, it’s time to seal the ends of the cylinder. This step is crucial to prevent the sausage mixture from leaking out during the stuffing process.
Start by attaching PVC end caps to both ends of the pipe. Apply a layer of PVC adhesive to the inside of each cap and press them firmly onto the ends of the pipe. Make sure they are securely attached and allow the adhesive to dry completely.
For added security, you can also use PVC cement or silicone sealant to create a watertight seal between the caps and the pipe. Apply a generous amount of the chosen sealant around the edges of the caps and smooth it with your finger. Let it dry according to the manufacturer’s instructions.
Once the cylinder ends are sealed, your water-powered sausage stuffer is one step closer to completion. The cylinder is now ready to be connected to the water-powered piston and other components to create a fully functional sausage stuffer.
In conclusion, constructing the cylinder for your water-powered sausage stuffer involves cutting the PVC pipe to the desired length and sealing the ends with PVC end caps and adhesive or sealant. This ensures a secure and leak-proof cylinder, allowing you to stuff sausages with ease.
Building The Water-powered Mechanism
Learn how to create a water-powered sausage stuffer with our step-by-step guide for building the water-powered mechanism. By following these instructions, you can efficiently make a sausage stuffer that operates using water power, offering a unique and practical solution for your sausage-making needs.
Building the Water-Powered Mechanism is an essential step in making a water-powered sausage stuffer. This mechanism works by using water pressure to push the sausage meat through the casing, making the process much simpler and faster. The first step in building this mechanism is to assemble the water input system.Assembling The Water Input System
To assemble the water input system, you will need the following materials:- Water hose
- Water supply valve
- Water pressure gauge
- Water pressure regulator
- Quick-connect fittings
- Attach the water hose to the water supply valve.
- Attach the water pressure gauge to the water hose.
- Attach the water pressure regulator to the water hose.
- Connect the quick-connect fittings to the water hose.
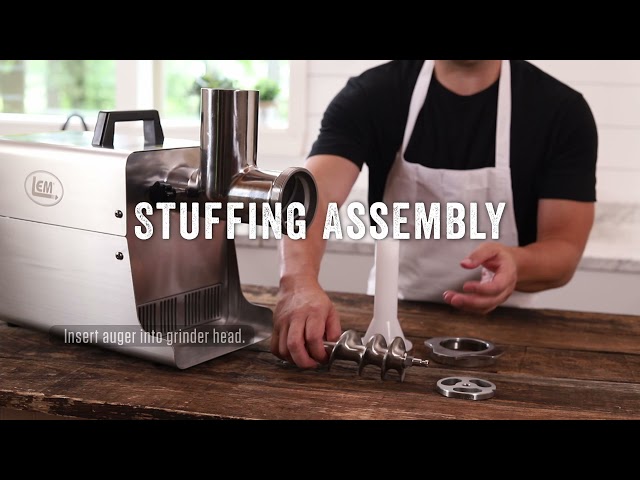
Creating The Piston
To create the piston, you will need the following materials:- PVC pipe
- PVC cap
- Drill
- Sandpaper
- Anchor rings
- O-rings
- Attach the PVC cap to the PVC pipe.
- Drill a hole in the center of the cap.
- Smooth the rough edges of the hole with sandpaper.
- Create grooves for the anchor rings using the drill and sandpaper.
- Insert the anchor rings into the grooves.
- Place the O-rings on the piston.
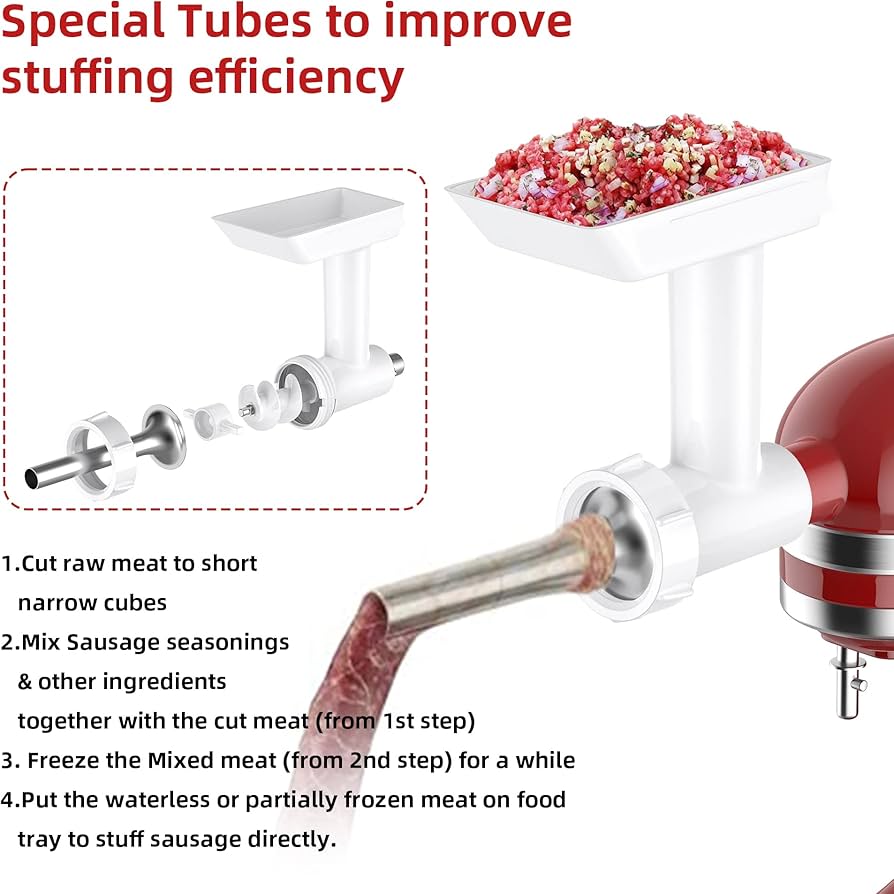
Attaching The Sausage Horn
Attaching the sausage horn to your water-powered sausage stuffer is a crucial step in the process of making homemade sausages. Follow the instructions carefully, ensuring that the horn is securely attached to the stuffer to avoid any mishaps during the stuffing process.
Attaching the Sausage Horn After creating the piston and drilling a hole in the cap, the next step in making a water-powered sausage stuffer is to attach the sausage horn. The horn is what holds the casing in place while the sausage is being pushed out. There are a few things to consider when selecting and attaching the horn. Selecting a Horn Size The size of the horn you choose will depend on the size of the casings you plan to use. It’s important to choose a horn that is slightly smaller than the casing to ensure a snug fit. This will prevent the casing from slipping off during the stuffing process. If you plan to use multiple sizes of casings, you may need to purchase additional horns. Secure Attachment Techniques Once you have selected the appropriate size horn, it’s time to attach it to the stuffer. There are a few techniques you can use to ensure a secure attachment: 1. Hose Clamps: Hose clamps are a popular choice for securing the horn to the stuffer. Simply slide the horn onto the nozzle and tighten the hose clamp around the base of the horn. 2. Screws: If you have access to a drill, you can use screws to attach the horn to the stuffer. Drill two small holes into the base of the horn and align them with the holes on the stuffer. Insert screws into the holes and tighten. 3. Welding: For a more permanent attachment, welding the horn to the stuffer is an option. However, this requires some welding experience and access to welding equipment. No matter which technique you choose, make sure the horn is securely attached to the stuffer before using it. With the sausage horn securely attached, you’re now ready to start stuffing your casings with delicious homemade sausage. Happy stuffing!Testing And Troubleshooting
Once you have successfully assembled your water-powered sausage stuffer, it’s time to move on to the testing and troubleshooting phase. This is an important step to ensure that your stuffer is functioning properly and ready to use for making delicious sausages. In this section, we will guide you through the initial water pressure test and provide adjustments for optimal performance.
Initial Water Pressure Test
The initial water pressure test is crucial to determine if your water-powered sausage stuffer is functioning as intended. Follow these steps to conduct the test:
- Connect your stuffer to a water source using the appropriate fittings and pipes.
- Ensure that all connections are securely tightened to prevent any leaks.
- Turn on the water supply to the stuffer.
- Observe the water pressure and check if it is consistent throughout the system.
- If there are any leaks or fluctuations in water pressure, identify the problem areas and make the necessary adjustments.
Adjustments For Optimal Performance
After conducting the initial water pressure test, you may need to make some adjustments to optimize the performance of your water-powered sausage stuffer. Here are a few areas you can focus on:
- Nozzle Size: If you find that the sausage filling is not coming out smoothly or is getting stuck, you may need to adjust the size of the nozzle. A larger nozzle can help facilitate the flow of the sausage mixture.
- Piston Design: The design and construction of the piston can greatly impact the efficiency of the stuffer. Ensure that the piston is properly aligned and moves smoothly within the cylinder.
- Water Pressure Regulation: If you notice inconsistent water pressure during the initial test, you may need to install a pressure regulator to maintain a steady flow of water. This will help ensure a consistent and controlled stuffing process.
- Sealing: Check for any potential leaks in the system, especially around the connections and seals. Use appropriate sealing materials or replace faulty parts to prevent any water or sausage mixture from leaking out.
By conducting the initial water pressure test and making necessary adjustments for optimal performance, you can ensure that your water-powered sausage stuffer is ready to use. Troubleshooting and fine-tuning the system will help you achieve consistent and professional results every time you make sausages.
Safety And Maintenance Tips
Learn how to make a water-powered sausage stuffer with these safety and maintenance tips. Follow the instructions carefully and avoid overfilling the casing to prevent breakage. Watch tutorial videos for a step-by-step guide.
Operating Safely
When using a water-powered sausage stuffer, it is important to prioritize safety to prevent any accidents or injuries. Follow these operating safety tips to ensure a smooth and safe sausage stuffing experience:
- Always wear protective gloves and goggles to protect your hands and eyes from any potential splashes or spills.
- Before starting the machine, make sure the water pressure is set to the recommended level and that all connections are secure.
- Keep your fingers and hands away from the moving parts of the stuffer to avoid any accidents.
- Regularly inspect the machine for any signs of damage or wear and tear. If you notice any issues, do not use the stuffer until it has been repaired.
- Ensure that the area around the sausage stuffer is clean and free from any obstructions to prevent tripping or falling hazards.
- Never leave the machine unattended while it is in operation.
Routine Maintenance Checklist
To keep your water-powered sausage stuffer in optimal condition and extend its lifespan, it is important to follow a routine maintenance checklist. Regular maintenance will ensure smooth operation and prevent any breakdowns. Here are some maintenance tips to keep in mind:
- Regularly clean the stuffer after each use to remove any residue or food particles that may have accumulated.
- Inspect and replace any worn or damaged parts, such as O-rings or seals, to prevent leaks.
- Check the water pressure regularly to ensure it is within the recommended range.
- Apply food-grade lubricant to the moving parts of the stuffer to reduce friction and ensure smooth operation.
- Store the stuffer in a clean and dry area to prevent rust or corrosion.
- Follow the manufacturer’s instructions for any additional maintenance tasks specific to your water-powered sausage stuffer.
By following these safety and maintenance tips, you can ensure a safe and efficient sausage stuffing process with your water-powered sausage stuffer. Prioritizing safety and regular maintenance will not only protect you from accidents but also extend the lifespan of your machine, allowing you to enjoy delicious homemade sausages for years to come.
Using Your Water-powered Stuffer
Learn how to operate your water-powered sausage stuffer effectively with these simple steps. Start by attaching the cap to the base, then connect the head and drill a hole in the cap. Follow through by creating the piston, making grooves for anchor rings, and assembling the stuffer.
Enjoy hassle-free sausage stuffing with this innovative method.
Once you have successfully assembled your water-powered sausage stuffer, it’s time to put it to work. Here’s a guide on how to efficiently use your stuffer to create delicious sausages.
Preparing The Sausage Mix
Before you begin stuffing, ensure your sausage mix is ready. Use a combination of freshly ground meat, spices, and other flavorings. Mix the ingredients thoroughly to ensure an even distribution of flavor.
Stuffing Techniques And Tips
- Prepare Casings: Soak the casings in warm water to soften them and make them pliable for stuffing.
- Load the Stuffer: Place the prepared sausage mix into the stuffer’s canister, ensuring not to overfill it to prevent breakage.
- Attach Horn: Secure the sausage horn to the stuffer, ensuring it is firmly in place for smooth stuffing.
- Start Stuffing: Turn on the water supply to activate the stuffer. Slowly and steadily press the sausage mix through the horn into the casings, ensuring uniform filling.
- Tie Off: Twist or tie off the filled casings at regular intervals to form individual sausages.
- Repeat: Continue the process until all the sausage mix is used, ensuring a consistent and even fill for each sausage.

Credit: m.youtube.com
Customization And Upgrades
When it comes to making a water-powered sausage stuffer, the ability to customize and upgrade the equipment can significantly enhance its functionality. Whether it’s increasing efficiency or adding convenient features, these modifications can elevate the stuffer’s performance to better suit specific needs.
Adding A Foot Switch
Integrating a foot switch to the water-powered sausage stuffer can provide hands-free control, streamlining the sausage stuffing process. This simple upgrade allows the operator to initiate and halt the stuffer’s operation with a foot tap, offering greater convenience and flexibility during use.
Enhancing Capacity And Efficiency
Increasing the stuffer’s capacity and efficiency can be achieved through various modifications such as optimizing the water pressure, adjusting the piston size, or enhancing the seal to minimize water leakage. These upgrades can elevate the stuffer’s performance, enabling smoother and more productive sausage stuffing operations.

Credit: www.smokingmeatforums.com
Frequently Asked Questions
How Do You Make Homemade Sausage Stuffer?
To make a homemade sausage stuffer, you can use a water-powered piston system. Attach a cap to the base and drill a hole in it. Make a piston and grooves for anchor rings. Connect the head and assemble the stuffer.
Check the diameter of the rim and make necessary adjustments. You can find detailed instructions and plans on YouTube and forums.
How To Stuff Sausage Casings Without A Machine?
To stuff sausage casings without a machine, use a funnel and push the casing onto the nozzle. Leave a two-inch tail and knot it. Push small amounts of sausage into the funnel with your thumb. Avoid overfilling to prevent breakage.
How Does A Hydraulic Sausage Filler Work?
A hydraulic sausage filler works by using hydraulic pressure to push the meat mixture into the casing. It uses water power to operate and efficiently stuff sausages.
Conclusion
Making a water-powered sausage stuffer is a practical and cost-effective solution for home butchers. With simple materials and easy assembly, this DIY project offers an efficient and sustainable way to stuff sausages. By harnessing the power of water, you can streamline the sausage-making process while reducing manual effort.