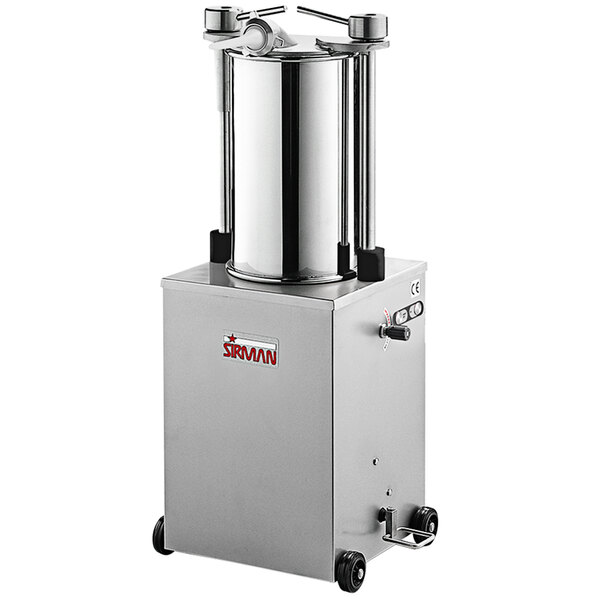
To make a hydraulic sausage stuffer, you will need to attach a hydraulic cylinder to a base, create a piston with grooves for anchor rings, and attach a head with a hole for the sausage horn. Check the diameter of the rim and assemble all parts accordingly.
Homemade hydraulic sausage stuffers can be built using various materials and designs, and there are many resources available online to guide you through the process. Whether you are a home cook or a professional butcher, a hydraulic sausage stuffer can help you create perfectly stuffed sausages with ease and efficiency.
So why not try making one yourself and enjoy the benefits of homemade sausages?
Introduction To Hydraulic Sausage Stuffers
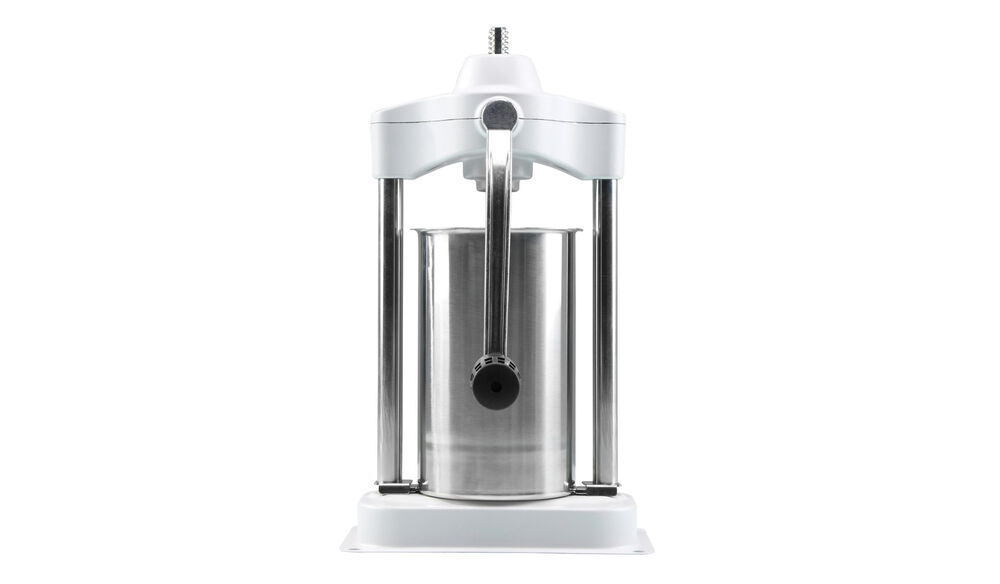
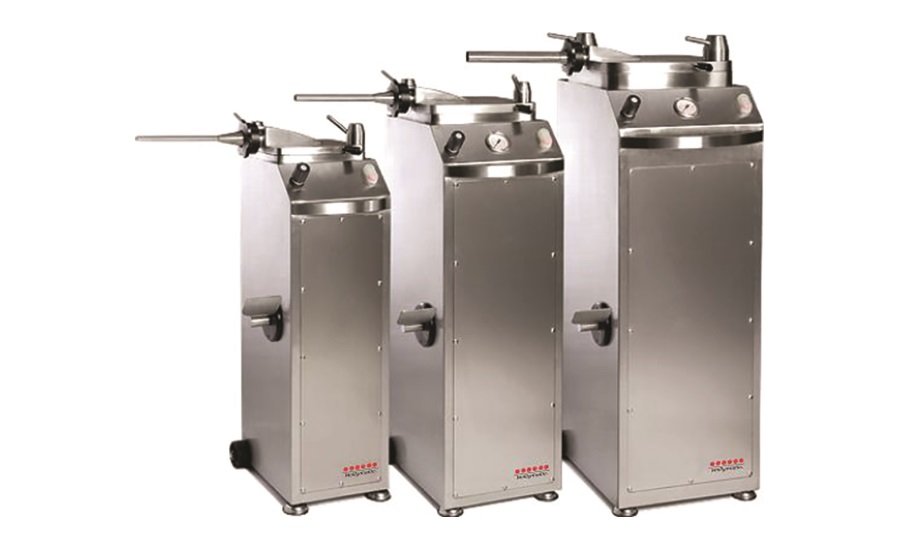
Hydraulic sausage stuffers are innovative devices designed to streamline the sausage-making process. By utilizing hydraulic pressure, these machines efficiently and consistently push the meat mixture into casings, resulting in perfectly formed sausages. Whether you’re a professional chef or an enthusiastic home cook, a hydraulic sausage stuffer can significantly enhance your sausage-making experience.
Benefits Of A Hydraulic Stuffer
Hydraulic sausage stuffers offer numerous advantages that make them a top choice for sausage production. From their high efficiency to their ability to handle large quantities of meat, these machines are a game-changer for sausage-making enthusiasts.
- Consistent and uniform sausage filling
- Efficient operation for high-volume production
- Precise control over the stuffing process
- Reduced manual effort and labor
- Ability to handle various types of casings
How It Differs From Manual And Electric Stuffers
Compared to manual and electric stuffers, hydraulic sausage stuffers offer unique features and benefits that set them apart in the sausage-making industry.
| Feature | Hydraulic Stuffer | Manual Stuffer | Electric Stuffer |
|---|---|---|---|
| Efficiency | Highly efficient for large-scale production | Requires significant manual effort and time | Operates with moderate efficiency |
| Consistency | Ensures consistent sausage filling | Dependent on manual control, leading to inconsistency | Relies on motorized operation for consistency |
| Capacity | Capable of handling large volumes of meat | Limited capacity for meat stuffing | Varies based on motor power and design |
| Control | Allows precise control over the stuffing process | Manual control may result in uneven filling | Offers some level of control but may lack precision |

Credit: mbfoodequipment.com
Essential Components
Making a hydraulic sausage stuffer requires several essential components. These components include materials, an understanding of hydraulic principles, and specific tools and equipment. Let’s delve into each of these essential components in detail.
List Of Materials Needed
Before starting the project, gather the following materials:
- Steel tubing
- Hydraulic cylinder
- Water pump
- Pressure gauge
- Control valves
- Stainless steel casing horn
- Seals and O-rings
- Fasteners and fittings
- Base plate and frame
- Power source
Understanding Hydraulic Principles
Hydraulic sausage stuffers operate based on hydraulic principles. Understanding these principles is crucial for building an efficient stuffer.
Hydraulic systems use liquid to transmit power. In the case of a sausage stuffer, the liquid is typically water, which is pressurized to generate force for pushing the sausage meat into casings. The key components of a hydraulic system include a pump to pressurize the liquid, control valves to regulate the flow, a cylinder to convert the hydraulic pressure into mechanical force, and seals to prevent leakage.
Designing Your Stuffer
Designing your hydraulic sausage stuffer is an essential step in creating a functional and efficient machine. By carefully considering the size and capacity, as well as creating blueprints and schematics, you can ensure that your homemade stuffer meets your specific needs. Let’s explore these aspects in detail:
Determining The Size And Capacity
Before you start building your hydraulic sausage stuffer, it’s important to determine the ideal size and capacity for your intended use. Consider the volume of sausages you plan to produce and the frequency of use. This will help you decide on the appropriate dimensions and specifications for your stuffer.
Some factors to consider when determining the size and capacity include:
- The amount of meat you will be stuffing
- The desired batch size
- The available space in your kitchen or workspace
By carefully considering these factors, you can ensure that your hydraulic sausage stuffer is suitable for your needs and can handle the desired workload.
Blueprint And Schematic Creation
Once you have determined the size and capacity of your hydraulic sausage stuffer, the next step is to create detailed blueprints and schematics. These documents will serve as a guide during the construction process, ensuring accuracy and precision.
When creating blueprints and schematics, it’s important to include:
- Measurements and dimensions for each component
- Material specifications for the frame, piston, and other parts
- Assembly instructions and connection details
By having detailed blueprints and schematics, you can easily refer to them during the construction process, minimizing errors and ensuring that all components fit together correctly.
Once you have determined the size and capacity and created detailed blueprints and schematics, you are ready to start building your hydraulic sausage stuffer. Remember to follow safety guidelines and use high-quality materials to ensure the durability and functionality of your homemade stuffer.
Building The Base And Frame
When it comes to making a hydraulic sausage stuffer, the first step is to build a sturdy base and frame. This is essential to ensure stability and durability throughout the sausage stuffing process. In this section, we will walk you through the process of cutting and assembling the frame, as well as ensuring stability and durability.
Cutting And Assembling The Frame
To start, gather all the necessary materials for the base and frame construction. This typically includes sturdy wood or metal beams, screws, a saw, and a drill. Once you have all the materials ready, follow these steps:
- Measure and mark the desired dimensions for your base and frame on the wood or metal beams.
- Using a saw, carefully cut the beams according to the marked measurements.
- Next, assemble the frame by attaching the cut beams together using screws. Make sure to align the corners properly for a stable structure.
- Double-check the frame’s stability by applying pressure and ensuring there are no wobbles or loose connections.
Ensuring Stability And Durability
Once the frame is assembled, it’s crucial to ensure its stability and durability. Here are some key steps to follow:
- Inspect the frame for any weak points or potential areas of vulnerability. Reinforce these areas with additional screws or braces.
- Consider adding crossbars or diagonal supports to enhance the frame’s stability.
- Apply a protective coating or paint to the frame to prevent moisture damage or rust if using metal beams.
- Regularly inspect and maintain the frame to address any signs of wear or damage promptly.
By following these steps, you can build a solid base and frame for your hydraulic sausage stuffer. A sturdy frame will provide the necessary support and stability for the hydraulic mechanism, ensuring smooth and efficient sausage stuffing.
Assembling The Hydraulic System
To assemble the hydraulic system for a homemade hydraulic sausage stuffer, start by bleeding the air out of the stuffer by running water through it with the exit port open. Next, attach the cap to the base and head, drill a hole in the cap, and make the piston and grooves for anchor rings.
Finally, check the diameter of the rim and assemble the stuffer. Follow these steps for a successful DIY project.
Assembling the hydraulic system for your sausage stuffer can be a daunting task, but with the right guidance, it can be an easy and fulfilling experience. In this section, we will cover the steps needed to properly select the right hydraulic cylinder and connect the hydraulic pump.Selecting The Right Hydraulic Cylinder
The first step in assembling your hydraulic system is to select the right hydraulic cylinder. The cylinder is the heart of the system, and it’s important to choose the right size and type for your sausage stuffer. When selecting your hydraulic cylinder, consider the maximum load capacity of your stuffer, the speed at which you want to operate it, and the space you have available for installation. It’s also important to choose a cylinder with the right stroke length, as this will determine how much meat you can stuff at once.Connecting The Hydraulic Pump
Once you have selected the right hydraulic cylinder, the next step is to connect the hydraulic pump. The pump is responsible for supplying the hydraulic fluid that powers the cylinder, so it’s important to choose a pump that can deliver the right amount of fluid at the right pressure. When connecting the pump, be sure to follow the manufacturer’s instructions carefully, and make sure that all fittings are properly tightened and secured. It’s also important to choose the right size and type of hydraulic hose, as this will ensure that the fluid flows smoothly and efficiently through the system. Overall, assembling the hydraulic system for your sausage stuffer requires careful planning and attention to detail. By selecting the right hydraulic cylinder and connecting the hydraulic pump correctly, you can ensure that your stuffer operates smoothly and efficiently, allowing you to create delicious, homemade sausages with ease.Creating The Sausage Canister
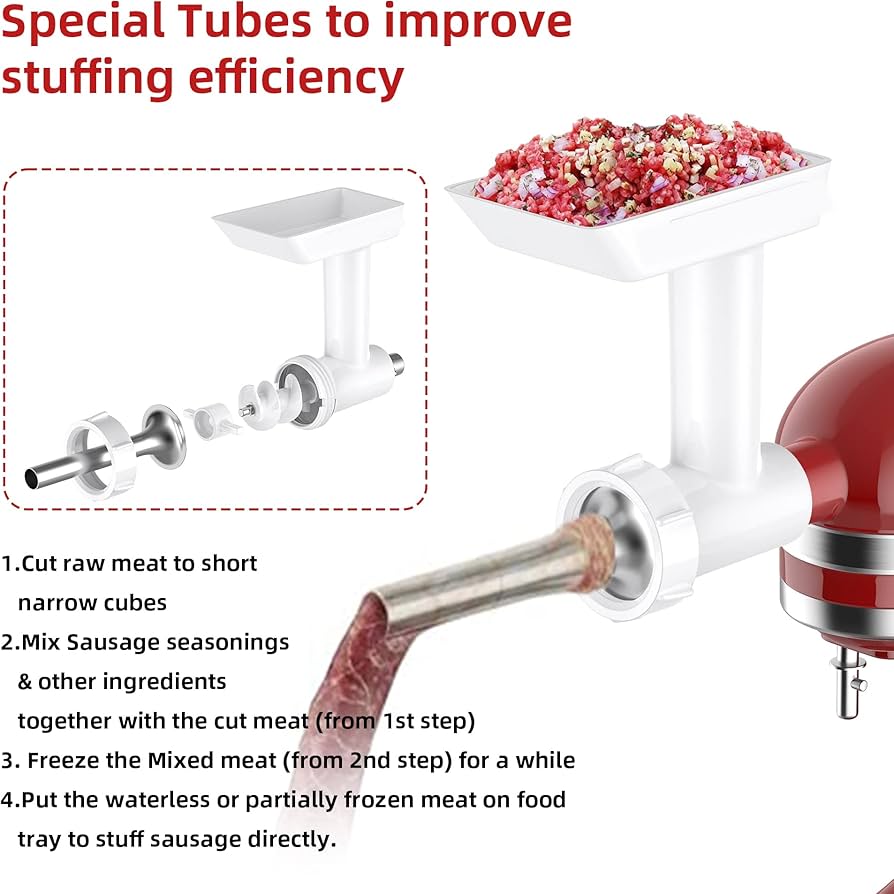
Learn how to make a hydraulic sausage stuffer with these informative DIY videos. From assembling the necessary parts to modifying the sausage horn, these step-by-step guides provide valuable insights to create the perfect sausage canister without the need for a motor or hand crank.
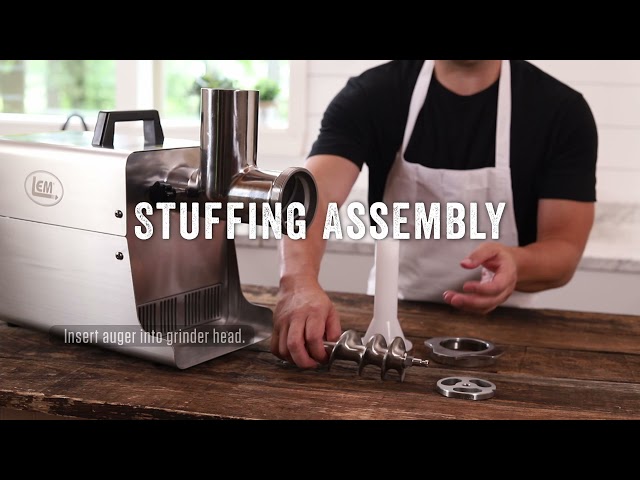
Creating the Sausage Canister: The canister is a crucial component of a hydraulic sausage stuffer. It is where the sausage meat is stored before it is pushed through the sausage horn. Creating the canister is a relatively simple process that involves attaching a metal tube to a plate and sealing the ends. Here are the steps to create the sausage canister:Fabricating The Canister
1. Cut a 6-inch diameter metal tube to the desired length of the canister. The length will depend on the amount of sausage meat you want to make at once. 2. Cut two circular metal plates to fit the ends of the tube. Ensure the diameter of the plates matches the diameter of the tube. 3. Drill a hole in one of the plates to accommodate the hydraulic piston. The size of the hole will depend on the size of the piston. 4. Weld the plates to the ends of the tube. Ensure the weld is strong and the plates are sealed tightly to the tube.Attaching The Canister To The Frame
1. Attach the canister to the frame of the hydraulic sausage stuffer. The frame should be strong enough to support the weight of the canister when it is filled with sausage meat. 2. Ensure the canister is securely fastened to the frame to prevent it from moving or falling during the sausage stuffing process. 3. Connect the hydraulic piston to the hole in the plate of the canister. Ensure the connection is tight and there are no leaks. In conclusion, creating the sausage canister is a crucial step in making a hydraulic sausage stuffer. By following the steps outlined in this article, you can fabricate a canister that is both sturdy and functional. Once the canister is attached to the frame, you can begin the process of stuffing sausage meat into casings.Adding The Filling Mechanism
To add the filling mechanism to your hydraulic sausage stuffer, start by attaching the cap to the base and then connect the head. Drill a hole in the cap and make the piston, ensuring to create grooves for anchor rings.
Finally, assemble the components for a functional stuffer.
Once you have designed the piston for your hydraulic sausage stuffer, it’s time to focus on adding the filling mechanism. This step is crucial for ensuring that the sausage filling is properly distributed and packed into the casings. Here are some considerations to keep in mind:
Designing The Piston
When it comes to designing the piston, it’s important to ensure a tight fit within the cylinder. This will prevent any leakage or loss of pressure during the sausage stuffing process. The piston should be made of a durable material, such as stainless steel, that can withstand the pressure exerted during operation.
Sealing And Pressure Considerations
Proper sealing is essential for maintaining the pressure required to fill the sausages effectively. Make sure to use high-quality seals, such as O-rings, to prevent any air or liquid from escaping. Additionally, consider the pressure requirements of your sausage stuffer and choose a hydraulic system that can generate the necessary force to push the filling into the casings.
One effective way to ensure a secure seal and maintain consistent pressure is by using anchor rings and grooves on the piston. These anchor rings will help keep the O-rings in place and prevent any unwanted movement that could compromise the seal. It’s also essential to regularly check the diameter of the rim to ensure a proper fit and prevent any leakage.
Another consideration is the size and shape of the sausage horn or nozzle. This component determines the diameter and shape of the sausages you can produce. Make sure to modify the sausage horn according to your desired specifications, ensuring that it fits securely onto the stuffer and allows for smooth and even filling.
When assembling the filling mechanism, pay attention to the attachment of the cap to the base and the head of the stuffer. Use appropriate fittings and secure them tightly to prevent any leaks or instability during operation. Additionally, drilling a hole in the cap can be helpful for releasing excess air or pressure during the sausage stuffing process.
Lastly, consider the power supply for your hydraulic sausage stuffer. Ensure that it is reliable and provides sufficient force to operate the filling mechanism smoothly. You may want to use a foot switch for convenient control of the stuffer’s operation.
By focusing on these factors when adding the filling mechanism to your hydraulic sausage stuffer, you can ensure efficient and consistent sausage production with minimal leakage or loss of pressure.
Credit: www.provisioneronline.com
Safety Features And Precautions
When making a hydraulic sausage stuffer, it is important to prioritize safety features and precautions. Ensure that all valves are closed and bleed out any air before use. Follow proper instructions and guidelines to prevent accidents and ensure a successful sausage making process.
Incorporating Safety Valves
When it comes to making a hydraulic sausage stuffer, safety should always be a top priority. Incorporating safety valves into the design is essential to prevent any potential accidents or mishaps. These valves act as a safeguard, releasing excess pressure in the system to maintain a safe operating range. By installing safety valves at strategic points, such as in the hydraulic pump and cylinders, you can ensure that the stuffer operates smoothly without any risk of overpressure or damage.
Routine Maintenance And Care
Maintaining and caring for your hydraulic sausage stuffer is vital to prolong its lifespan and ensure safe operation. Regular routine maintenance helps identify any potential issues before they become major problems. Here are some key maintenance tips to keep in mind:
- Inspect all hoses and fittings for any signs of wear or damage, and replace them as needed.
- Check the hydraulic fluid levels regularly and top up if necessary. Use the recommended fluid specified by the manufacturer.
- Keep the stuffer clean and free from any debris or food particles that may affect its performance.
- Check the safety valves periodically to ensure they are functioning correctly.
- Follow the manufacturer’s guidelines for lubricating moving parts to prevent friction and ensure smooth operation.
By following these routine maintenance practices, you can ensure that your hydraulic sausage stuffer remains in excellent condition and operates safely every time.
Testing And Troubleshooting
To ensure the smooth operation of a homemade hydraulic sausage stuffer, testing and troubleshooting are essential steps. Prior to use, bleeding the air out and checking for any leaks is crucial. Troubleshooting involves inspecting the water supply, connections, and ensuring the piston functions properly.
Conducting Initial Tests
Before using your hydraulic sausage stuffer for production, it’s essential to conduct initial tests to ensure its proper functionality. Here’s how you can conduct the initial tests:
- Check the hydraulic fluid levels and ensure there are no leaks in the system.
- Test the piston by running the stuffer without the sausage meat to ensure smooth and consistent movement.
- Verify that the pressure gauge is functioning accurately by testing it with different pressure settings.
- Inspect the seals and O-rings for any signs of wear or damage.
Common Issues And Solutions
If you encounter any issues during the initial tests or while using the hydraulic sausage stuffer, here are some common problems along with their solutions:
- Issue: Uneven Stuffing
- Issue: Hydraulic Fluid Leaks
- Issue: Difficulty in Controlling Pressure
- Issue: Inconsistent Speed of the Piston
Solution: Check the alignment of the piston and make sure the sausage meat is evenly distributed in the cylinder.
Solution: Inspect the hydraulic hoses and connections for leaks, and tighten or replace any damaged components.
Solution: Calibrate the pressure regulator and ensure that the gauge readings correspond to the desired pressure levels.
Solution: Lubricate the piston and check for any obstructions in the hydraulic system that may be affecting its movement.
Using Your Homemade Stuffer
Learn how to make a hydraulic sausage stuffer and use it effectively for your homemade sausages. Bleed the air out of the stuffer, attach the head, and connect the power supply to create your own water-powered sausage stuffer. Enjoy hassle-free sausage making with this DIY hydraulic stuffer.
Now that you have successfully created your own hydraulic sausage stuffer, it’s time to put it to good use. Here’s how you can effectively use your homemade stuffer to prepare delicious sausages:
Preparing The Meat Mixture
Before using your homemade stuffer, it’s crucial to ensure that the meat mixture is well-prepared. Start by grinding the meat to the desired consistency and then season it with spices and herbs. Once the meat mixture is ready, make sure to keep it chilled to maintain its freshness and prevent any bacterial growth.
Operating The Stuffer
Operating your homemade hydraulic stuffer is a simple process. First, load the prepared meat mixture into the stuffer’s cylinder. Then, turn on the water supply to activate the hydraulic system, which will smoothly push the meat mixture into the casings. Monitor the pressure to ensure even and consistent stuffing of the sausages.
Cleaning And Maintenance
Looking to make a hydraulic sausage stuffer without the need for a motor or hand crank? Check out these DIY tutorials on YouTube that provide step-by-step instructions on how to create your own water-powered sausage stuffer. From assembling the necessary parts to modifying the equipment, these videos offer valuable insights for homemade sausage enthusiasts.
Disassembly And Cleaning Process
To ensure the proper functioning and longevity of your hydraulic sausage stuffer, regular cleaning and maintenance are essential. Follow these steps to disassemble and clean your sausage stuffer effectively: 1. Start by turning off the hydraulic power and disconnecting the machine from the power source. 2. Remove the casing tube and any remaining sausages from the stuffer. Dispose of any excess meat or casings properly. 3. Next, carefully disassemble the parts of the stuffer, such as the piston, cylinder, and valves. Refer to the manufacturer’s instructions for specific guidance on disassembly. 4. Rinse the disassembled parts with warm water to remove any residue or meat particles. Use a soft brush or sponge to scrub away stubborn stains or debris. 5. For a thorough cleaning, prepare a mixture of warm water and mild dish soap. Submerge the disassembled parts in the soapy water and let them soak for a few minutes. 6. After soaking, scrub the parts again with the brush or sponge to ensure all dirt and grime are removed. Pay close attention to hard-to-reach areas. 7. Rinse each part thoroughly with clean water to remove any soap residue. 8. Once all the parts are clean, allow them to air dry completely before reassembling the sausage stuffer.Long-term Maintenance Tips
In addition to regular cleaning, here are some long-term maintenance tips to keep your hydraulic sausage stuffer in optimal condition: 1. Lubricate the moving parts: Apply a food-grade lubricant to the piston, cylinder, and other moving parts to reduce friction and ensure smooth operation. Follow the manufacturer’s recommendations for the appropriate lubricant to use. 2. Check the seals and gaskets: Regularly inspect the seals and gaskets for any signs of wear or damage. Replace any faulty seals or gaskets promptly to prevent leaks or loss of pressure. 3. Store in a clean and dry environment: After cleaning, make sure to store your sausage stuffer in a clean and dry area. Avoid exposure to moisture or extreme temperatures, as this can cause damage to the machine. 4. Regularly inspect the hydraulic system: Check the hoses, fittings, and connections of the hydraulic system for any signs of leaks or damage. Repair or replace any faulty components to ensure proper functioning. 5. Follow the manufacturer’s maintenance schedule: Refer to the manufacturer’s guidelines for specific maintenance recommendations and intervals. Adhering to the recommended schedule will help prolong the lifespan of your hydraulic sausage stuffer. By following these cleaning and maintenance practices, you can keep your hydraulic sausage stuffer in top condition, ensuring its efficiency and longevity for years to come. Proper maintenance will also contribute to the production of high-quality sausages every time you use the machine.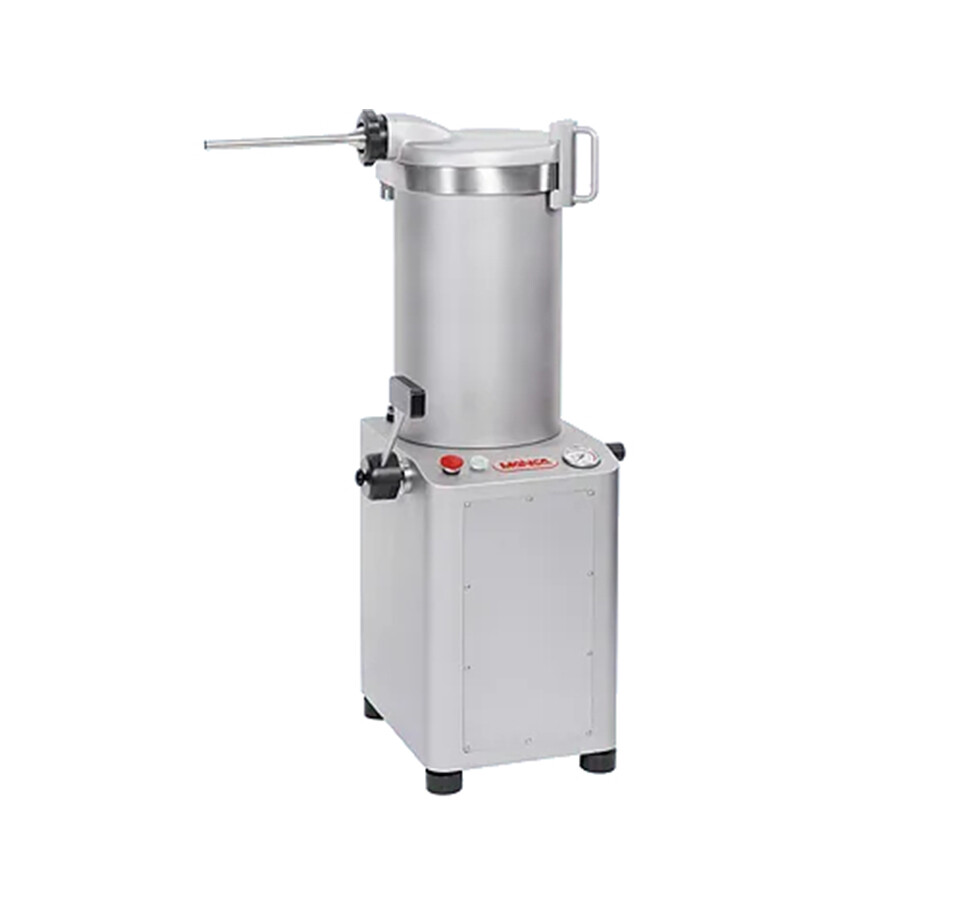
Credit: stilesfoodequipment.com
Customization And Upgrades
Customization and upgrades are essential for maximizing the efficiency and functionality of your hydraulic sausage stuffer. By accessorizing and exploring potential upgrades, you can tailor your stuffer to meet your specific needs and preferences.
Accessorizing Your Stuffer
Accessorizing your hydraulic sausage stuffer allows you to enhance its capabilities and adapt it to different sausage-making requirements. Consider the following accessories to customize your stuffer:
- Various-sized sausage horns for creating different types of sausages
- Attachment for filling casings with ease
- Additional nozzles for various sausage shapes
- Stainless steel construction for durability and hygiene
Potential Upgrades For Efficiency
Upgrading your hydraulic sausage stuffer can significantly improve its efficiency and performance. Here are some potential upgrades to consider:
- Motorized Power: Enhance the stuffer with a motorized power system for effortless operation and increased output.
- Pressure Gauge: Install a pressure gauge to monitor and adjust the pressure, ensuring consistent and precise sausage stuffing.
- Quick-Release Mechanism: Implement a quick-release mechanism for easy assembly, disassembly, and cleaning.
- Variable Speed Control: Add a variable speed control feature to adjust the stuffing speed according to your requirements.
Frequently Asked Questions
Faq 1: How Does A Hydraulic Sausage Stuffer Work?
Hydraulic sausage stuffers work by utilizing water pressure to push the meat mixture into the casings. The water-powered piston creates a smooth and efficient stuffing process.
Faq 2: What Are The Advantages Of Using A Hydraulic Sausage Stuffer?
Using a hydraulic sausage stuffer offers several advantages. Firstly, it provides consistent and even stuffing, resulting in uniformly filled sausages. Secondly, it requires less effort compared to manual or motorized stuffers. Lastly, the water-powered operation allows for precise control over the stuffing process.
Faq 3: Can I Make A Hydraulic Sausage Stuffer At Home?
Yes, you can make a hydraulic sausage stuffer at home. By following DIY plans or tutorials, you can create your own water-powered stuffer using easily available materials. Building your own stuffer allows customization and cost savings compared to purchasing a commercial one.
Conclusion
Creating a hydraulic sausage stuffer is a practical and cost-effective solution for sausage enthusiasts. The DIY process outlined in this blog empowers individuals to craft their own stuffer with accessible materials and straightforward instructions. By following these steps, you can enjoy the convenience and efficiency of a hydraulic sausage stuffer tailored to your specific needs.