Are you planning to upgrade your kitchen with a new faucet but unsure of how to install a Pfister kitchen faucet? You’re not alone! Many homeowners face challenges during faucet installations. Fortunately, with the right guidance, this task can be straightforward and rewarding. With over 15 years of experience in plumbing and home improvement, I’ve compiled a comprehensive guide that will walk you through each step of the installation process. From gathering the necessary tools to troubleshooting common issues, you will gain the confidence and knowledge needed to successfully complete your faucet installation. Read on to transform your kitchen with a stylish and functional Pfister faucet.
Understanding the Components of a Kitchen Faucet
Before installing a kitchen faucet, it’s essential to understand its components. A typical kitchen faucet includes the spout, handle, and a variety of internal parts such as cartridges and washers. Familiarizing yourself with these components can help you troubleshoot issues later. The spout directs the water flow, while the handle controls the temperature and pressure. Pay attention to the type of installation required based on your sink’s configuration, as this will influence the tools and methods you use.
Types of Faucets
There are several types of kitchen faucets, including single-handle, pull-down, and pull-out faucets. Single-handle faucets are easier to install and operate with one hand. Pull-down faucets provide flexibility and reach, while pull-out faucets are ideal for cleaning larger pots. Understanding the type of faucet you have will guide your installation process.
Essential Tools Needed
Before beginning the installation, gather the necessary tools. Common tools include an adjustable wrench, basin wrench, screwdriver, and plumber’s tape. Having these tools on hand will simplify the process and ensure you can complete the installation without interruptions. Check your faucet’s manual for any specific tools that might be required.
Key Points:
- Familiarize yourself with faucet components for easier installation.
- Choose the right faucet type based on your kitchen needs.
Preparation for Installation
Proper preparation is crucial for a successful faucet installation. Start by turning off the water supply to avoid leaks and water damage. Make sure to have a towel handy to catch any spills during the installation. Additionally, clear the area under the sink to provide ample working space. This preparation will save time and reduce frustration during the installation process.
Turning Off the Water Supply
Locate the water supply valves, typically found under the sink. Turn them clockwise to shut off the water supply. If there are no individual valves, you may need to turn off the main water supply for your home. Confirm the water is off by turning on the faucet to allow any remaining water to drain out.
Clearing the Installation Area
Remove any items stored under the sink to create a clean workspace. This includes cleaning supplies, pots, and pans. A clear area will not only make the installation easier but also ensure that you can easily access all necessary components without obstruction.
Key Points:
- Always turn off the water supply before starting installation.
- A clear workspace helps streamline the installation process.
Preparation for Installation
Before installing a Pfister kitchen faucet, preparation is crucial to ensure a smooth process. Begin by gathering all necessary tools, such as a basin wrench, adjustable wrench, and plumber’s tape. Additionally, make sure to read the manufacturer’s instructions thoroughly. This will familiarize you with the specific requirements of your faucet model. Also, turn off the water supply to avoid any leaks during installation. Lastly, clear the area under the sink to provide enough space for maneuvering and to access plumbing connections easily.
Tools Needed
Essential tools for faucet installation include a basin wrench for tightening bolts in confined spaces, an adjustable wrench for securing water supply connections, and plumber’s tape to ensure leak-proof fittings. Having all tools ready beforehand can save time and prevent frustration during installation.
Understanding Faucet Components
Familiarize yourself with the components of your new faucet, including the spout, handle, and mounting hardware. Knowing how each part fits together will make the installation process smoother. Review the manual to identify any unique components specific to your model.
Key Points:
- Preparation is key to a successful installation.
- Familiarity with tools and components simplifies the process.
💡 Always read the installation manual thoroughly before starting. Understanding the steps will save you time and prevent mistakes.
💡 Gather all tools and materials beforehand to streamline the installation process and minimize interruptions.
Step-by-Step Installation Process
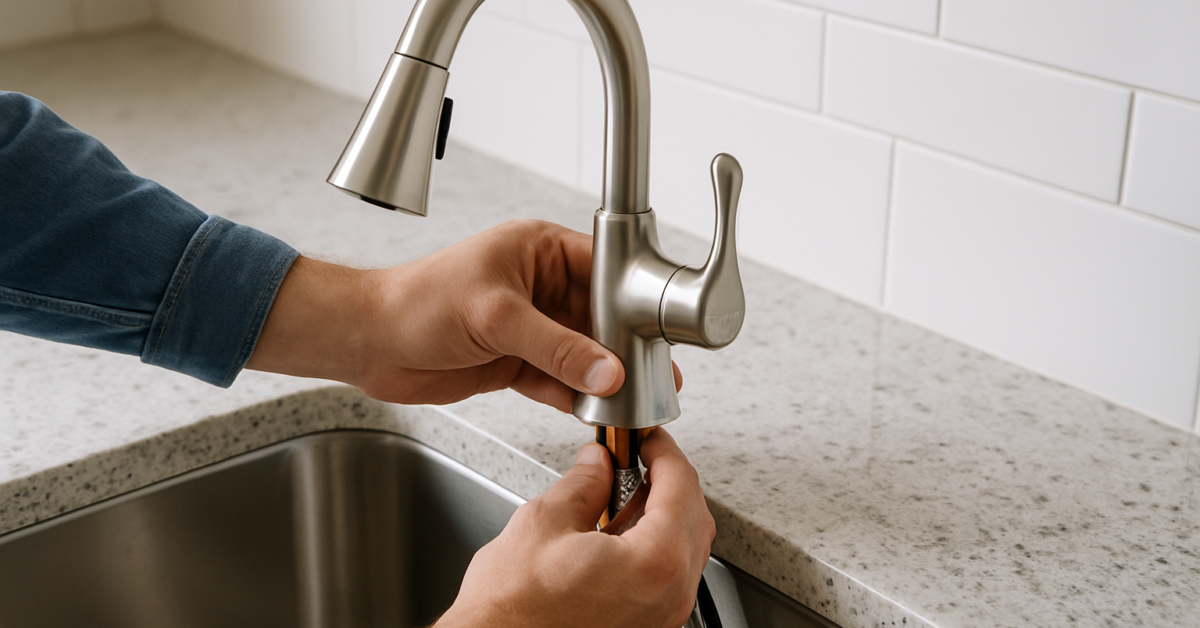
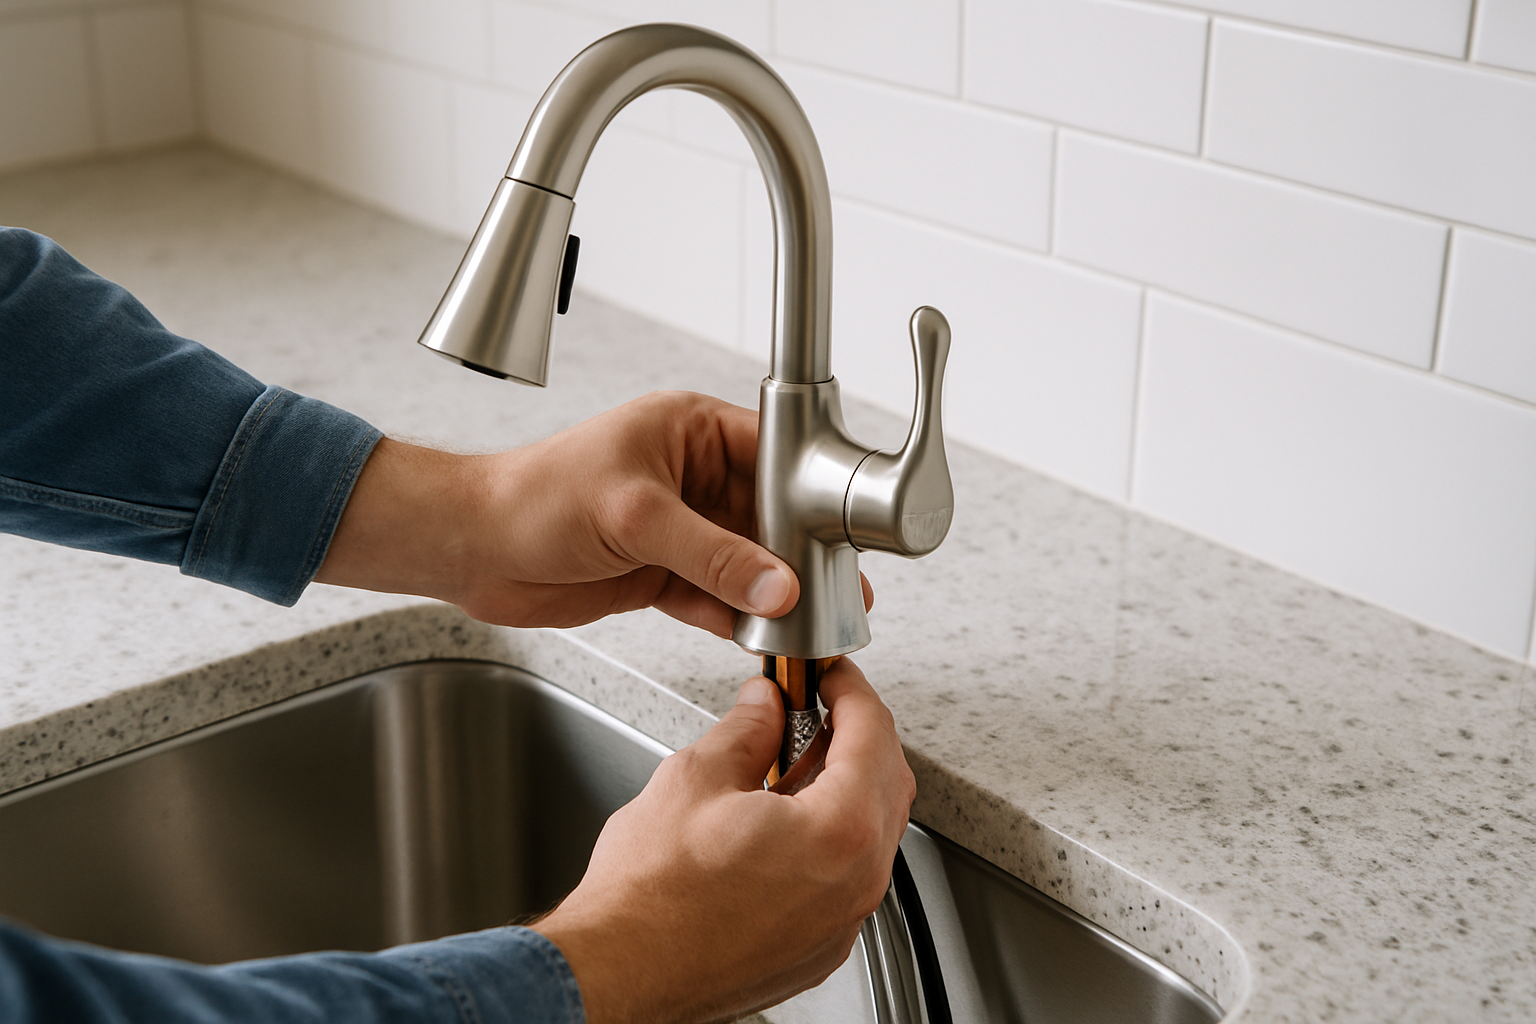
Installing the Pfister kitchen faucet involves several clear steps. First, remove the old faucet by disconnecting the water supply lines and loosening the mounting nuts. Clean the sink surface before placing the new faucet in position. Next, attach the mounting hardware as per the manufacturer’s instructions. Once securely fastened, connect the water supply lines and use plumber’s tape to ensure a watertight seal. Finally, turn on the water supply and check for leaks, making adjustments as necessary.
Removing the Old Faucet
To remove the existing faucet, first turn off the water supply. Disconnect the water supply lines and use a basin wrench to loosen the mounting nuts. Carefully lift the old faucet out and clean the area to prepare for the new installation.
Installing the New Faucet
Position the new faucet in the sink, ensuring it is aligned properly. Secure it using the provided mounting hardware, tightening it with a wrench. Follow the specific instructions for your faucet model to ensure proper installation and functionality.
Testing for Leaks
After installation, turn the water supply back on slowly. Check for leaks around the connections and the faucet base. If you notice any leaks, turn off the water supply and tighten the connections or reapply plumber’s tape as needed.
Key Points:
- Follow a step-by-step approach for successful installation.
- Testing for leaks is crucial to ensure a properly installed faucet.
💡 Always ensure the water supply is off before starting any work to prevent flooding.
💡 Use plumber’s tape on threads to prevent leaks and ensure a secure fit.
💡 After installation, test the faucet’s functionality by running water and checking for leaks immediately.
EXPERT TIPS Pro Advice
Inspect the water supply lines.
Before starting, check the condition of your water supply lines. Old or damaged lines may need replacement to avoid future leaks.
Have a towel handy.
Keep a towel or small bucket nearby to catch any water that may spill during disconnection and installation processes.
Use a helper if needed.
If you’re unsure about balancing the faucet while securing it, ask someone to hold it in place, making the process easier.
Take your time with adjustments.
If adjustments are necessary, don’t rush. Ensuring everything is aligned correctly will save you from leaks and future repairs.
Document the process.
Taking photos during the disassembly of the old faucet can help you remember how everything fits together when installing the new one.
Frequently Asked Questions
Conclusion
Installing a Pfister kitchen faucet can be done successfully with the right tools and preparation. Key steps include turning off the water supply, connecting the hoses securely, and testing for leaks. By following the installation guidelines carefully, you can achieve a professional finish on your own.
🎯 Key Takeaways:
- Gather necessary tools before starting.
- Turn off water supply to avoid leaks.
- Follow manufacturer instructions closely.
- Use plumber’s tape for secure connections.
- Test for leaks after installation.
Expert Advice: Take your time during installation and don’t rush through the steps. If uncertain about any part of the process, seek guidance from online resources or consult a professional for advice.
Now that you have the information, gather your tools and start your faucet installation confidently!


