How to Clean Kitchen Faucet Head for a Fresh Look
Is your kitchen faucet head looking dull and clogged? If so, you’re not alone—many homeowners struggle with maintaining a clean and functional faucet. Over time, mineral deposits and grime can build up, affecting water flow and overall hygiene. In this article, we’ll share expert tips on how to clean kitchen faucet head effectively, ensuring it remains not only functional but also aesthetically pleasing. You’ll discover step-by-step methods to remove buildup, maintain your faucet’s performance, and enhance your kitchen’s cleanliness. Let’s dive into the essential techniques for restoring your faucet head to its sparkling best.
Understanding the Importance of Cleaning Your Kitchen Faucet Head
Cleaning your kitchen faucet head is essential for maintaining good hygiene and ensuring optimal water flow. Over time, mineral deposits, mold, and bacteria can accumulate, leading to reduced water pressure and potential health risks. Regular cleaning not only enhances the appearance of your faucet but also prolongs its lifespan. A clean faucet head ensures that water remains safe for cooking and drinking, improving the overall functionality of your kitchen. Neglecting this task can lead to more significant plumbing issues down the line, making it imperative for homeowners to prioritize faucet maintenance.
Common Issues Caused by Dirty Faucet Heads
Dirty faucet heads can lead to several issues, including decreased water pressure and unpleasant odors. Mineral buildup can clog the aerator, affecting water flow and making it difficult to fill pots or wash dishes efficiently. Additionally, lingering bacteria and mold can affect the taste and quality of your water, posing health risks for your family. Understanding these issues highlights the importance of regular cleaning.
Signs That Your Faucet Head Needs Cleaning
There are several signs indicating it’s time to clean your faucet head. Look for visible mineral deposits or discoloration around the aerator, which often appear as white or yellowish stains. If you notice a decrease in water flow or unusual noises when the faucet is used, these can also be signs of buildup. Regularly inspecting your faucet head can help you identify these issues early, preventing more significant problems.
Step-by-Step Guide to Cleaning Your Kitchen Faucet Head
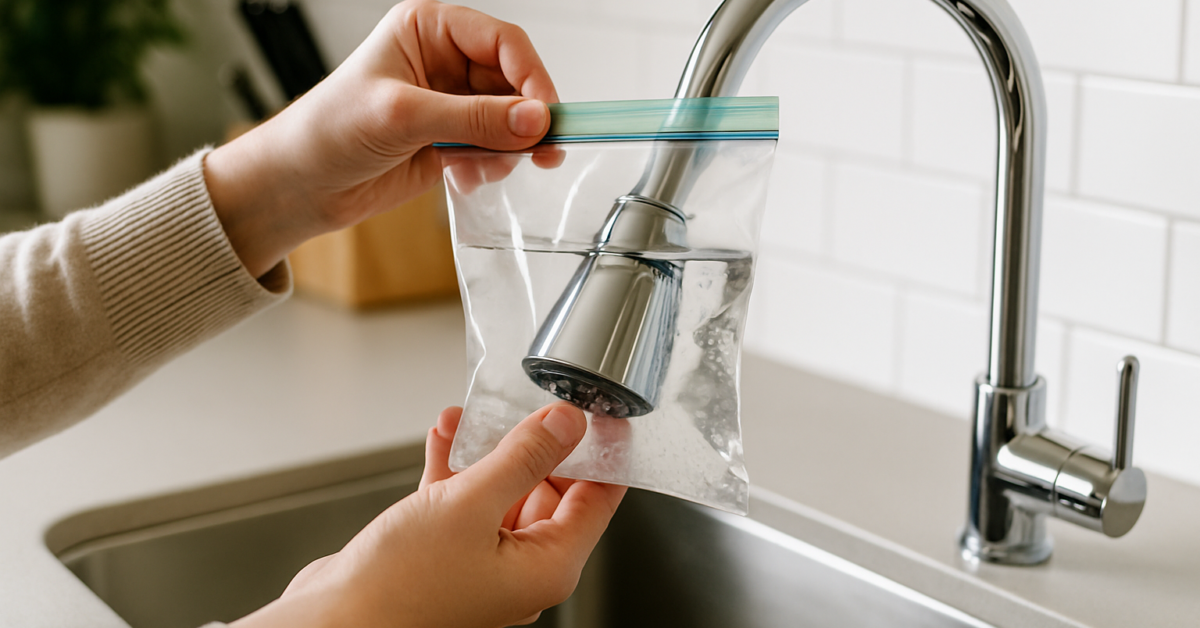
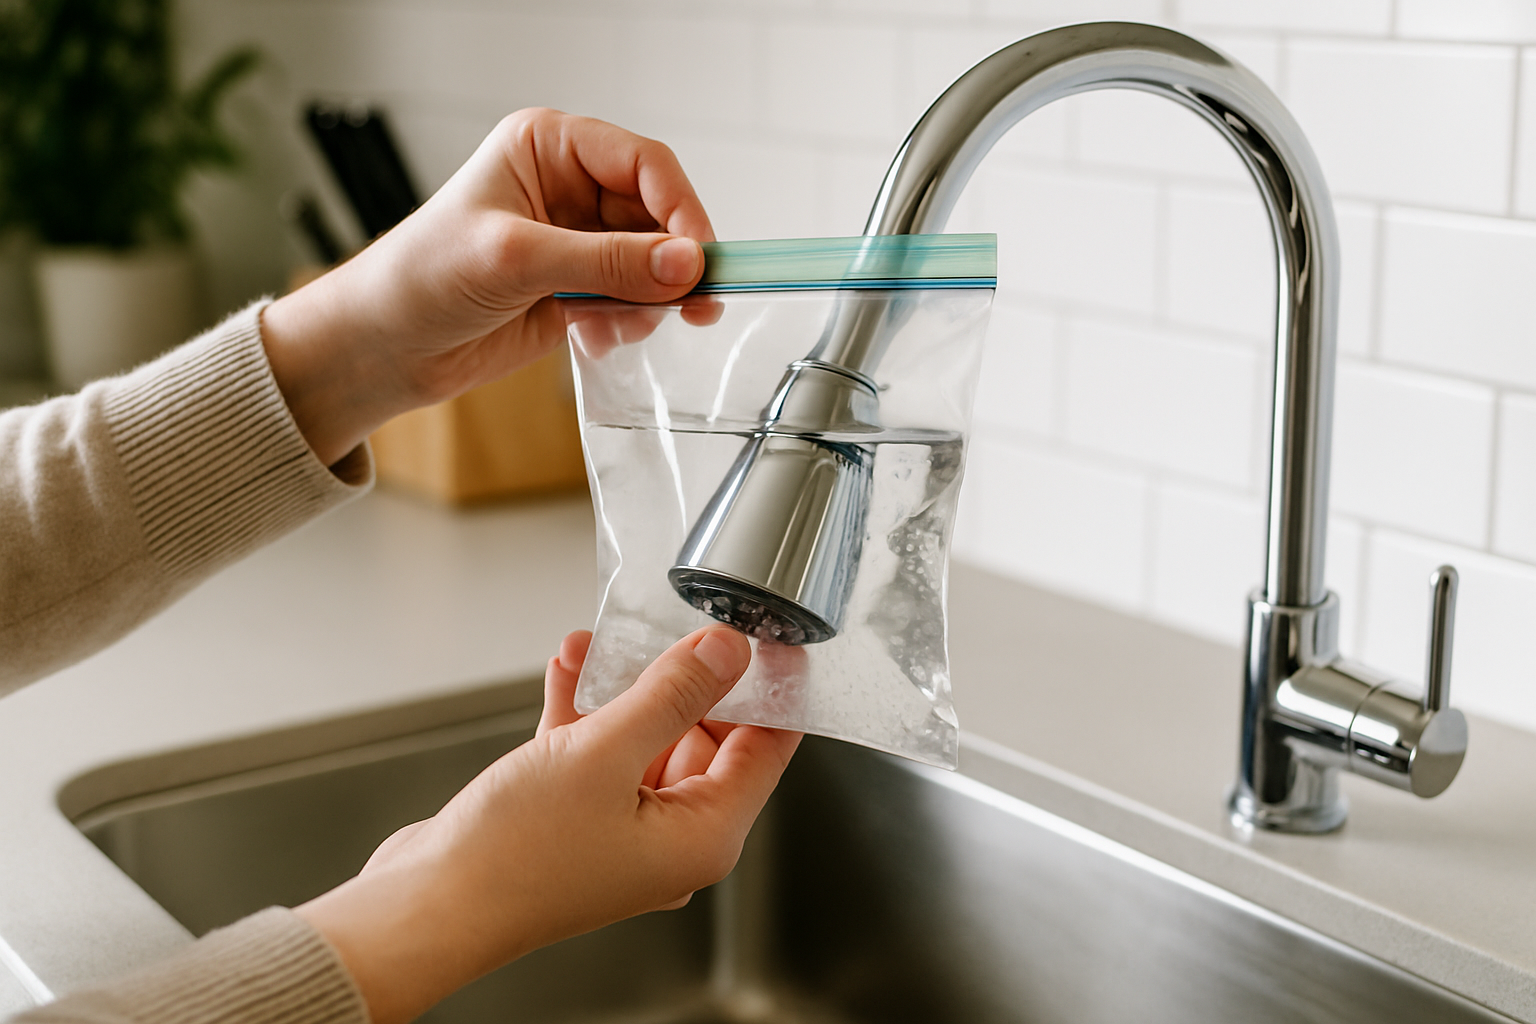
Cleaning your kitchen faucet head is a straightforward process that can be completed in just a few steps. Begin by gathering your cleaning supplies, which may include vinegar, a soft brush, and a cloth. Start by removing the faucet head, typically by unscrewing it counterclockwise. Once removed, soak it in a mixture of equal parts vinegar and water for about 15-30 minutes to dissolve mineral deposits. After soaking, scrub the aerator gently with a soft brush to remove any remaining buildup. Rinse thoroughly under running water before reattaching it to the faucet. This simple maintenance task can significantly improve the performance and longevity of your kitchen faucet.
Preparation Before Cleaning
Before you start cleaning, ensure you have all the necessary tools at hand. Gather vinegar, a soft brush, a cloth, and a bowl for soaking the faucet head. Turn off the water supply to avoid any mess. This preparation will streamline the process and prevent interruptions, allowing for a more efficient cleaning experience.
Techniques for Effective Cleaning
Soaking the faucet head in vinegar is one of the most effective methods for removing mineral deposits. The acidity in vinegar helps break down buildup without damaging the faucet. After soaking, using a soft brush or cloth allows you to clean hard-to-reach areas. Rinsing the faucet head thoroughly is crucial to remove any vinegar residue, ensuring that no strong odors linger once reattached.
Understanding Faucet Head Build-Up
Over time, mineral deposits, soap scum, and grime can accumulate on your kitchen faucet head, affecting both its appearance and performance. Understanding the materials and design of your faucet head is crucial for effective cleaning. Typically, faucet heads are made from metal or plastic, both of which require different cleaning approaches. Regular maintenance can prevent build-up, ensuring optimal water flow and extending the life of your faucet. Knowing when and how to clean is essential; neglect can lead to clogs or more extensive repairs.
Identifying Common Deposits
Common deposits on faucet heads include limescale from hard water, soap scum, and mineral build-up. Limescale typically appears as white or chalky spots, while soap scum can create a greasy layer. Identifying these deposits early prevents further accumulation and potential clogs, making your cleaning more effective.
Choosing the Right Cleaning Method
Different types of deposits require specific cleaning methods. For limescale, an acidic solution such as vinegar is effective, while soap scum may need a degreaser. Understanding these methods ensures you use the most efficient technique for your specific issue, minimizing damage to the faucet finish.
Key Points:
- Regular maintenance prevents build-up and extends faucet life.
- Identify the type of deposits for effective cleaning.
💡 Regularly inspect the faucet head to catch build-up early. This proactive approach helps maintain water flow and reduces the need for deep cleaning.
💡 Use a soft cloth or sponge for cleaning. Harsh scrubbers can scratch the surface, leading to further build-up.
Step-by-Step Cleaning Process
Once you understand the nature of the deposits, a systematic approach to cleaning the faucet head can be implemented. Begin by gathering your cleaning supplies, which typically include an acidic solution for limescale, a soft cloth, and possibly a toothbrush for hard-to-reach areas. The cleaning process can be divided into preparation, application, and final inspection stages to ensure thoroughness. Following a step-by-step guide makes cleaning easier and more efficient, yielding optimal results.
Preparation for Cleaning
Before cleaning, turn off the water supply to avoid any accidental splashes. Remove the faucet head if possible, as this allows for easier access and deeper cleaning. Soak the faucet head in a vinegar solution for 30 minutes to loosen deposits, making the next steps simpler.
Applying Cleaning Solutions
After soaking, use a soft brush or cloth to scrub the faucet head gently. Pay close attention to crevices where deposits tend to accumulate. For stubborn areas, applying a baking soda paste can enhance cleaning power. Rinse thoroughly with water to remove any cleaning residue.
Key Points:
- A systematic approach ensures thorough cleaning.
- Rinsing is crucial to prevent future build-up.
💡 Always rinse the faucet head thoroughly after cleaning to prevent any residue from causing build-up.
💡 Consider using a toothbrush for hard-to-reach spots, ensuring a deep clean without damaging the faucet.
EXPERT TIPS Pro Advice
Schedule Regular Cleanings
Regular cleaning every 1-2 months helps prevent build-up, ensuring your faucet remains functional and looks good.
Use Soft Water
If possible, soft water can reduce limescale build-up, making maintenance easier and enhancing the longevity of your faucet.
Inspect for Leaks
During cleaning, check for leaks or wear. Addressing these issues early can prevent costly repairs later.
Avoid Harsh Chemicals
Harsh chemicals can damage faucet finishes. Stick to natural solutions like vinegar and baking soda for safe cleaning.
Keep the Area Dry
Wipe down the faucet head after use to minimize moisture, reducing the risk of mineral deposits forming.
Frequently Asked Questions
Conclusion
Cleaning your kitchen faucet head is essential for maintaining water flow and hygiene. Regular cleaning, typically every few months, can prevent mineral buildup and ensure a longer lifespan for your faucet. Use safe methods, like vinegar, and avoid harsh chemicals to keep it in top shape.
🎯 Key Takeaways:
- Clean your faucet head every few months.
- Use vinegar for effective cleaning.
- Avoid bleach to prevent damage.
- Check for clogs if water sprays erratically.
- A toothbrush is great for detailed cleaning.
Expert Advice: Regular maintenance of your kitchen faucet head not only improves performance but also enhances the overall cleanliness of your kitchen. Make cleaning a part of your routine to avoid future issues.
Start by assessing the condition of your faucet head today and schedule a cleaning if needed!


