How to Change a Kitchen Faucet: A Complete Guide for You
Are you tired of dealing with a leaky or outdated kitchen faucet? Learning how to change a kitchen faucet can not only enhance your kitchen’s functionality but also boost its aesthetics. With over 15 years of experience in home improvement and DIY projects, I understand the challenges that come with plumbing tasks. In this article, you will discover a step-by-step guide that simplifies the process of faucet replacement, from gathering tools to final installation checks. Whether you’re a seasoned DIYer or a novice looking to save on plumbing costs, this guide will equip you with the necessary insights to successfully change your kitchen faucet.
Understanding Your Kitchen Faucet
Before embarking on the journey of changing a kitchen faucet, it’s essential to understand the various types available. Common faucet types include single-handle, double-handle, pull-down, and pull-out faucets, each with distinct features and functionalities. Familiarizing yourself with these types will help you choose a suitable replacement that meets both aesthetic and functional needs. Additionally, assess the existing plumbing setup, as compatibility is crucial for a successful installation.
Types of Faucets
Single-handle faucets are popular for their ease of use, allowing users to control both water temperature and flow with one hand. Double-handle faucets provide separate controls for hot and cold water, offering a more precise temperature adjustment. Pull-down and pull-out faucets are designed for versatility, with a spray head that extends for easier washing and rinsing tasks.
Plumbing Considerations
Before replacing your faucet, inspect the plumbing beneath your sink. Check for any signs of leaks, corrosion, or damage. Additionally, ensure that the existing plumbing configuration can accommodate the new faucet, as some models may require specific installation setups or connections.
Tools Required
Gathering the right tools is essential for a smooth faucet replacement process. Commonly needed tools include an adjustable wrench, basin wrench, screwdriver, and plumber’s tape. Having these tools ready will minimize frustration and streamline the installation, making the overall process more efficient.
Key Points:
- Familiarize yourself with different faucet types
- Inspect plumbing for compatibility and potential issues
- Prepare necessary tools for installation
Preparing for Faucet Replacement
Proper preparation is key to successfully changing a kitchen faucet. Start by turning off the water supply to prevent leaks and water damage. Next, clear the area around the sink to create a safe and accessible workspace. Having a clean environment will help you focus on the task at hand without distractions or hazards.
Shutting Off Water Supply
Locate the shut-off valves under your sink, typically situated on the wall or on the supply lines. Turn them clockwise to close the valves completely. If there are no shut-off valves, you may need to turn off the main water supply for your home. Always test the faucet after shutting off the water to ensure no water is flowing.
Clearing the Workspace
Remove any items from the countertop and under the sink to provide ample space for the installation process. This will not only prevent accidents but also make it easier to access the plumbing and faucet components. Consider placing a towel or bucket under the sink to catch any residual water that may spill during the replacement.
Gathering Replacement Parts
Before starting the installation, ensure you have all necessary replacement parts, including the new faucet and any required mounting hardware or connectors. Double-check that these components are compatible with your existing plumbing. This preemptive step will save time and frustration during the replacement process.
Key Points:
- Turn off the water supply before starting
- Clear the area to prevent accidents
- Ensure all replacement parts are ready and compatible
Preparation and Tools Needed for Faucet Replacement
Before changing a kitchen faucet, proper preparation is essential for a smooth and efficient process. Gather the necessary tools, including an adjustable wrench, screwdriver, and plumber’s tape. Ensure you have a bucket or towel to catch any water that may spill when disconnecting the old faucet. Additionally, turn off the water supply to avoid leaks and flooding. Familiarize yourself with your specific faucet model to understand the required steps and components involved in installation.
Understanding Your Current Faucet Setup
Inspect the existing faucet to identify its type and configuration. Most kitchen faucets are either single-handle or dual-handle. Note how the current faucet connects to the water supply and the type of mounting used. This understanding will help you choose a compatible replacement and avoid unexpected challenges during installation.
Gathering Essential Tools
Collect tools like an adjustable wrench, basin wrench, and a flathead or Phillips screwdriver. Having plumber’s tape on hand can prevent leaks in the new installation. If you have space, a flashlight can help illuminate dark areas under the sink, making it easier to see what you’re doing. Being well-prepared minimizes delays and frustrations.
Key Points:
- Preparation is key to a successful faucet change.
- Understanding your faucet type aids in a smoother replacement process.
💡 Always turn off the water supply before starting to prevent accidental flooding.
💡 Take photos of your current setup before disassembly for reference during reinstallation.
💡 Use a bucket or towel to catch any water that may spill during the process.
Step-by-Step Guide to Changing Your Kitchen Faucet
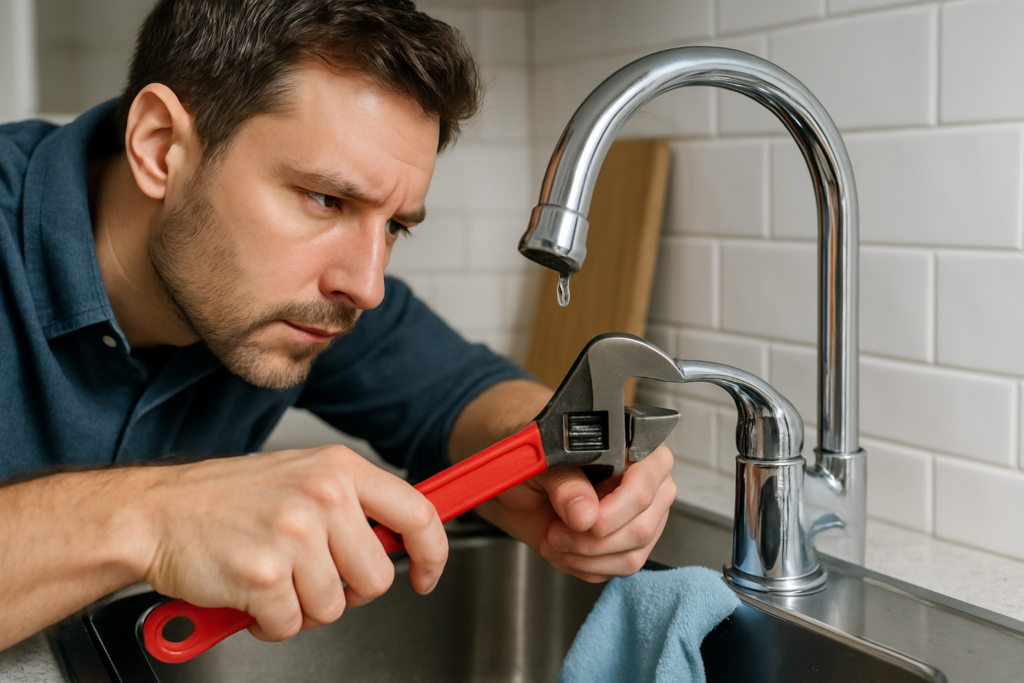
Changing a kitchen faucet involves several key steps. Begin by disconnecting the old faucet. Use your wrench to loosen the nuts holding the faucet in place, then remove the supply lines. Once the old faucet is out, clean the sink surface to ensure a proper seal for the new faucet. Follow the manufacturer’s instructions to install the new faucet, ensuring all connections are secure and watertight. After installation, turn the water supply back on and check for leaks before completing the process.
Removing the Old Faucet
Start by disconnecting the water supply lines using your wrench. Once the lines are free, locate the mounting nuts securing the faucet to the sink. Use a basin wrench for hard-to-reach areas. After unscrewing the nuts, gently lift the old faucet out of the sink. Be cautious of any remaining water that may spill out.
Installing the New Faucet
Place the new faucet in the mounting hole, ensuring it aligns correctly. Secure it with the mounting nuts, tightening them with your wrench but avoiding overtightening, which can damage the fittings. Connect the water supply lines to the appropriate inlet ports, securing them with a wrench. Remember to apply plumber’s tape to the threads for a watertight seal.
Key Points:
- Follow a systematic approach for effective faucet replacement.
- Testing for leaks post-installation ensures long-term functionality.
💡 Ensure all connections are tight but do not overtighten to avoid damaging parts.
💡 Test the faucet for leaks by running water for several minutes after installation.
💡 Keep a small towel handy to quickly wipe up any spills during the process.
EXPERT TIPS Pro Advice
Measure before you buy
Understanding the dimensions of your current setup ensures that you purchase a faucet that fits properly, avoiding unnecessary modifications.
Use plumber’s tape wisely
Applying plumber’s tape on threaded connections creates a better seal, preventing leaks and reducing the risk of water damage.
Familiarize yourself with local plumbing codes
Knowing local regulations can guide you in selecting compliant fixtures and ensure the installation meets safety standards.
Consider water pressure issues
If you experience low water pressure, check for clogs in the supply lines or aerators before proceeding with faucet replacement.
Have extra help if needed
Enlisting a friend to assist can simplify the process, especially when aligning the faucet and securing it from underneath.
Frequently Asked Questions
Conclusion
Changing a kitchen faucet is a manageable DIY project that enhances functionality and aesthetics. Remember to gather your tools, turn off the water supply, and follow step-by-step instructions for installation. With a little patience, you can successfully replace your faucet.
🎯 Key Takeaways:
- Gather essential tools before starting the project.
- Always turn off the water supply to prevent leaks.
- Consider DIY installation if you have basic plumbing skills.
- Allow adequate time for the replacement process.
- Use plumber’s tape for secure connections.
Expert Advice: Approach the faucet replacement with confidence and take your time to ensure each step is done correctly. A successful installation will not only improve your kitchen’s functionality but also its overall appeal.
Ready to upgrade your kitchen? Gather your tools and start planning your faucet replacement today!