Are you tired of the constant drip from your kitchen faucet? A leaking kitchen faucet not only wastes water but can also lead to higher utility bills and further plumbing issues. Understanding how to repair a leaking kitchen faucet can save you time and money while restoring peace to your kitchen. With over 15 years of experience in home repair tips, I will guide you through the essential steps to identify and fix the problem. In this article, you’ll learn about common causes of leaks, necessary tools for the job, and step-by-step instructions to ensure your faucet functions like new again. Let’s dive in and put an end to that annoying leak!
Understanding Kitchen Faucet Leaks
Leaking kitchen faucets are common household issues that can cause water waste and higher utility bills. Understanding the types of leaks and their causes is crucial for effective repair. Typically, leaks occur at the spout, base, or handle, often due to worn-out washers or O-rings. Identifying the type of leak can help determine the best repair approach. Regular maintenance, such as checking for wear and ensuring proper installation, can prevent leaks from developing. Knowing how to repair a leaking kitchen faucet can save homeowners time and money while improving overall efficiency.
Types of Faucet Leaks
Faucet leaks can manifest in various ways, including dripping from the spout, leaking at the base, or water seeping from the handle. Drips from the spout often indicate worn washers, while leaks at the base may suggest loose connections. Handle leaks frequently arise from deteriorated O-rings. Recognizing these signs helps in diagnosing the problem accurately, which is essential for effective repair.
Common Causes of Leaks
Several factors contribute to kitchen faucet leaks. Over time, components like washers, O-rings, and seals can degrade due to friction and wear, leading to leaks. Additionally, mineral buildup from hard water can also cause blockages and leaks. Regular inspection and maintenance can help identify these issues early, allowing for timely repairs and prolonging the faucet’s lifespan.
Key Points:
- Identify types of leaks for accurate diagnosis.
- Regular maintenance can prevent future leaks.
💡 Inspect your faucet regularly for signs of wear and tear.
Tools and Materials Needed for Repair
Before starting the repair, it’s essential to gather the necessary tools and materials. Common tools include adjustable wrenches, screwdrivers, and pliers. You may also need replacement parts such as washers, O-rings, or cartridges, depending on the type of faucet. Having everything on hand ensures a smoother repair process without interruptions. Preparing your workspace by laying down towels can help catch any water spills during the repair, making cleanup easier.
Essential Tools
Key tools for repairing a leaking kitchen faucet include an adjustable wrench to loosen and tighten fittings, and various screwdrivers for removing faucet handles and hardware. Pliers may also be needed for gripping small parts. Ensuring these tools are readily available will streamline the repair process.
Replacement Parts Overview
Depending on the leak’s source, you may need specific replacement parts. Common items include rubber washers, O-rings, and cartridge assemblies. Familiarizing yourself with the parts your faucet uses can help you easily source the right replacements when needed, minimizing downtime during repairs.
Key Points:
- Gather all necessary tools and parts before starting.
- Prepare your workspace to minimize mess and interruptions.
💡 Always turn off the water supply before starting any repairs.

Identifying the Source of the Leak
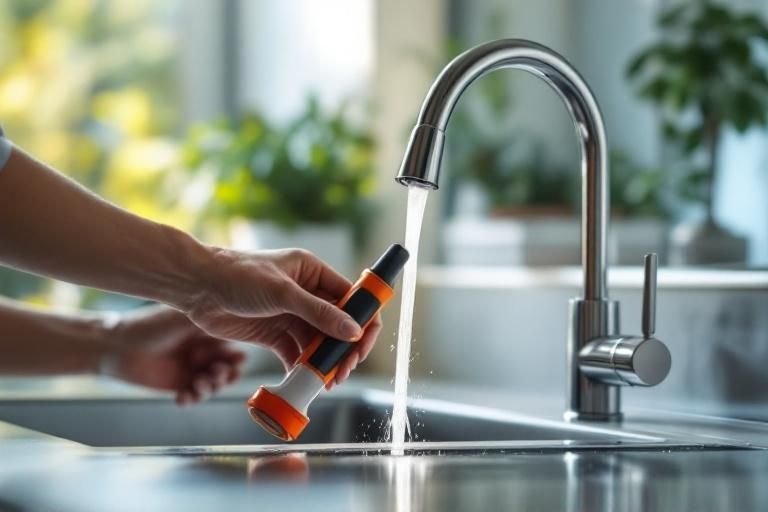
Before attempting any repairs, it’s crucial to determine where the leak is coming from. Common sources of leaks in kitchen faucets include the faucet handle, spout, and base. Identifying the source allows you to address the specific issue rather than making unnecessary repairs elsewhere. Start by observing the faucet during use. Look for moisture or dripping water, which can indicate a faulty O-ring, cartridge, or loose connections. Using a towel can help you trace the water flow to pinpoint the leak’s origin.
Inspecting the Faucet Handle
The faucet handle is often where leaks begin, primarily due to worn-out O-rings or seals. To inspect, turn off the water supply and remove the handle by unscrewing it. Check the O-ring for signs of wear or damage. If it appears brittle or cracked, replacing it is essential to stop the leak.
Examining the Faucet Spout
Leaks from the spout can indicate issues with the cartridge or aerator. Remove the aerator at the spout’s end and check for debris that may cause blockage. If the cartridge is faulty, it may need replacement. Look for signs of corrosion or mineral buildup that could be affecting the faucet’s function.
Checking the Base and Supply Lines
Water pooling around the base of the faucet can signal a problem with the supply lines or connections. Inspect the connections under the sink for any loose fittings. Tightening these connections can often resolve leaks. If the supply lines are damaged, replacing them is necessary to prevent further water damage.
Key Points:
- Identifying the leak source is essential for effective repairs.
- Common leak areas include the handle, spout, and base.
💡 Use a towel to dry areas around the faucet to help identify the source of the leak more easily.
💡 Turn off the water supply before disassembling the faucet to prevent further leakage and mess.
Performing the Repair Process
Once you’ve identified the leak’s source, you can begin the repair process. The repair steps will vary based on the specific issue, whether it’s a worn O-ring, a faulty cartridge, or loose connections. Gather necessary tools, such as a wrench, screwdrivers, and replacement parts. It’s important to follow a systematic approach to ensure that all components are properly addressed and that the faucet is reassembled securely to prevent future leaks.
Replacing the O-Ring or Seal
If the O-ring is damaged, carefully remove the old one and replace it with a new one of the same size. Ensure the new O-ring fits snugly in its groove. This simple repair can often stop leaks at the handle. After replacement, reassemble the handle and test for leaks before proceeding.
Changing the Cartridge
For a leaking spout, you may need to replace the cartridge. Remove the handle and unscrew the retaining nut. Pull out the old cartridge and insert the new one, ensuring it fits securely. Reassemble the faucet and turn the water supply back on to check for leaks. This repair can restore proper flow and eliminate leaks.
Securing Connections and Supply Lines
If the leak is due to loose connections, tighten them using an adjustable wrench. For damaged supply lines, turn off the water, disconnect the old lines, and replace them with new lines. Ensure all connections are tight to prevent future leaks. Once completed, check for leaks by turning the water back on gradually.
Key Points:
- Follow a systematic repair process to address the specific leak source.
- Replacing O-rings and cartridges are common effective repairs.
💡 Always keep a set of basic plumbing tools handy for quick repairs.
💡 Follow the manufacturer’s instructions for replacing parts to ensure compatibility.
EXPERT TIPS Pro Advice
Document the disassembly process with photos.
Taking photos during disassembly can help you remember the order of components when reassembling the faucet.
Use thread seal tape on threaded connections.
Applying thread seal tape can help create a watertight seal on threaded connections, preventing future leaks.
Test for leaks after each repair step.
By testing for leaks after each step, you can identify any issues immediately and avoid multiple repairs.
Keep your workspace organized.
An organized workspace prevents losing small parts and helps maintain focus during the repair process.
Review online tutorials for your specific faucet model.
Online tutorials can provide model-specific guidance and tips that enhance your repair process and outcomes.
Frequently Asked Questions
Conclusion
Repairing a leaking kitchen faucet can often be done by homeowners with basic tools and knowledge. Identifying the cause, using the right techniques to fix it, and knowing when to seek professional help are essential steps. Regular maintenance can also prevent future leaks.
🎯 Key Takeaways:
- Common causes of leaks include worn-out washers and loose parts.
- DIY repairs are possible with proper tools and safety measures.
- Replacing washers is a common effective repair method.
- Persistent leaks may require professional plumbing assistance.
Expert Advice: Always turn off the water supply before starting any repairs and take your time to ensure each component is correctly handled. Regular checks can help maintain your faucet’s condition.
If you encounter persistent issues, don’t hesitate to consult a professional plumber for a thorough repair.


