Are you frustrated with a leaky or outdated kitchen faucet? Replacing a single handle kitchen faucet can seem daunting, but it doesn’t have to be. With the right knowledge and tools, you can transform your kitchen in just a few hours. In this comprehensive guide, we will walk you through the entire process, ensuring you feel confident every step of the way. Drawing from years of plumbing expertise, we will provide practical tips and common pitfalls to avoid, making your faucet replacement a breeze. By the end of this article, you will not only know how to replace a single handle kitchen faucet but also understand the key components involved in the installation process.
Understanding the Components of a Single Handle Kitchen Faucet
Before diving into the replacement process, it’s crucial to understand the basic components of a single handle kitchen faucet. This knowledge will help you identify parts that may need replacement or repair. A single handle faucet typically includes the handle, spout, aerator, and the valve assembly. The handle controls both water flow and temperature, while the valve assembly is responsible for regulating water delivery. Familiarizing yourself with these components will streamline the replacement process, ensuring that you can easily identify any issues that may arise during the installation.
Key Components Explained
The primary components of a single handle kitchen faucet include the handle, which moves to adjust water temperature and flow, and the spout, through which water is dispensed. The aerator, located at the spout’s end, helps to control the water flow and reduce splashing. The valve assembly, often hidden beneath the sink, is crucial for controlling water pressure and temperature. Understanding these parts will aid in troubleshooting and replacement.
Tools Needed for Replacement
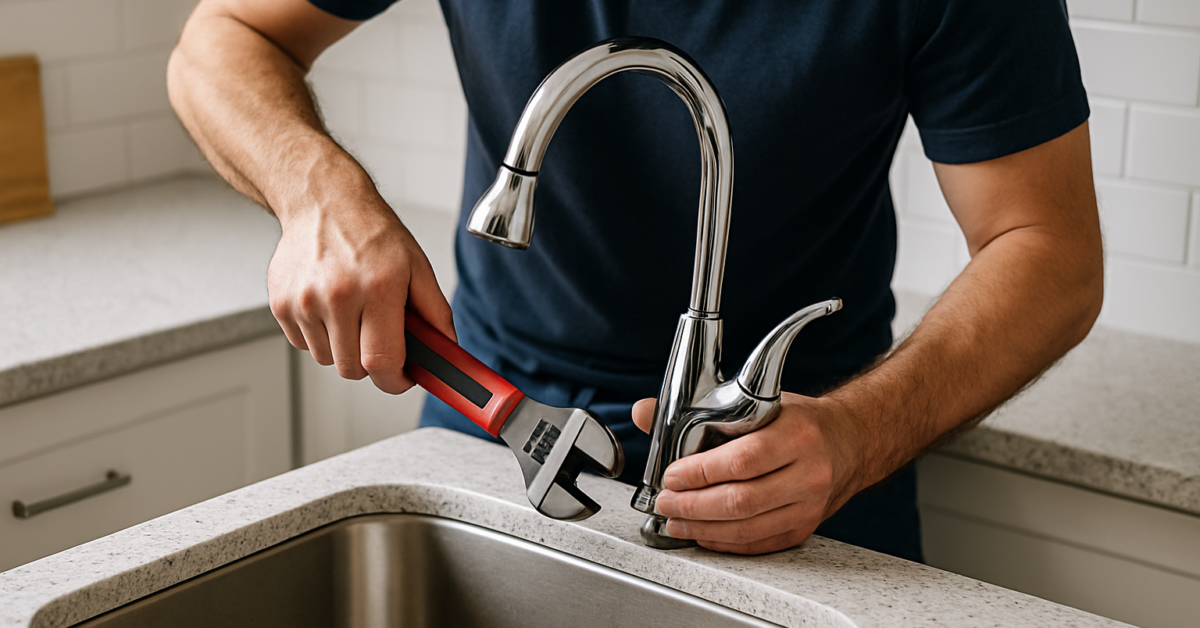
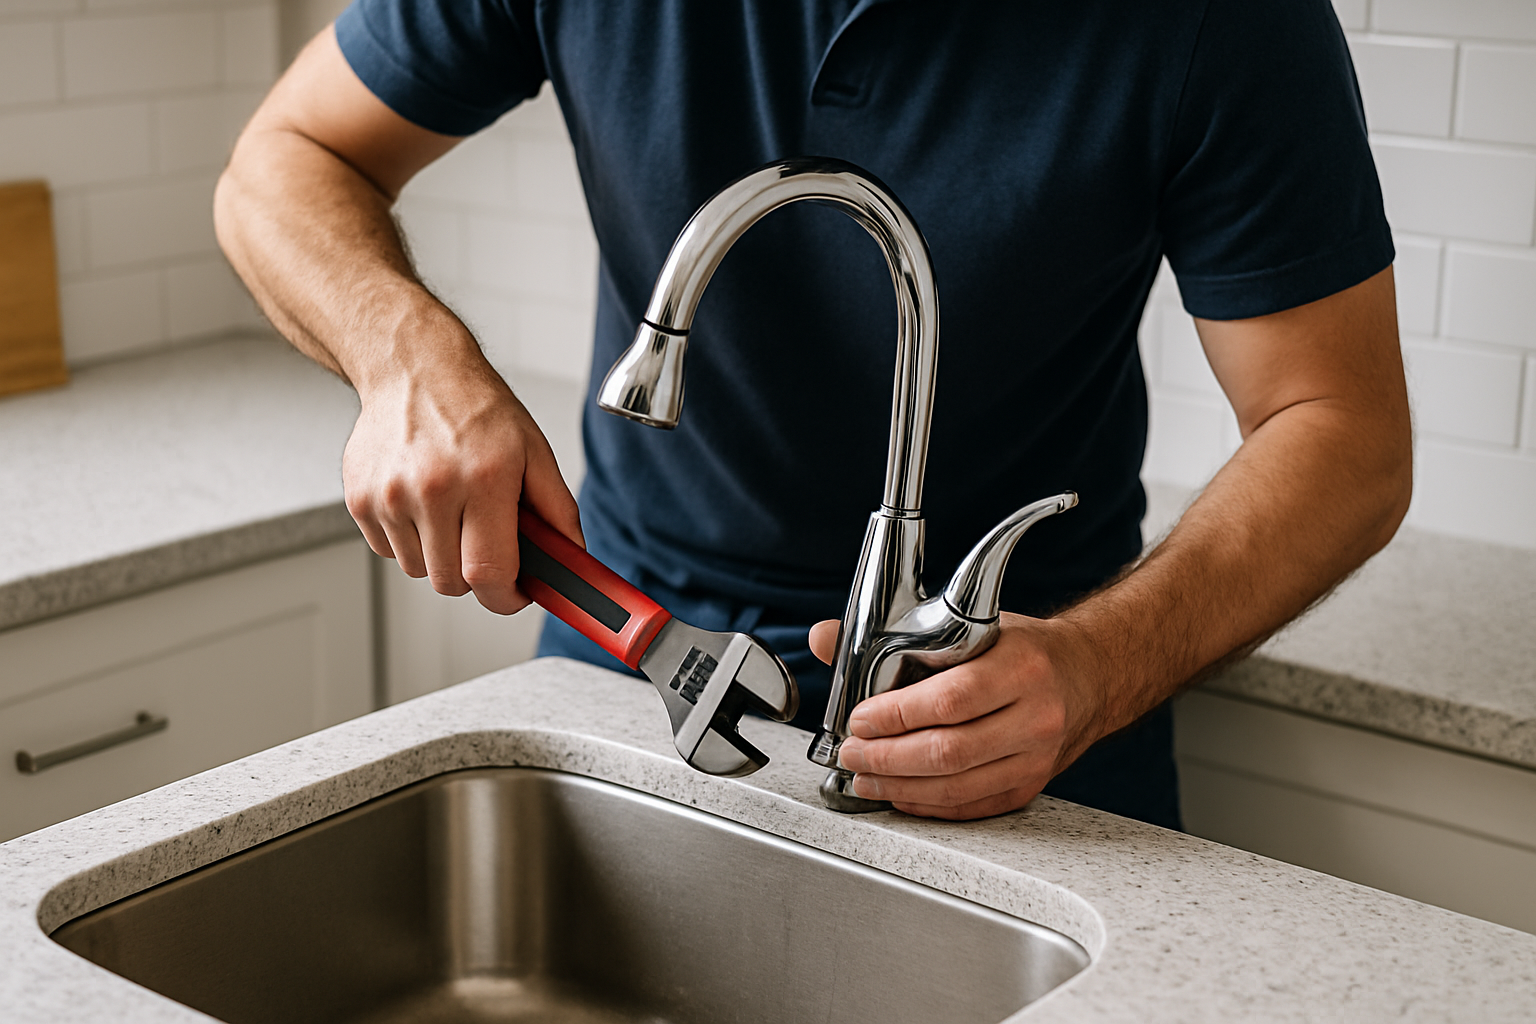
To replace a single handle kitchen faucet, you’ll need a set of basic tools. Typically, this includes an adjustable wrench, a basin wrench for hard-to-reach areas, a screwdriver for securing screws, and plumber’s tape for sealing connections. Having these tools on hand before starting will save you time and frustration during the replacement process, ensuring a smoother experience.
Key Points:
- Know the key components of your faucet for efficient replacement
- Gather necessary tools before starting the replacement process
Preparing for Faucet Replacement
Preparation is essential for a successful faucet replacement. Start by turning off the water supply to the sink to prevent any leaks or spills during the process. It’s also advisable to lay down a towel or bucket to catch any residual water from the pipes. Assess the current setup by examining how the faucet is connected, which will help you understand the disassembly process. Taking photos at various stages can also assist in reassembly, ensuring you remember how everything fits together.
Turning Off Water Supply
Before beginning any plumbing work, turn off the water supply valves located under the sink. This action is crucial to prevent water from flowing while you disconnect the faucet. If there are no individual shut-off valves, you may need to turn off the main water supply for your home, which can be more disruptive. Always check that the water is off by turning on the faucet before proceeding.
Assessing the Current Faucet Setup
Take time to closely examine how your current faucet is connected, including the supply lines and any mounting hardware. This assessment will give you insight into what tools you will need and how to proceed with disassembly. Consider taking photos of the setup to refer back to during reinstallation, making the process less confusing.
Key Points:
- Always turn off the water supply before starting
- Assessing the setup can simplify the replacement process
Preparation for Replacing Your Kitchen Faucet
Replacing a single handle kitchen faucet requires careful preparation to ensure a smooth process. Start by gathering all necessary tools, such as an adjustable wrench, basin wrench, plumber’s tape, and a bucket to catch any water. Turn off the water supply to prevent leaks during the replacement. It’s also wise to clear the area under the sink to give yourself enough space to work. Once prepared, check the existing faucet’s mounting and connection types, as this will influence your removal method and any additional fittings you may need.
Gather Necessary Tools
Before you begin, ensure you have all necessary tools at hand. Common tools include an adjustable wrench for loosening nuts, a basin wrench for tight spaces, plumber’s tape for sealing connections, and a bucket to capture any residual water. Having everything ready will save time and reduce frustration during the installation.
Turn Off Water Supply
Locate the water shut-off valves under the sink and turn them clockwise to close them. If there are no individual shut-off valves, turn off the main water supply for the house. This step is crucial to prevent flooding or leaks while you work on the faucet replacement.
Key Points:
- Gathering tools in advance saves time.
- Turning off the water supply prevents leaks.
💡 Always have a towel or sponge available to soak up any spills.
Step-by-Step Installation of New Faucet
Once the old faucet is removed, installing the new single handle faucet is straightforward. Begin by following the manufacturer’s instructions for the new faucet. Typically, you’ll install the mounting hardware from below the sink, securing it tightly. Connect the water supply lines and ensure they are tightened properly. After installation, turn the water supply back on slowly to check for leaks before fully testing the faucet. This ensures that everything is functional and prevents potential water damage.
Install Mounting Hardware
Begin the installation by securing the new faucet’s mounting hardware under the sink. Use the provided nuts and washers to ensure a tight fit. This step is crucial, as a loose mounting can lead to leaks or movement of the faucet over time. Follow the specific instructions provided with your new faucet.
Connect Water Supply Lines
After securing the faucet, connect the water supply lines. Attach the hot and cold lines to their respective inlets on the faucet, using plumber’s tape to ensure a tight seal. Use an adjustable wrench to tighten the connections, but avoid overtightening, which can damage the fittings. Check for leaks once the water is turned back on.
Key Points:
- Proper installation prevents leaks and ensures functionality.
- Follow manufacturer instructions for best results.
💡 Double-check all connections before turning on the water supply.
EXPERT TIPS Pro Advice
Check for Compatibility
Before purchasing a new faucet, ensure it is compatible with your sink’s configuration to avoid unnecessary modifications during installation.
Use Plumber’s Tape Wisely
Apply plumber’s tape to threaded connections to create a watertight seal, which is essential for preventing leaks.
Test for Leaks Gradually
After installation, turn the water supply on slowly to catch any potential leaks early, allowing for easier fixes.
Consider Professional Help for Complex Installations
If your plumbing setup is complicated or if you’re unsure, hiring a professional can save you time and prevent costly mistakes.
Frequently Asked Questions
Conclusion
Replacing a single handle kitchen faucet is a manageable DIY project if you have the right tools and follow the steps carefully. Turn off the water supply, disconnect old fittings, connect the new faucet, and check for leaks. With patience, you can successfully improve your kitchen’s functionality.
🎯 Key Takeaways:
- Gather essential tools like wrenches and screwdrivers.
- Always turn off the water supply before starting work.
- Ensure fittings are tight to prevent leaks.
- Use a deck plate if new faucet holes don’t align.
Expert Advice: Take your time with each step, and don’t hesitate to consult online resources or guides for visual assistance. Proper installation can enhance your kitchen’s efficiency and aesthetics.
Ready to tackle your kitchen faucet replacement? Gather your tools and get started today!


