Have you ever struggled with a malfunctioning kitchen sink soap dispenser? You’re not alone—many homeowners face this common issue. Knowing how to replace kitchen sink soap dispenser can save you time and frustration while ensuring your kitchen remains functional and stylish. In this comprehensive guide, we’ll walk you through the entire replacement process, from identifying the right tools to complete installation. With our expert tips and clear instructions, you’ll gain the confidence to tackle this DIY project and enhance your kitchen’s efficiency. Read on to learn the essential steps for a successful replacement.
Understanding the Kitchen Sink Soap Dispenser
A kitchen sink soap dispenser is a convenient fixture that allows easy access to dish soap or hand soap. Understanding its components and functioning is crucial before attempting a replacement. Most dispensers consist of a pump, a reservoir, and a nozzle. When the pump is pressed, soap is drawn from the reservoir and dispensed through the nozzle. Knowing these parts will help you troubleshoot any issues and facilitate the replacement process. Additionally, dispensers can be mounted on the sink or countertop, impacting the removal and installation methods. Familiarity with these details will prepare you for a successful replacement.
Common Issues with Soap Dispensers
Soap dispensers can experience several common issues, such as clogging, leaks, or malfunctioning pumps. Clogging often occurs due to soap residue buildup in the nozzle, while leaks can happen at the connection point with the reservoir. Recognizing these issues can help you determine whether a simple fix is possible or if a full replacement is necessary. Understanding these problems will save you time and money in the long run.
Types of Soap Dispensers
There are various types of kitchen sink soap dispensers, including manual and automatic models. Manual dispensers require a hand pump, while automatic ones use sensors for dispensing. Knowing the type of dispenser you have will guide your replacement process, as installation methods may differ. Additionally, the size and design of the dispenser can affect compatibility with your existing sink setup, making it essential to choose the right type.
Key Points:
- Familiarize yourself with the parts of the dispenser
- Identify common issues to assess replacement necessity
Preparing for the Replacement Process
Before replacing your kitchen sink soap dispenser, proper preparation is key to a smooth installation. Start by gathering the necessary tools, which typically include a wrench, screwdriver, and possibly a bucket to catch any residual soap. Next, turn off the water supply to avoid any spills during the process. Understanding the layout of your sink and how the dispenser is attached will also help streamline the replacement. Taking these preparatory steps can prevent common issues and ensure a successful installation.
Gathering Necessary Tools
To effectively replace your kitchen sink soap dispenser, gather essential tools such as a wrench, screwdriver, and a bucket. A wrench is useful for loosening any fittings, while a screwdriver will help you detach the dispenser from the sink. Having these tools on hand will streamline the process and reduce the risk of delays caused by searching for equipment mid-task. Being prepared sets the stage for a more efficient and successful replacement.
Assessing Your Sink Setup
Take the time to assess your sink setup before proceeding with the replacement. Look at how the soap dispenser is mounted, whether it’s secured with screws or simply fitted into a hole. Understanding this will help you determine the best method for removal and installation. Additionally, measure the existing dispenser to ensure that any new unit you choose will fit properly, preventing future compatibility issues.
Key Points:
- Prepare tools in advance for efficiency
- Assess sink configuration to simplify the process
Understanding Your Soap Dispenser System
Before replacing your kitchen sink soap dispenser, it’s crucial to understand its components and how they function. Most dispensers consist of a pump, a reservoir, and a nozzle. Familiarizing yourself with these parts will streamline the replacement process. Begin by checking if your dispenser is integrated with the sink or if it is a standalone unit. This knowledge will guide you on whether to detach it from the sink or simply replace the pump mechanism. Additionally, ensure you have a clear workspace and the necessary tools, such as a wrench or pliers, to make the process efficient.
Identifying Common Issues
Common issues with soap dispensers include clogs, leaks, or ineffective pumps. A clog often occurs in the tube connecting the reservoir to the nozzle, while leaks may arise from worn seals or cracks. If the pump is not dispensing soap properly, it could be due to air trapped in the system or a faulty pump mechanism. Identifying these issues will help you determine if a complete replacement or a simple repair is needed.
Gathering Necessary Tools
To replace a soap dispenser efficiently, gather essential tools beforehand. A wrench or adjustable pliers are typically needed to unscrew the dispenser. A bucket or sponge may also be useful to catch any residual soap or water during removal. Additionally, having a flashlight can help you see under the sink more clearly. Preparing these tools will minimize disruptions during the replacement process.
💡 Inspect the hose for kinks or clogs, as these can prevent proper dispensing.
💡 Always turn off the water supply before starting the replacement to avoid spills.
💡 Consider taking a photo of the existing setup to assist with reinstallation.
Step-by-Step Replacement Process
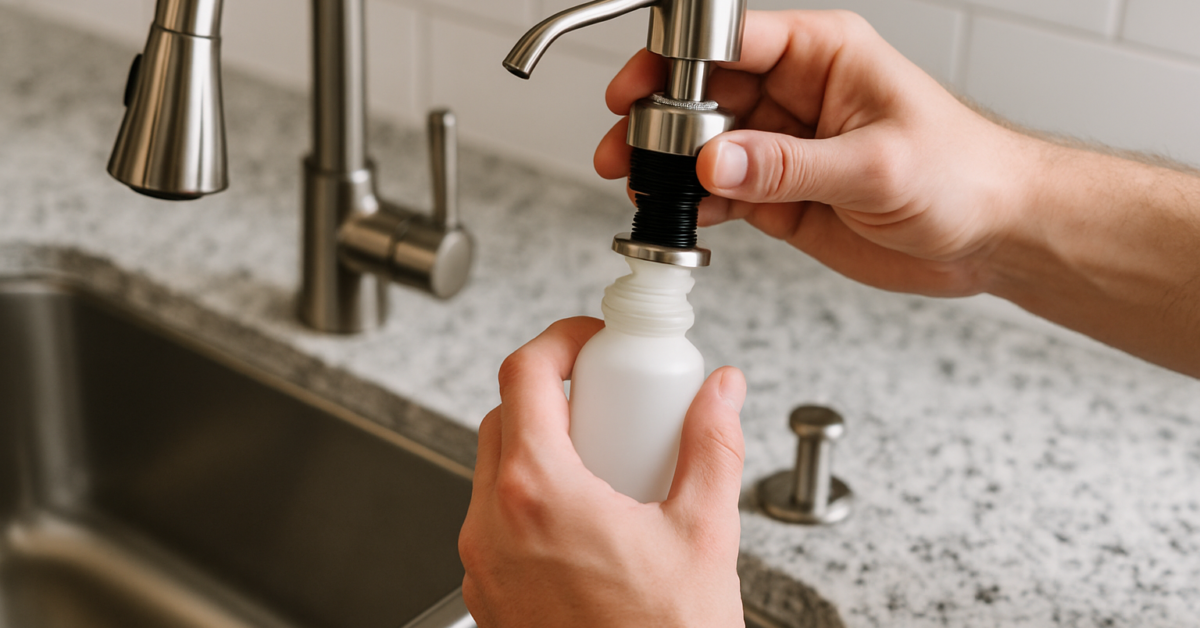
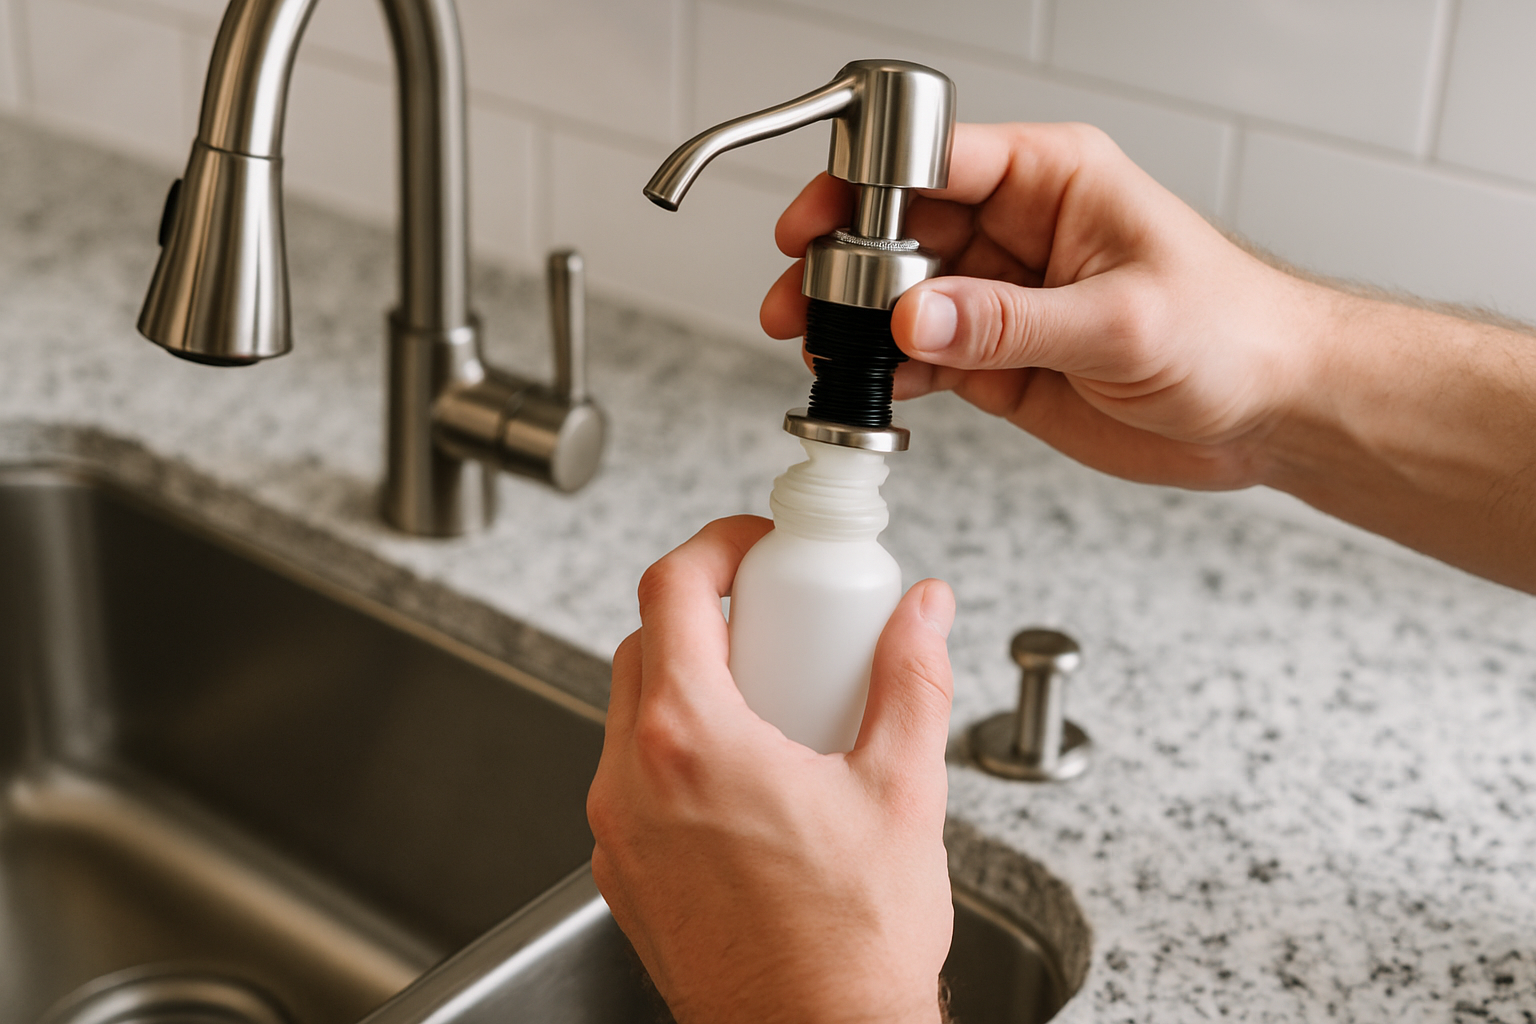
Replacing a kitchen sink soap dispenser is a manageable DIY task that follows a straightforward process. Start by disconnecting the water supply to avoid any leaks. Next, remove the old dispenser by unscrewing it from the sink. If it’s connected to a hose, carefully detach it. Once the old dispenser is out, clean the sink area to ensure a good seal for the new unit. Install the new dispenser by reversing the removal process, ensuring that all connections are secure and leak-free. Finally, refill the reservoir and test the dispensing function to confirm proper installation.
Removing the Old Dispenser
Begin by locating the securing nut beneath the sink that holds the dispenser in place. Use a wrench to loosen and remove it. After removal, detach the soap line or hose by carefully pulling it off. It’s essential to do this gently to avoid damaging any attached components. Once removed, clean the area around the hole in the sink to prepare for the new dispenser installation.
Installing the New Dispenser
With the old dispenser removed, position the new dispenser in the same hole. Secure it tightly with the nut from beneath the sink. Attach the soap line or hose, ensuring it fits snugly to prevent leaks. Once everything is in place, refill the soap reservoir and pump a few times to prime the dispenser. This helps eliminate any air pockets and ensures smooth operation. Finally, check for any leaks around the installation area.
💡 Test the soap dispenser after installation to ensure proper function and leak-free operation.
💡 Use plumber’s tape on threaded connections for a better seal.
💡 If the dispenser has a spring mechanism, ensure it is properly seated before securing.
EXPERT TIPS Pro Advice
Take note of the soap type used
Different soaps have varying viscosities. Using a soap that is too thick can lead to clogging, while too thin may not provide a proper lather.
Consider the height of the dispenser
Installing the dispenser at a comfortable height prevents awkward usage. Ideally, it should be accessible for both adults and children.
Check for warranty information
Some dispensers come with warranties. Understanding these can save you costs on future replacements if issues arise.
Frequently Asked Questions
Conclusion
Replacing a kitchen sink soap dispenser is a manageable DIY task that enhances kitchen convenience. By understanding the necessary tools, installation steps, and maintenance tips, you can ensure a successful replacement. Proper care and attention to detail will result in a functional and leak-free dispenser.
🎯 Key Takeaways:
- Gather basic tools like a screwdriver and adjustable wrench.
- Follow step-by-step instructions for safe removal and installation.
- Choose appropriate soap to prevent clogging.
- Use plumber’s tape for a watertight seal.
- Regularly clean the dispenser to maintain functionality.
Expert Advice: Take your time during the installation process, ensuring each step is done correctly. A careful approach will yield the best results and prevent future issues.
Now that you know how to replace a soap dispenser, gather your tools and tackle this home improvement project!