Are you dealing with leaks or clogs in your kitchen sink drain? Knowing how to replace your kitchen sink drain pipe can save you time, money, and frustration. Many homeowners encounter issues with their plumbing, often leading to costly repairs if not addressed promptly. As a seasoned expert in home improvement and plumbing, I will guide you through the essential steps to successfully replace your kitchen sink drain pipe. In this article, you’ll learn the tools you’ll need, step-by-step instructions for the replacement process, and tips to ensure a secure fit and long-lasting solution. Whether you’re a DIY novice or a seasoned handyman, this guide will provide you with the knowledge to tackle this project with confidence.
Understanding the Kitchen Sink Drain System
Replacing a kitchen sink drain pipe requires a fundamental understanding of the drain system. The drain pipe is essential for carrying wastewater away from the sink and into the home’s plumbing system. It typically consists of several parts, including the sink strainer, P-trap, and the horizontal drain line that connects to the home’s sewage system. Knowing how these components work together will help you navigate the replacement process more effectively. Familiarize yourself with the layout of your plumbing to identify the parts that need replacement and ensure proper drainage.
Components of the Drain System
The kitchen sink drain system is made up of several key components. The sink strainer collects debris to prevent clogs, while the P-trap prevents sewer gases from entering the home. The horizontal drain line carries water away. Understanding each part’s role will aid in a successful replacement.
Common Issues with Drain Pipes
Drain pipes can face several issues, including leaks, clogs, and corrosion. Leaks typically occur at joints, while clogs can result from food waste buildup. Corrosion can weaken pipes over time. Identifying these problems will help you determine whether a repair or replacement is necessary.
Key Points:
- Know the components of your drain system.
- Identify common issues to address before replacement.
💡 Assess the condition of your existing pipes before starting the replacement.
Tools and Materials Needed for Replacement
Before replacing the kitchen sink drain pipe, gather the necessary tools and materials to streamline the process. Common tools include a pipe wrench, pliers, a bucket, and a hacksaw. Materials typically involve the new drain pipe, fittings, and plumber’s tape. Having everything on hand will minimize interruptions and keep your workspace organized. Depending on your drain type, you may need different pipe sizes, so measure existing pipes carefully to ensure a proper fit. Preparation is key to a successful DIY project.
Essential Tools
Essential tools for replacing a kitchen sink drain pipe include a pipe wrench for loosening fittings, pliers for gripping pipes, and a bucket to catch any excess water. These tools will help ensure a smooth replacement process without unnecessary mess.
Required Materials
The required materials for the replacement include a new drain pipe, various fittings, and plumber’s tape to ensure a watertight seal. Selecting the right materials is crucial for long-term durability and effective drainage in your kitchen.
Key Points:
- Gather all necessary tools and materials beforehand.
- Measure existing pipes for accurate replacements.
💡 Double-check measurements before purchasing materials to avoid returns.
Understanding the Kitchen Sink Drain Pipe System
Before embarking on replacing the kitchen sink drain pipe, it’s crucial to understand the components involved. The drain pipe typically consists of various parts including the sink strainer, trap, and the horizontal drain line that connects to the home plumbing. Each component plays a vital role in ensuring proper drainage and preventing leaks. Familiarizing yourself with these elements will help you identify the source of any issues and make the replacement process smoother. Additionally, having the right tools ready, such as a pipe wrench, pliers, and plumber’s tape, is essential for a successful installation.
Identifying Drain Pipe Problems
Common issues with kitchen sink drain pipes include clogs, leaks, and corrosion. Identifying the problem often starts with observing water drainage patterns. Slow drainage can indicate a clog, while water pooling around the pipes may suggest a leak. If the pipe shows visible signs of rust or deterioration, it’s likely time for a replacement. Inspecting these signs regularly can prevent larger plumbing problems down the line.
Gathering Necessary Tools
To replace the kitchen sink drain pipe effectively, you will need several tools: a pipe wrench for unscrewing fittings, pliers for gripping and twisting, and a bucket to catch any residual water. Additionally, having plumber’s tape handy will ensure a watertight seal when reassembling the pipes. Preparing these tools beforehand can significantly streamline the replacement process.
💡 Always turn off the water supply before starting any plumbing work to prevent accidents.
💡 Use a bucket to catch water when detaching pipes to minimize mess.
💡 Label each component as you disassemble it to simplify reassembly.
Step-by-Step Guide to Replacing the Kitchen Sink Drain Pipe
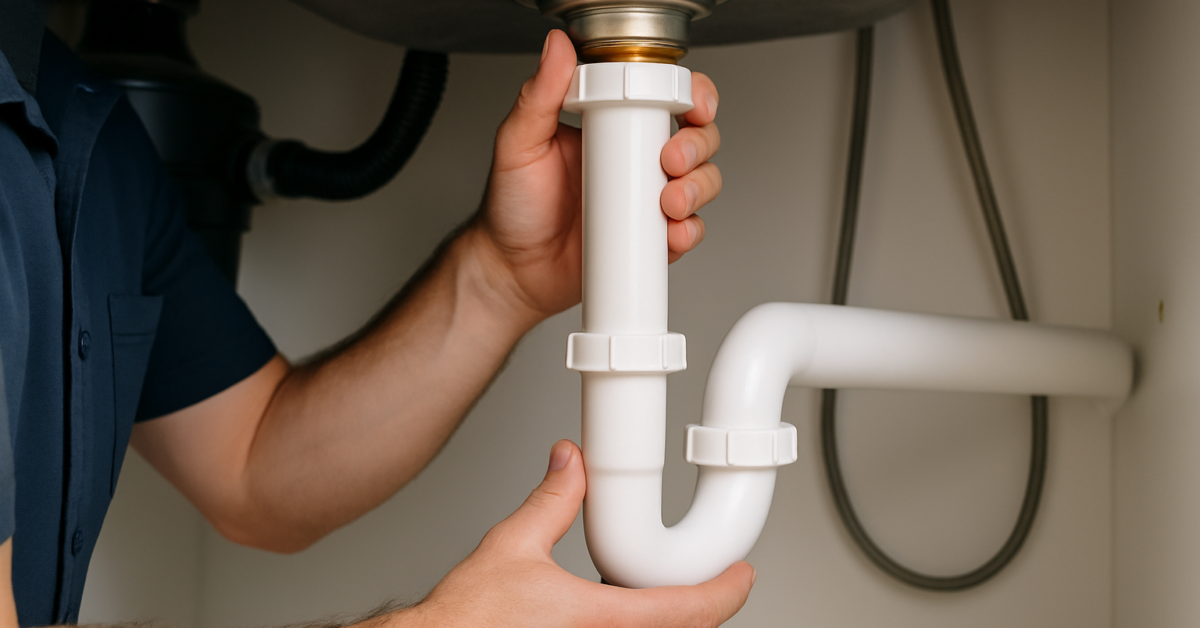
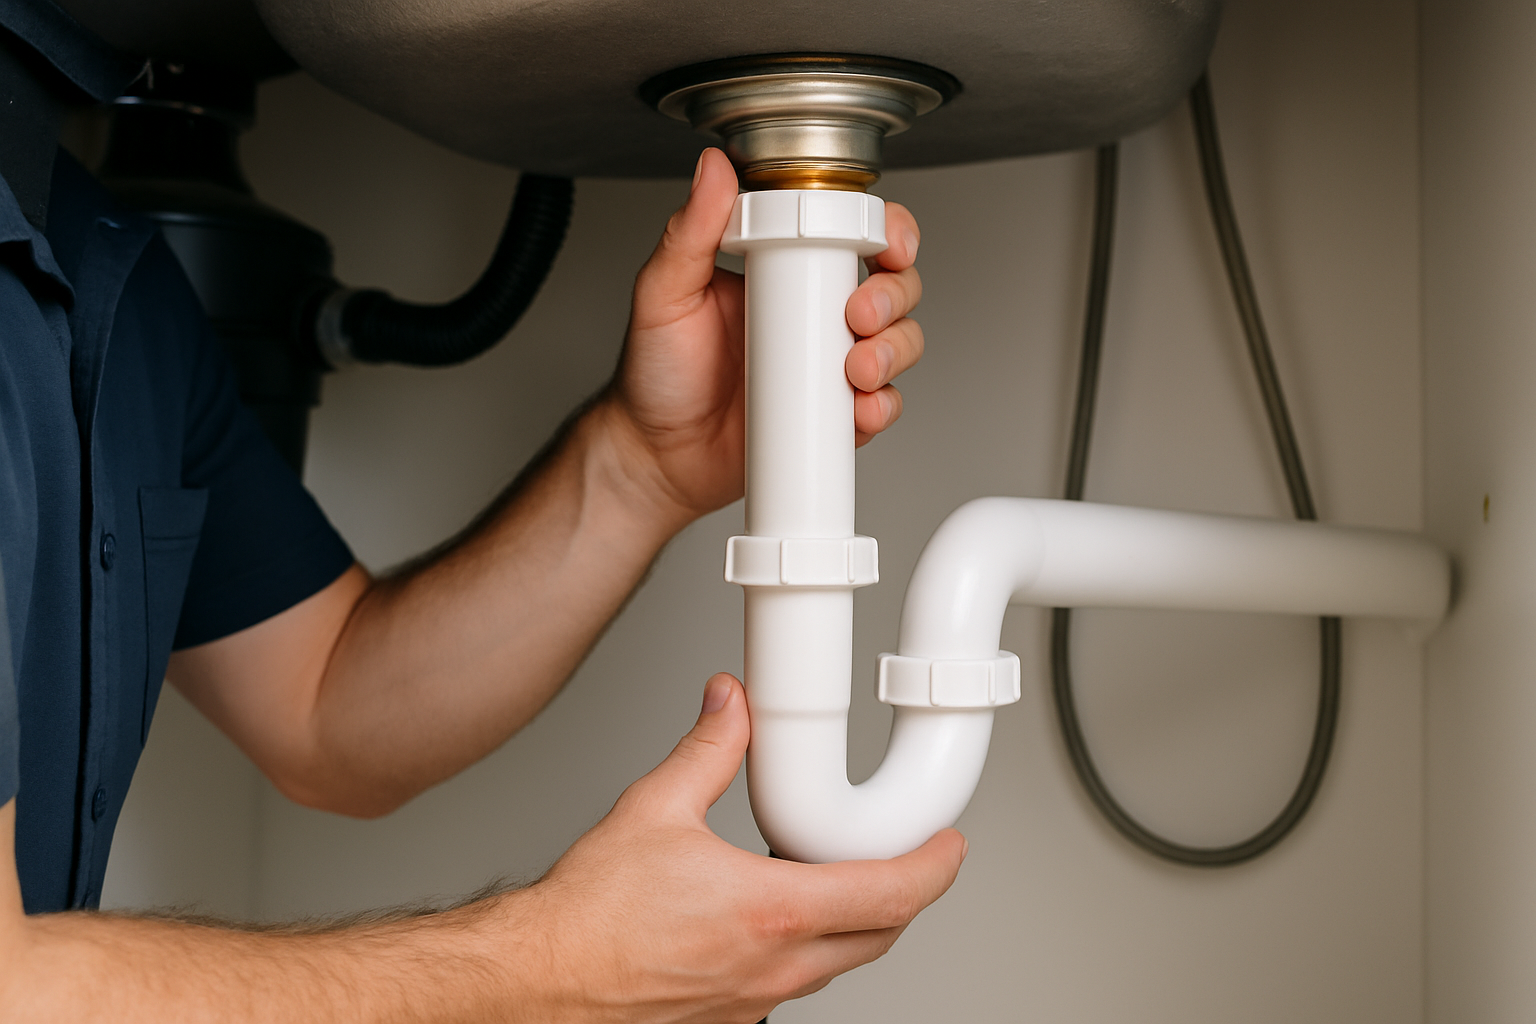
Replacing the kitchen sink drain pipe involves several key steps that ensure a proper installation. Begin by disconnecting the old drain pipe, which typically involves loosening the slip nuts that hold it in place. After removing the old pipe, clean the connection points thoroughly to prepare for the new installation. Next, measure and cut the new pipe to fit the existing setup, ensuring all connections align correctly. Finally, reassemble the components, applying plumber’s tape to threaded areas to prevent leaks, and secure everything tightly.
Disconnecting the Old Drain Pipe
Start by placing a bucket under the sink to catch any spillage. Loosen the slip nuts connecting the drain pipe to the sink and trap using a pipe wrench or pliers. Once the nuts are undone, carefully remove the pipes while ensuring no debris falls into the plumbing system. This step is crucial as it sets the stage for a clean replacement.
Installing the New Drain Pipe
After cleaning the connection points, measure the new drain pipe accurately to ensure a perfect fit. Cut the pipe if necessary, then attach it to the sink strainer and the trap securely. Use plumber’s tape on threaded connections to prevent leaks. Once everything is in place, run water through the system to check for any leaks and ensure that the drainage is functioning properly.
💡 Double-check measurements before cutting the new pipe to avoid mistakes.
💡 Consider using flexible piping if installation space is tight.
💡 Always test the system with water after installation to ensure everything is sealed properly.
EXPERT TIPS Pro Advice
Inspect for blockages before replacement.
Clearing blockages before starting the replacement can save time and prevent future issues, ensuring that the new pipe functions optimally.
Use a level to ensure proper alignment.
Ensuring the drain pipe is level prevents stagnation of water, which can lead to clogs and unpleasant odors.
Keep a repair kit handy.
Having a basic plumbing repair kit allows for quick fixes in case of unexpected leaks or issues during installation.
Frequently Asked Questions
Conclusion
Replacing a kitchen sink drain pipe can be a manageable DIY project if approached correctly. Key steps include gathering necessary tools, identifying when to replace, and ensuring proper sealing during installation. Understanding materials and maintenance can further enhance your plumbing skills.
🎯 Key Takeaways:
- Gather essential tools like a pipe wrench and Teflon tape.
- Look for signs like leaks and clogs to determine replacement.
- Using proper sealants prevents leaks after installation.
- Choose the right material for your plumbing needs.
Expert Advice: Approach the task with confidence, ensuring you follow instructions carefully. If you’re uncertain at any point, don’t hesitate to consult a professional plumber for guidance.
Now that you’re informed, consider reviewing your kitchen plumbing for potential upgrades or maintenance to prevent future issues.