To make a sausage stuffer, you will need to gather the necessary parts and tools and follow a few key steps. This can include attaching a cap to a base, drilling a hole in the cap, making a piston, creating grooves for anchor rings, and assembling the stuffer.
There are various methods and techniques for making a sausage stuffer, such as using a water-powered piston or modifying a sausage horn. By following the right process, you can create a homemade sausage stuffer that is efficient, effective, and affordable.
With a little bit of effort and ingenuity, you can enjoy the satisfaction of making your own sausages from scratch.

Credit: www.youtube.com
Introduction To Diy Sausage Stuffing
Discover the art of DIY sausage stuffing with a homemade sausage stuffer. Create your own stuffer using everyday materials to elevate your sausage-making game. Enjoy the satisfaction of crafting delicious sausages from scratch with your custom-made sausage stuffer.
The Appeal Of Homemade Sausages
When it comes to making sausages at home, the appeal is undeniable. Creating your own sausages allows you to control the ingredients, ensuring they are fresh and of the highest quality. Additionally, you can customize the flavors to suit your preferences, resulting in a truly unique and personalized product. The satisfaction of crafting something delicious from scratch is unmatched, making homemade sausages a popular choice for many culinary enthusiasts.
Safety And Hygiene Considerations
When making sausage at home, it’s essential to prioritize safety and hygiene. Ensuring that all equipment and surfaces are clean and sanitized is crucial to prevent contamination and foodborne illnesses. Additionally, proper handling of raw meat is imperative to avoid any health risks. By following strict safety and hygiene protocols, you can enjoy the process of making sausage at home while prioritizing the well-being of yourself and others.
Essential Materials And Tools
Making a sausage stuffer at home can be a rewarding and cost-effective project. Before you begin, it’s essential to gather the necessary materials and tools. Here’s a comprehensive guide to the required items and selecting the right materials for your DIY sausage stuffer.
List Of Required Items
- Steel pipe
- Steel rod
- Stainless steel funnel
- Compression springs
- O-rings
- Wood or metal base
- Drill and drill bits
- Welding equipment
- Angle grinder
- Measuring tape
- Marker or pencil
- Protective gear (gloves, goggles)
Selecting The Right Materials
When selecting materials for your homemade sausage stuffer, it’s crucial to prioritize durability and food safety. Opt for high-quality stainless steel for the pipe, rod, and funnel to ensure they are food-grade and resistant to corrosion. Additionally, carefully choose the compression springs and O-rings to withstand the pressure and provide a tight seal.
For the base, consider using sturdy wood or metal that can support the weight and provide stability during the sausage stuffing process. When it comes to tools, ensure that your drill, drill bits, welding equipment, and angle grinder are suitable for working with the chosen materials and can provide precise and secure assembly.
Designing Your Sausage Stuffer
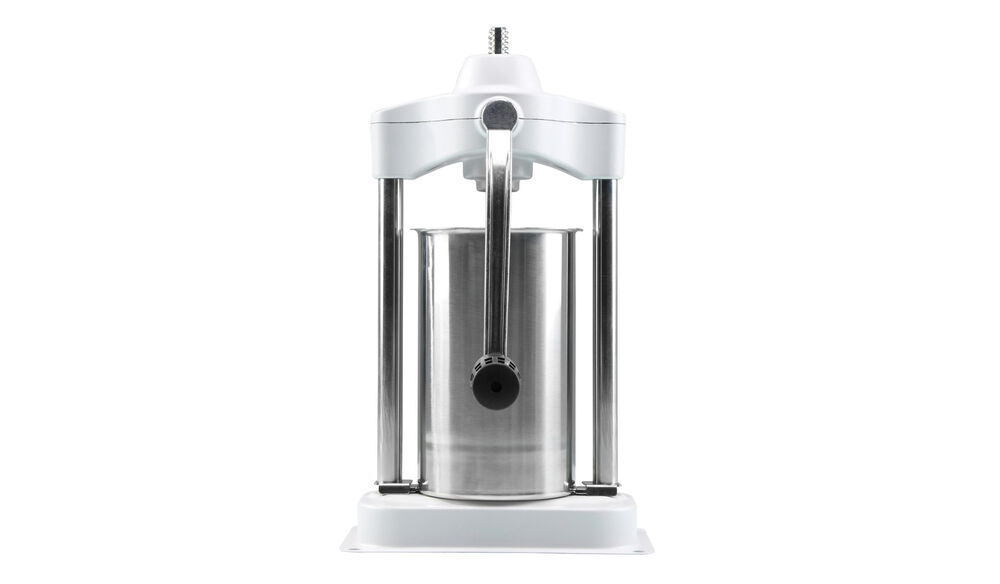
Designing your own sausage stuffer can be a fun and rewarding project for any DIY enthusiast. By following step-by-step instructions and using basic materials, you can create a sausage stuffer that is tailored to your specific needs and preferences. Whether you opt for a manual or water-powered piston, you’ll be able to enjoy homemade sausage that tastes delicious and is made with love.
When it comes to making your own sausage, having a sausage stuffer is essential. While there are many options available on the market, designing your own sausage stuffer can be a fun and rewarding project. Not only will you have a customized tool that suits your specific needs, but you’ll also have the satisfaction of knowing that you built it yourself. In this article, we’ll explore the process of designing your sausage stuffer, from creating blueprints and measurements to customizing the design to fit your preferences.
Blueprints And Measurements
Before you start building your sausage stuffer, it’s important to have detailed blueprints and accurate measurements. This will ensure that your stuffer is structurally sound and functions properly. Start by sketching out the design on paper or using computer-aided design (CAD) software. Include all the necessary components such as the cylinder, plunger, and nozzle. Take precise measurements of each part to ensure a perfect fit and smooth operation.
Once you have your blueprints and measurements ready, it’s time to gather the materials. Determine the type of material you want to use for each component, keeping in mind factors such as durability, food safety, and ease of cleaning. Stainless steel or food-grade plastic are popular choices for the cylinder and plunger, while stainless steel or brass are often used for the nozzle.
Customizing The Design
One of the advantages of designing your sausage stuffer is the ability to customize it according to your preferences. Consider factors such as the capacity, pressure control, and ease of operation. If you plan to make large batches of sausage, opt for a stuffer with a larger cylinder. To have better control over the pressure, you can incorporate a pressure gauge or adjustable plunger. Additionally, think about the ergonomics of the design, ensuring that it is comfortable to use for extended periods.
Another aspect to consider when customizing your sausage stuffer is the attachment options. Some designs allow for different types of nozzles, allowing you to create sausages of various sizes and shapes. By having interchangeable nozzles, you can experiment with different casings and fillings to create unique and flavorful sausages.
Remember to test your design as you go along. Assemble the different components and check for any potential issues or areas for improvement. Make adjustments as necessary to ensure that your sausage stuffer functions seamlessly.
In conclusion, designing your sausage stuffer is a rewarding project that allows you to create a customized tool tailored to your needs. By following the steps of creating blueprints and measurements, and customizing the design, you can build a sausage stuffer that will make your homemade sausage-making process a breeze. So roll up your sleeves, gather your materials, and get ready to enjoy the satisfaction of crafting your own sausage stuffer.
Constructing The Base And Frame
When it comes to making your own sausage stuffer, constructing a sturdy and reliable base and frame is essential. This is the foundation that will hold all the components together and ensure smooth operation. In this section, we will guide you through the process of cutting and assembling the base and securing the frame.
Cutting And Assembling The Base
The first step in constructing your sausage stuffer is to cut and assemble the base. To do this, you will need a solid piece of wood or metal that is wide and long enough to accommodate the other components. Start by measuring and marking the dimensions of the base on the chosen material.
Next, using a saw or appropriate cutting tool, carefully cut along the marked lines to create the base. Ensure that the edges are smooth and free from any splinters or roughness. This will provide a stable and safe platform for the rest of the sausage stuffer.
Once the base is cut, it’s time to assemble it. Place the cut piece on a flat surface and position the other components, such as the piston rod and any additional attachments, according to the design or blueprint you are following. Use screws or nails to securely attach the components to the base.
Make sure to double-check the alignment and stability of the assembled base. You want to ensure that it is level and securely fastened, as any wobbling or instability can affect the overall performance of the sausage stuffer.
Securing The Frame
After constructing the base, the next step is to secure the frame. The frame provides support and stability to the sausage stuffer, ensuring that it can withstand the pressure and movement during the sausage stuffing process.
Start by selecting the appropriate material for the frame, such as metal or sturdy plastic. Cut the frame pieces according to the desired dimensions, making sure they are long enough to cover the height of the sausage stuffer components.
Using screws or bolts, attach the frame pieces to the base, ensuring they are tightly secured. This will prevent any wobbling or movement of the frame during operation. Additionally, you can reinforce the frame by adding corner brackets or braces for added stability.
Once the frame is securely attached to the base, give it a gentle shake to check for any looseness or instability. If you notice any issues, tighten the screws or bolts further to ensure a solid and sturdy frame.
With the base and frame constructed and securely fastened, you are now ready to move on to the next steps of building your own sausage stuffer. Stay tuned for our upcoming blog posts, where we will guide you through the remaining stages of the construction process.
The Plunger Mechanism
To make a sausage stuffer, you need to understand the plunger mechanism. This mechanism pushes the meat mixture through the stuffer tube and into the casing. To create the plunger, drill a hole in the cap of the stuffer and insert a PVC pipe.
Cover the pipe with a rubber stopper and attach a handle for easy use.
Crafting the piston is an important step in making a sausage stuffer with a plunger mechanism. The piston is the part that pushes the meat through the tube and into the casing. To craft the piston, you will need a piece of wood or plastic that is the same diameter as the tube. Cut the piston to the same length as the cylinder. Sand the edges of the piston until it fits snugly into the cylinder. You can also add a groove to the piston to hold the o-ring in place. Ensuring an airtight seal is crucial to the success of your sausage stuffer. One way to do this is to use an o-ring. The o-ring should fit snugly into the groove on the piston. You can purchase o-rings at most hardware stores. Make sure the o-ring is the same diameter as the piston. Another way to ensure an airtight seal is to use a food-grade silicone sealant. Apply a thin layer of silicone sealant to the edges of the piston and cylinder before inserting the piston. Assembling the plunger mechanism involves inserting the piston into the cylinder and attaching the plunger handle. The plunger handle can be made from a wooden dowel or metal rod. Attach the plunger handle to the piston by drilling a hole in the center of the piston and inserting the handle. Secure the handle with a screw or bolt. In conclusion, crafting the piston, ensuring an airtight seal, and assembling the plunger mechanism are essential steps in making a sausage stuffer with a plunger mechanism. With these steps, you can create a homemade sausage stuffer that is both functional and cost-effective.The Sausage Tube And Nozzle
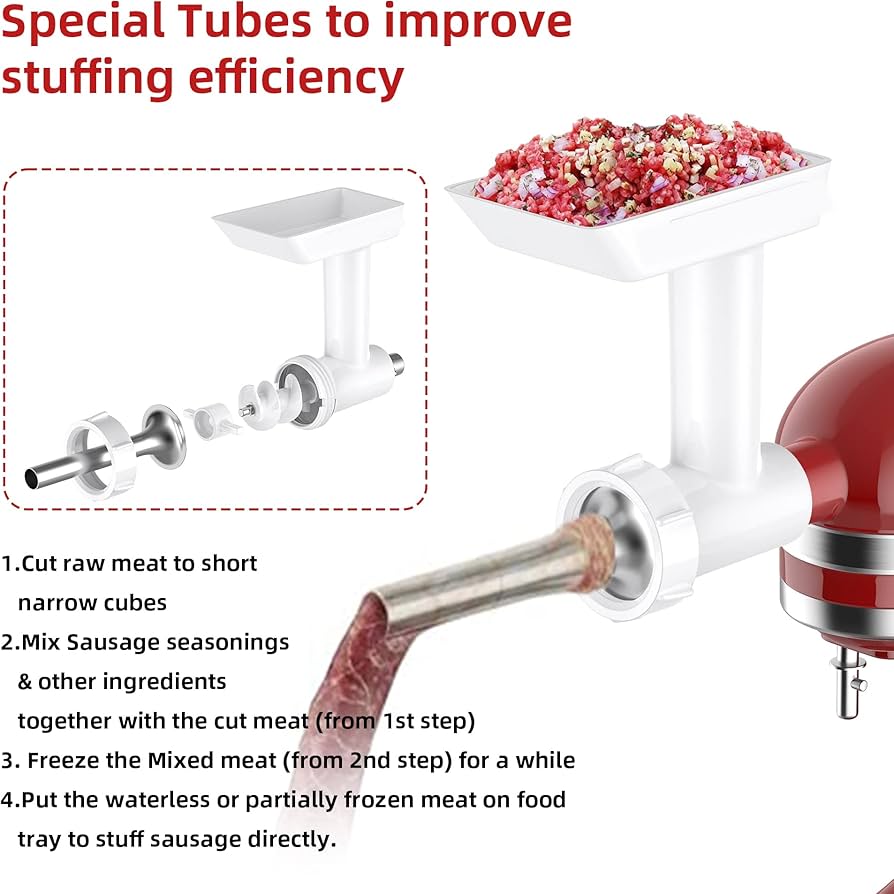
To create a sausage stuffer, you can make a homemade version using a sausage tube and nozzle. Assemble the necessary parts and follow step-by-step instructions to make your own practical and cost-effective sausage stuffer without the need for a motor or hand crank.
Creating The Sausage Horn
To make your own sausage stuffer, you will need to create a sausage horn. The sausage horn is the tube that is used to fill the casing with the sausage mixture. To create the sausage horn, you will need a piece of PVC pipe that is approximately 3-4 inches in diameter and 12-18 inches in length. Using a saw, cut the PVC pipe to the desired length. Then, use a drill to create a hole in one end of the pipe. The hole should be slightly smaller than the diameter of the nozzle you will be using.Attaching The Nozzle
Once you have created the sausage horn, you will need to attach a nozzle to the end. The nozzle is what allows the sausage mixture to flow out of the horn and into the casing. There are many different types of nozzles available, but the most common type is the cone-shaped nozzle. To attach the nozzle, simply slide it into the hole you drilled in the end of the sausage horn. Make sure that the nozzle is securely in place, as you don’t want it to come loose while you are stuffing the sausage. If you are having trouble getting the nozzle to stay in place, you can use a small amount of epoxy or silicone to glue it in place.Final Thoughts
Creating your own sausage stuffer can be a fun and rewarding project. By following these simple steps, you can create a sausage horn and attach a nozzle, allowing you to easily stuff your own sausage at home. Remember to choose the right size of PVC pipe and nozzle for your needs, and make sure that everything is securely attached before you start stuffing your sausage. With a little bit of practice, you’ll be able to create delicious homemade sausage that your friends and family will love.Assembly And Testing
Assembling your homemade sausage stuffer is an exciting step towards creating delicious sausages from scratch. With a few simple steps and the right tools, you’ll be ready to start stuffing in no time. In this section, we’ll guide you through the process of putting the pieces together and conducting the first test run to ensure everything is functioning smoothly.
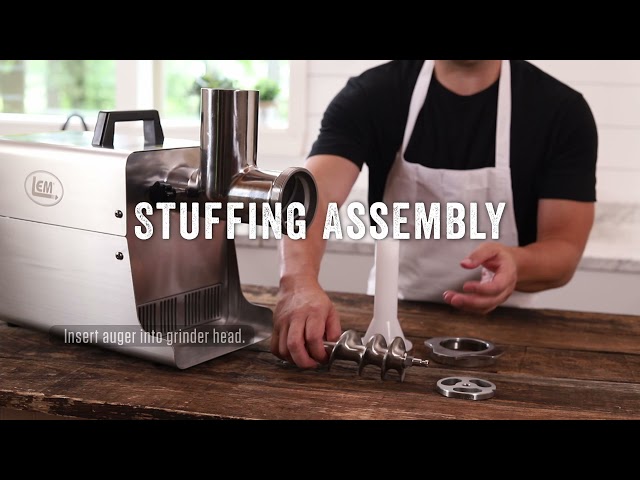
Putting The Pieces Together
Before you begin assembling your sausage stuffer, make sure you have all the necessary components and tools handy. Refer to the instruction manual or guide that came with your stuffer to familiarize yourself with the different parts. Here’s a step-by-step breakdown of how to put the pieces together:
- Start by attaching the base to a stable surface, such as a countertop or table, using the provided screws or clamps.
- Next, connect the cap to the base, ensuring a secure fit.
- Attach the head to the cap, aligning the openings properly.
- If required, drill a hole in the cap for the piston attachment.
- Create grooves on the piston for anchor rings to hold the sausage casing in place.
- Ensure the diameter of the rim is suitable for the sausage casings you’ll be using.
- Double-check that all the components are tightly secured and in proper alignment.
Conducting The First Test Run
Once you’ve assembled your sausage stuffer, it’s essential to conduct a test run to ensure everything is working as expected. Follow these steps to conduct your first test run:
- Prepare your sausage mixture and have the casings ready for stuffing.
- Attach the piston to the stuffer and secure it in place.
- Turn on the stuffer and slowly feed the sausage mixture into the hopper.
- Observe the flow of the mixture and check for any leaks or blockages.
- If necessary, adjust the pressure or speed settings to achieve the desired consistency.
- Continue filling the casings, ensuring a smooth and even distribution of the mixture.
- Monitor the stuffer throughout the process and make any necessary adjustments.
By conducting a thorough test run, you can identify any issues or adjustments needed before starting your sausage-making journey. Once you’re satisfied with the performance of your homemade sausage stuffer, you’ll be ready to create a variety of delicious sausages right in the comfort of your own kitchen.
Maintenance And Usage Tips
Proper maintenance and usage of your sausage stuffer are essential for its longevity and optimal performance. By following these tips, you can ensure that your sausage stuffer remains in excellent condition and continues to deliver delicious sausages every time.
Cleaning And Storage
To maintain the cleanliness of your sausage stuffer, it is crucial to clean it thoroughly after each use. Here’s a step-by-step guide to help you with the cleaning process:
- Disassemble the sausage stuffer by removing all the parts, including the piston, cylinder, and nozzle.
- Wash each part with warm soapy water, ensuring that all residue and grease are removed.
- Rinse the parts thoroughly and dry them with a clean cloth.
- Inspect all the parts for any signs of damage or wear and tear. Replace any damaged parts before using the sausage stuffer again.
- Once all the parts are clean and dry, reassemble the sausage stuffer and store it in a dry and cool place. Avoid storing it in areas with high humidity or extreme temperatures.
Troubleshooting Common Issues
Even with proper maintenance, you may encounter some common issues while using a sausage stuffer. Here are a few troubleshooting tips to help you resolve these problems:
| Issue | Troubleshooting Tip |
|---|---|
| The sausage meat is not coming out smoothly. | Check if the meat is properly ground and not too coarse. Adjust the grinder setting if needed. |
| The sausage casing is not filling evenly. | Make sure the casing is properly attached to the nozzle and is not twisted or kinked. Slow down the stuffing process to ensure even filling. |
| The piston is getting stuck. | Apply a food-grade lubricant to the piston and cylinder to ensure smooth movement. Avoid using excessive force while operating the sausage stuffer. |
| Leakage from the nozzle. | Check if the nozzle is securely attached and tightened. Replace any worn-out or damaged seals or gaskets. |
By following these maintenance and usage tips, you can keep your sausage stuffer in top-notch condition and enjoy the process of making delicious sausages at home. Remember to clean it thoroughly after each use and address any common issues promptly to ensure a seamless sausage-making experience.
Making Your First Batch Of Sausages
After successfully preparing your sausage mix, it’s time to use the stuffer effectively to create delicious sausages. Follow these steps to ensure your first batch turns out perfectly.
Preparing The Sausage Mix
Before using the sausage stuffer, ensure that your sausage mix is thoroughly prepared. This involves mixing your chosen meats and seasonings together until fully combined. Remember to keep the mixture cold to maintain its texture.
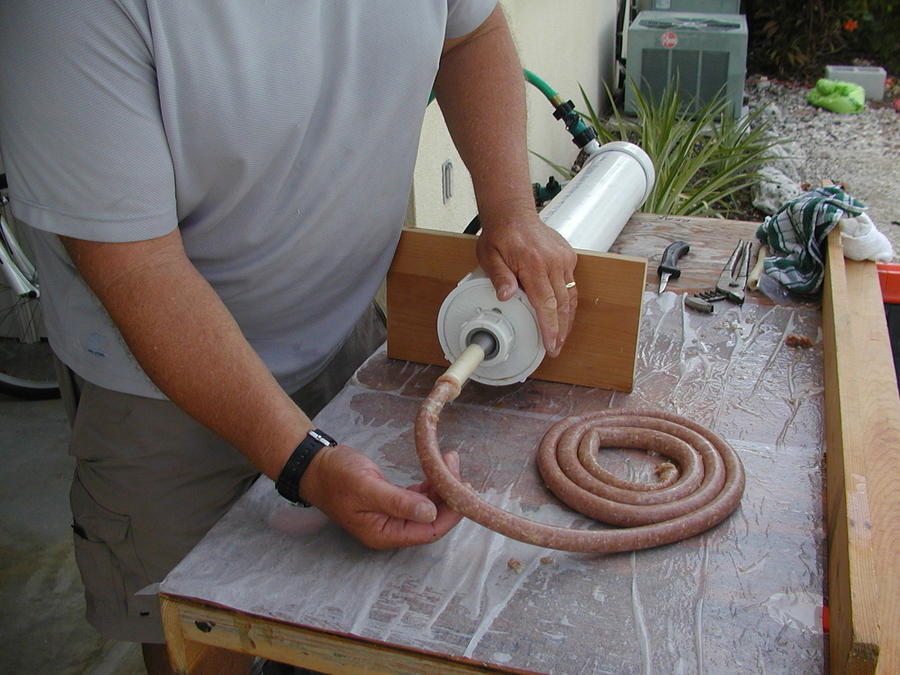
Using The Stuffer Effectively
When using the stuffer, it’s important to work efficiently and ensure each step is done carefully. Start by loading the sausage mixture into the stuffer’s canister, making sure not to overfill it. Then, attach the casing securely to the stuffer’s nozzle to prevent any air bubbles from forming in the sausages.
As you crank the stuffer, carefully guide the sausage into the casing, ensuring it fills evenly without any air pockets. Be mindful of the casing’s tension to avoid any breakage. Once the sausages are filled, twist or tie off the casing to create individual links.
Credit: www.smokingmeatforums.com
Advanced Modifications
Learn how to make a sausage stuffer with advanced modifications. Discover the techniques to create a homemade sausage stuffer without the need for a motor or hand crank. Follow step-by-step instructions and explore different methods to assemble your own sausage stuffer for a unique sausage-making experience.
Adding A Motor Or Hand Crank
One of the advanced modifications for a sausage stuffer involves adding a motor or hand crank. This upgrade can significantly enhance the efficiency and ease of operation of your sausage stuffer. By incorporating a motor or hand crank, you can streamline the sausage stuffing process and reduce the physical effort required.
Upgrading For Efficiency
Another advanced modification for a sausage stuffer is upgrading it for efficiency. This can involve various improvements such as optimizing the piston design, enhancing the sealing mechanism, or fine-tuning the overall structure to minimize friction and resistance. Upgrading for efficiency can result in smoother operation and improved sausage stuffing performance.
Cost Analysis
Learn how to conduct a cost analysis for making a sausage stuffer. By evaluating the expenses involved in acquiring materials and tools, you can determine the overall budget needed for this DIY project. This process ensures that you are fully prepared to create your own sausage stuffer.
When it comes to making your own sausage stuffer, one of the important factors to consider is the cost. In this cost analysis, we will compare the DIY option versus buying a stuffer from the store, and discuss budgeting for materials.
Comparing Diy Vs. Store-bought Stuffers
Let’s start by comparing the cost of making your own sausage stuffer versus purchasing one from the store. While store-bought stuffers may offer convenience and a wide range of options, they can also come with a hefty price tag. On the other hand, opting for a DIY approach can save you money and provide a sense of accomplishment.
When making your own stuffer, you have the flexibility to choose materials that suit your budget and preferences. You can repurpose items you already have or purchase affordable materials from a local hardware store. By doing so, you can significantly reduce the overall cost of the project.
Budgeting For Materials
Before embarking on your DIY sausage stuffer project, it’s important to create a budget for the necessary materials. This will help you stay organized and ensure that you have everything you need to complete the project successfully.
Here is a breakdown of the materials you may need for a basic DIY sausage stuffer:
| Materials | Estimated Cost |
|---|---|
| Steel pipe | $10 |
| Wood or plastic for the base | $5 |
| Piston (can be made from wood or plastic) | $5 |
| Rubber gasket or O-ring | $2 |
| Total | $22 |
Keep in mind that these are rough estimates and prices may vary depending on your location and the specific materials you choose. However, this breakdown gives you a general idea of the potential costs involved.
By budgeting for materials and opting for a DIY sausage stuffer, you have the opportunity to save money while still achieving the desired outcome. With a little creativity and resourcefulness, you can create a functional stuffer that meets your needs without breaking the bank.

Credit: www.instructables.com
Frequently Asked Questions
How Do You Make Homemade Sausage Stuffer?
To make a homemade sausage stuffer, drill a hole in a PVC cap, attach it to the base, and make a piston with o-rings. Assemble the stuffer and use it with a foot switch for power. You can find detailed tutorials online for making different types of homemade sausage stuffers.
How To Stuff Sausage Without A Stuffer?
To stuff sausage without a stuffer, you can try using a homemade alternative. One method is to use a piping bag or a ziplock bag with the corner cut off to pipe the sausage mixture into casings. Another option is to use a large syringe or a funnel to fill the casings.
These alternatives may take a bit more time and effort, but they can get the job done without a traditional sausage stuffer.
What Is The Best Way To Stuff Sausage?
The best way to stuff sausage is to use a sausage stuffer. Attach the sausage skins onto the nozzle of the stuffer, tie a knot on the end, and fill with the meat mixture. Twist the sausage at the desired length.
This method ensures the sausage is evenly and tightly packed.
Conclusion
Making your own sausage stuffer can be a rewarding and cost-effective endeavor. By following the steps outlined in this guide, you can create a customized sausage stuffer to meet your specific needs. Whether you opt for a water-powered piston or an electric stuffer, the satisfaction of crafting your own equipment is unmatched.
Happy sausage making!